Fermented carrot sticks were the snack that made me completely rethink what a jar of vegetables could be; salty, tangy, satisfyingly crunchy, and alive with beneficial bacteria that your gut actually wants.

Most people end up with sad, mushy carrots or a brine that smells off and triggers panic. The fix is a proper salt ratio and the right vessel, and both are simpler than you think.
This guide covers how lacto-fermentation actually works, which equipment sets you up for success, and the exact technique that keeps your carrot sticks crisp all the way through the ferment.
Table of Contents
What Is Lacto-Fermentation and Why Does It Make Carrots So Good?
Before you touch a single carrot, understanding the science behind lacto-fermentation will save you from every common mistake. It sounds complicated, but the process relies on just two things: salt and naturally occurring lactic acid bacteria that already live on the surface of fresh vegetables.
How the Process Works
When you submerge carrots in a saltwater brine, the salt creates an environment that is hostile to harmful microbes but welcoming to lactic acid bacteria. Those bacteria consume the natural sugars in the carrot and produce lactic acid as a byproduct. That lactic acid is what gives fermented carrot sticks their bright, tangy flavor. It also acts as a natural preservative, so your jar of carrots can sit in the refrigerator for months without spoiling.
This is entirely different from quick pickling, which relies on added vinegar and heat. Lacto-fermentation is a living, active process. You will often see small bubbles forming in the brine after the first day or two. That fizzing is a sign the bacteria are working exactly as they should.
Why Carrots Are Especially Great for Fermenting
Carrots have a firm, dense cell structure that holds up beautifully over a multi-day ferment. Unlike cucumbers, which can go limp quickly, a well-prepared carrot stick comes out of the jar with an audible snap. They also have just enough natural sugar to feed the bacteria without producing an overwhelmingly sour result. The finished flavor lands somewhere between a dill pickle and a roasted carrot, with a clean brightness that is genuinely addictive.
Carrots also pair well with a wide range of optional aromatics. Garlic cloves, fresh dill sprigs, a few slices of ginger, whole peppercorns, or a pinch of red pepper flakes all dissolve gently into the brine over the fermentation period and infuse every stick with flavor. You are not locked into one flavor profile, which makes this recipe endlessly adaptable.
If you are new to fermentation entirely, it helps to read through a good fermented carrots recipe first to get comfortable with the basic technique before branching into flavor variations.
The single most important thing to remember going into this process is that fermentation is a low-intervention method. You set up the jar, you wait, and the bacteria do all the work. Your job is mostly to make sure nothing goes wrong in that setup phase, which the next section covers in detail.
Print
Fermented Carrot Sticks: Crunchy, Probiotic-Rich and Ready in Days
- Total Time: 7215 min
- Yield: 10 servings 1x
- Diet: Vegan
Description
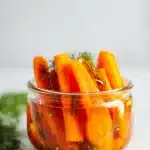
Fermented carrot sticks are crunchy, tangy lacto-fermented snacks made with just carrots, salt, and water. A 3 to 5 day ferment at room temperature develops a bright, savory flavor and fills the jar with live probiotic bacteria. They keep in the refrigerator for up to 3 months and get more complex in flavor the longer they sit.
Ingredients
For the brine:
2 cups non-chlorinated water (filtered or spring water)
1 tablespoon fine sea salt (or kosher salt, not iodized)
For the jar:
1 lb carrots (organic preferred, peeled and cut into 4-inch sticks)
2 garlic cloves (smashed)
4 sprigs fresh dill
1/2 teaspoon whole black peppercorns
3 thin slices fresh ginger (optional)
Instructions
1. Make the brine: Stir the sea salt into the non-chlorinated water until fully dissolved. The water should look completely clear with no visible salt crystals at the bottom. Set aside at room temperature.
2. Prep the carrots: Peel the carrots and cut them into sticks about 4 inches long and 1/2 inch wide. Uniform sizing ensures even fermentation across the whole batch.
3. Pack the jar: Place the garlic cloves, dill sprigs, peppercorns, and ginger slices (if using) into the bottom of a clean wide-mouth quart mason jar. Stand the carrot sticks vertically inside the jar, packing them firmly so they stay upright and tight.
4. Add the brine: Pour the saltwater brine over the packed carrot sticks until they are fully submerged. Leave about 1 inch of headspace at the top. Every carrot stick must be below the brine surface.
5. Weight the carrots: Place a fermentation weight or a small brine-filled zip-lock bag on top of the carrots to keep them submerged. This step prevents mold and keeps fermentation conditions consistent.
6. Cover and ferment: Cover the jar with an airlock lid, a loosely placed regular lid, or a cloth secured with a rubber band. Set the jar on your counter away from direct sunlight at a temperature between 65 and 75 degrees Fahrenheit.
7. Check daily: Starting on day 2, check the jar once a day. Small bubbles in the brine and a slightly cloudy appearance are both signs of active, healthy fermentation. Skim off any white film if it appears on the surface.
8. Taste and transfer: Starting on day 3, taste a carrot stick. For a mild tang, transfer the sealed jar to the refrigerator at day 3. For a more assertive sour flavor, continue fermenting up to day 7. Cold temperature locks in the flavor at whatever stage you prefer.
Notes
Store sealed in the refrigerator for up to 3 months. The flavor will continue to develop slowly in the cold, becoming more sour over time.
Use only non-iodized salt. Iodized table salt contains additives that can inhibit fermentation and affect flavor.
For extra crunch, add a small piece of horseradish root or a fresh grape leaf to the jar. Both contain tannins that help preserve the cell structure of the carrots.
Cloudy brine is normal and expected. It is caused by lactic acid bacteria and is a sign of a healthy ferment, not spoilage.
Save the leftover brine when you finish the carrot sticks. It works well in salad dressings, marinades, or as a small daily probiotic shot.
- Prep Time: 15 min
- Rest Time: 7200 min
- Cook Time: 0 min
- Category: Side Dishes, Snack
- Method: No-Cook
- Cuisine: American
Nutrition
- Serving Size: 3 to 4 carrot sticks
- Calories: 20 kcal
- Sugar: 3 g
- Sodium: 320 mg
- Fat: 0 g
- Saturated Fat: 0 g
- Unsaturated Fat: 0 g
- Trans Fat: 0 g
- Carbohydrates: 5 g
- Fiber: 1 g
- Protein: 0 g
- Cholesterol: 0 mg
The Ingredients and Equipment You Actually Need
Simplicity is the whole point here. A batch of homemade fermented carrot sticks requires a short list of ingredients, but the quality of each one genuinely matters.
Choosing Your Carrots
Organic carrots are the better choice for lacto-fermentation whenever possible. Conventionally grown carrots are often treated with pesticides that can inhibit the surface bacteria you need to drive the ferment. If organic is not available, scrub your carrots thoroughly under cold running water. Either way, look for carrots that are firm all the way through with no soft spots. Older, limp carrots will only get worse in the jar.
Peel your carrots and cut them into sticks that are roughly the height of your jar, minus about half an inch of clearance at the top. Uniform sizing means even fermentation from one stick to the next.
Salt: The Non-Negotiable Detail
Use sea salt or kosher salt. Do not use table salt, which contains iodine and anti-caking agents that can both inhibit fermentation and produce an unpleasant flavor. The standard ratio for fermented vegetables is 2% salt by weight of the water you use. For practical home use, this works out to roughly 1 tablespoon of fine sea salt per 2 cups of non-chlorinated water.
Non-chlorinated water is also critical. Tap water in most cities contains chlorine or chloramine, both of which are designed to kill bacteria. Those chemicals will work against your ferment. Use filtered water, spring water, or let tap water sit uncovered overnight to let the chlorine off-gas.
Equipment
- A wide-mouth quart mason jar or a Fido jar with a rubber gasket seal
- A fermentation weight or a small zip-lock bag filled with brine to keep the carrots submerged
- An airlock lid, if you want to reduce the need for daily burping (optional but convenient)
- A kitchen scale for accurate salt measurement
The fermentation weight is not optional in spirit, even if it is in terms of specific tools. Carrot sticks that poke above the brine surface are exposed to air and can develop mold. Keep everything below the waterline and you are in good shape. A fermented pickles recipe uses the same submersion logic, so the technique transfers directly if you want to try cucumbers next.
Step-by-Step: How to Make Fermented Carrot Sticks
Here is the full process from start to finish, written out so there is no guessing at any stage.
Step 1: Make the Brine
Combine 2 cups of non-chlorinated water with 1 tablespoon of fine sea salt in a clean bowl or jar. Stir until the salt is completely dissolved. If it is not dissolving easily, heat a small portion of the water, dissolve the salt, then add cold water to bring the total back to room temperature before using. You want the brine to be room temperature or cool when it goes over the carrots.
Step 2: Prep the Carrots and Aromatics
Peel your carrots and cut them into sticks roughly 4 inches long and about half an inch wide. Pack them vertically into your clean quart jar. This is the moment to layer in your chosen aromatics. Two smashed garlic cloves, a few sprigs of fresh dill, and half a teaspoon of whole peppercorns is a classic combination that produces a deeply savory finished stick. For something warmer and more complex, try a few thin slices of fresh ginger alongside the garlic.
Pack the carrot sticks firmly. They will shrink slightly during fermentation, so a tight initial pack helps them stay upright and keeps the brine ratios consistent.
Step 3: Add the Brine and Weight
Pour the brine over the packed carrots until they are fully submerged, leaving about an inch of headspace at the top of the jar. Place your fermentation weight on top. If using a small bag of brine as a weight, fill it, seal it, and press it down over the carrots until everything is below the surface.
Step 4: Ferment at Room Temperature
Cover the jar loosely (an airlock lid, a loose regular lid, or a cloth secured with a rubber band all work) and set it on your counter at room temperature, out of direct sunlight. The ideal fermentation temperature is between 65 and 75 degrees Fahrenheit. Cooler rooms ferment more slowly and produce a milder flavor. Warmer rooms move faster and produce a more pronounced tang.
Fermentation typically takes 3 to 5 days for a mild batch, or up to 7 days for a more assertively sour result. Check the jar once a day. You should start seeing small bubbles in the brine by day 2. Taste a stick starting on day 3 and decide how far you want to take it. When the flavor is right to you, seal the jar and transfer it to the refrigerator. Cold temperature slows fermentation to nearly a halt, locking in the flavor at whatever stage you prefer.
Step 5: Serve or Store
Your probiotic carrot sticks are ready to eat straight from the jar. They hold well in the refrigerator for up to 3 months. The flavor will continue to develop slowly even in the cold, so a jar you open on day 10 will taste noticeably different from one you open on day 45.
For anyone who enjoys exploring the broader world of lacto-fermented foods, a good fermented honey garlic recipe pairs beautifully with these sticks as a condiment or dipping sauce.
Serving Ideas, Troubleshooting, and Pro Tips
You made a jar of beautiful, tangy carrot sticks. Now what?
How to Serve Fermented Carrot Sticks
The most obvious use is as a snack straight from the jar, and honestly it is one of the best. But these sticks earn a spot on a lot of other plates too.
- Slice them thin on a bias and use them as a topping for grain bowls alongside pickled cabbage and sesame dressing
- Chop them and fold them into a grain salad the way you would use capers for a salty, tangy bite
- Serve them alongside roasted meats as an acidic counterpoint to rich fat, much the way you would use a fermented salsa recipe to cut through heaviness
- Add them to a charcuterie board as the fermented element next to olives and cornichons
- Pack a few into a lunchbox alongside hummus for a crunchy, gut-friendly alternative to raw vegetables
Troubleshooting Common Problems
Cloudy brine: This is completely normal. Cloudiness in the brine is caused by lactic acid bacteria and is a sign of a healthy, active ferment. It does not mean anything has gone wrong.
White film on the surface: A thin white layer on top of the brine is most likely kahm yeast, a harmless but unattractive byproduct of fermentation. Skim it off and ensure your carrots are pushed back below the surface. It will not hurt the batch.
Mushy texture: Mushy fermented carrot sticks are almost always the result of too-warm fermentation temperatures or carrots that were not fresh to begin with. If your kitchen runs warm, try fermenting in a slightly cooler spot, like a basement or a shaded cabinet. Some fermenters add a small piece of horseradish root or a grape leaf to the jar. Both contain tannins that help maintain crunch by slowing the softening of the pectin in the cell walls.
Mold (fuzzy, colored): If you see blue, green, or black fuzzy mold, discard the batch. This happens when vegetables are not kept fully submerged. It is rare when the process is followed correctly, but it does occur. Start fresh with clean equipment and pay extra attention to keeping everything below the brine line.
Pro Tips for the Best Results
- Always use a kitchen scale for the salt. Volume measurements of salt vary significantly by brand and grind size, and an off ratio is the single most common cause of fermentation failure.
- Label your jar with the start date. It is surprisingly easy to lose track of where you are in the process.
- If you love big garlic flavor, add the garlic on day 2 rather than day 1. Raw garlic can sometimes inhibit fermentation when added in large quantities at the start.
- Save the leftover brine when you finish the sticks. It makes an excellent addition to salad dressings, marinades, or a small shot glass consumed on its own as a probiotic tonic.
Frequently Asked Questions
How long do you need to ferment carrot sticks?
Most batches of fermented carrot sticks are ready to eat after 3 to 5 days at room temperature. A 3-day ferment gives you a mild, lightly tangy result, while 5 to 7 days produces a more assertively sour flavor. Taste a stick starting on day 3 and transfer the jar to the refrigerator when the flavor is where you want it.
What is the difference between fermented carrots and pickled carrots?
Pickled carrots are preserved in a vinegar solution, which is added directly and requires no active fermentation. Fermented carrots go through lacto-fermentation, where naturally occurring lactic acid bacteria convert the sugars in the carrot into lactic acid. Fermented carrots contain live probiotics and have a more complex, rounded tang, while pickled carrots have a sharper, vinegar-forward flavor.
Why is my fermented carrot brine cloudy?
A cloudy brine is one of the best signs you can see in a jar of lacto-fermented vegetables. The cloudiness is caused by lactic acid bacteria and fine particles from the carrots themselves. It means fermentation is active and progressing well. Clear brine after several days can sometimes mean fermentation is stalling, often due to too much salt or water that is too cold.
Are fermented carrots still crunchy?
Yes, when done correctly, fermented carrot sticks stay remarkably crunchy. The key factors are starting with firm, fresh carrots, fermenting at a cool-to-moderate temperature, and not over-fermenting. If you want extra insurance against softness, add a small piece of horseradish root or a fresh grape leaf to the jar. Both contain tannins that help preserve the cell structure of the carrots during the ferment.
Conclusion
There is something genuinely satisfying about pulling a jar of fermented carrot sticks out of the refrigerator five days after you packed it and hearing that crisp snap when you bite in. It is proof that the simplest ingredients, just carrots, water, and salt, can become something completely different and genuinely better when you give them time.
Give this recipe a try this week. It takes about fifteen minutes of active effort and then the bacteria handle the rest. Pack a jar tonight and you will have a crunchy, probiotic-rich snack ready by the weekend.
For more recipes like fermented carrot sticks, follow us on Facebook and Pinterest for gut-friendly fermentation ideas and easy homemade snack recipes.