The garlic turning blue in your fermented honey garlic recipe isn’t a mistake, it’s a sign you’re doing it right. That weird color stops many cooks from a ferment worth its sticky-sweet, funky bite.
Recipes skip why your garlic looks alien or why the honey barely bubbles. This one tackles the real problem: garlic treated to prevent sprouting, which kills fermentation.
You’ll learn to spot active fermentation (don’t wait for massive fizz), know when it’s mellowed enough to eat, and why aged cloves become candy-like in texture.
Table of Contents

Table of Contents
Why This Fermented Honey Garlic Recipe Works
Immune-boosting benefits of honey and garlic
Garlic and honey have been paired as medicine for centuries. Not just because someone thought they’d taste good together. Both contain compounds that fight bacteria and support your immune system.
Raw garlic gives you allicin. That’s the sulfur compound that makes your eyes water when you chop it. Allicin breaks down quickly, but fermentation preserves more of it than cooking does. Raw honey brings its own arsenal, enzymes, antioxidants, and oligosaccharides that feed beneficial gut bacteria.
What surprised me about this fermented honey garlic recipe is how the two ingredients amplify each other. The honey draws out garlic’s juices, which thins the honey into a syrupy consistency. That thin honey coats the back of a spoon perfectly. It also makes the garlic mellow and chewy, not harsh and burning.
Raw honey contains glucose oxidase, which produces trace hydrogen peroxide. Fermented garlic develops new antioxidant compounds not present in raw cloves. The resulting liquid is probiotic-rich, unlike cooked garlic infusions in honey. A single clove with a spoonful of honey delivers more functional benefit than either ingredient alone.
I keep a jar during cold season. A spoonful of honey stirred into tea tastes better than any supplement. If you’re looking for a savory dinner to drizzle it over, this one pan garlic butter chicken recipe works beautifully with a teaspoon of the fermented honey brushed on at the end.
The simplest ferment: no starter culture needed
You don’t need whey, brine, or a powdered starter. Raw honey already contains wild yeasts and bacteria. When garlic juice thins the honey enough, those microbes wake up and start fermenting. That’s it.
The pH of raw honey sits around 3.9. Low enough to prevent botulism spores from germinating. If you’re nervous, test your honey with pH strips. Anything below 4.6 is safe. Most raw honey lands well under that mark without help.
I lightly crush the cloves with the flat of my knife. Not smashed to pieces, just cracked enough to release juice. That juice is what kicks off the whole process. Within a few days, the honey loosens up. Bubbles appear slowly. The garlic floats a little.
This fermented honey garlic recipe taught me patience. The cloves taste sharp for the first week. By day 14, they’ve turned mellow and slightly chewy, like gummy candy with a kick. The honey transforms too, picking up a savory funk I genuinely didn’t expect.
Once your honey garlic is ready, try spooning it over roasted vegetables or using it to finish a honey garlic slow cooker pork tenderloin for a sticky, tangy glaze.
Print
Fermented Honey Garlic Recipe: The 2-Ingredient Probiotic Powerhouse for Your Kitchen
- Total Time: 20165 min
- Yield: 16 servings 1x
- Diet: Gluten-Free, Vegetarian
Description
A two-ingredient ferment of garlic cloves and raw honey that yields a probiotic-rich syrup and mellow, chewy garlic. Just crack the cloves, cover with raw honey, and wait 14 days for the wild fermentation to transform both. Use the honey for drizzling, marinades, and immune support, and the garlic anywhere you want a sweet-savory punch.
Ingredients
For the ferment:
1½ cups (340g) raw, unpasteurized honey
15–20 garlic cloves (about 2 heads), peeled
Optional:
1 tablespoon raw apple cider vinegar (if honey pH is above 4.6)
Instructions
1. Prepare the garlic: Peel 15–20 garlic cloves. Lay the flat side of a knife over each clove and press firmly until it cracks, just enough to release juice, not smash. Discard any that are soft or sprouting.
2. Combine with honey: Place cracked cloves into a clean pint jar. Pour the raw honey over them until cloves are covered by about an inch, leaving at least 2 inches of headspace. Stir gently to coat. If your honey’s pH tests above 4.6, stir in 1 tablespoon raw apple cider vinegar.
3. Ferment and burp daily: Cover loosely with a lid (do not tighten). Let the jar sit at room temperature away from direct sunlight. Every 24 hours, open the lid briefly to release gas, then stir or flip the jar to re-coat the garlic. Tiny bubbles should appear by day 3–5. After 14 days, the ferment is mellow and ready to use. The honey will be thin and syrupy, the garlic soft and mild. Continue burping and flipping daily if storing longer.
Notes
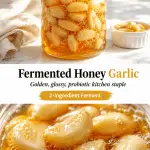
Blue or green cloves are normal, just an enzymatic reaction to the honey’s acidity.
Bubbles are subtle; don’t expect vigorous fizz. Thinning honey and a slight tang signal fermentation.
Store at room temperature for up to 2 days. Do not freeze, texture will degrade.
For long-term storage, keep in a cool, dark place and continue burping periodically; cloves will continue mellowing.
- Prep Time: 5 min
- Rest Time: 336 hours
- Cook Time: 0 min
- Category: Condiment, Side Dishes
- Method: No-bake
- Cuisine: International
Nutrition
- Serving Size: 1 tablespoon honey with 2 garlic cloves
- Calories: 76 kcal
- Sugar: 17 g
- Sodium: 1 mg
- Fat: 0 g
- Saturated Fat: 0 g
- Unsaturated Fat: 0 g
- Trans Fat: 0 g
- Carbohydrates: 19 g
- Fiber: 0 g
- Protein: 0 g
- Cholesterol: 0 mg
Ingredients for Fermented Honey Garlic
Active Time: 5 minutes Total Time: 336 hours 5 minutes Yield: 16 servings
- 1½ cups (340g) raw, unpasteurized honey
- 15–20 garlic cloves (about 2 heads), peeled
You cannot swap in pasteurized honey, as it’s been heated above the temperature that kills the wild yeasts needed to start fermentation. If your raw honey is crystallized, set the jar in a bowl of warm water until it pours easily, but keep the honey itself below 95°F.
Choosing the best raw honey
Raw honey isn’t just another sticky sweetener here. It’s the engine. The same raw honey that glazes a honey baked ham recipe carries the live yeasts and bacteria that make this ferment work. Pasteurized honey can’t do that.
Look for labels that say “raw,” “unfiltered,” or “unpasteurized.” Good raw honey has a pH around 3.9, well below the 4.6 threshold that keeps botulism spores dormant. I still test mine with a pH strip. If your honey reads above 4.6, stir in 1 tablespoon of raw apple cider vinegar to safely nudge the acidity down. That one extra step saves a lot of worry. The vinegar taste disappears as fermentation progresses.
Heavily filtered honey might look clearer, but clumps, pollen grains, and slight cloudiness are actually what you want. Those bits mean the microbes are intact.
Preparing fresh garlic cloves
I peel the garlic, then lay the flat side of my knife over each clove and give it a firm press, not a smash, just enough to crack the surface. That tiny split lets honey seep in and garlic juice flow out, which thins the honey just enough for fermentation to wake up. Smashing the cloves into mush makes them disintegrate later.
Pick firm heads. Sprouting or soft cloves ferment poorly. If your garlic has been treated to stop sprouting (check the bag), it may stall the process. Farmer’s market garlic with papery skins usually works better than supermarket bulbs coated for shelf life.
Don’t panic if your cloves turn blue or green after a few days. That’s a natural enzymatic reaction with the honey’s acids. The color is harmless and the cloves end up candy-soft and savory, perfect for folding into a creamy garlic parmesan chicken breast once they’ve mellowed.
How to Make Fermented Honey Garlic
Step 1: Prepare the garlic
Peel 15–20 cloves, discarding any that are soft or sprouting. Lay the flat side of a knife over each clove and press firmly until you hear a crack. The skin will separate easily, and the clove splits just enough to release juice. Don’t smash them into paste. Those tiny cracks let honey seep in and garlic’s natural moisture thin the honey, which wakes up the wild yeasts. If your garlic was treated to prevent sprouting, the ferment may stall. Farmer’s market garlic with papery skins tends to be more active.
Quick Note: Blue or green cloves a few days in are normal, just an enzymatic reaction with the honey’s acids. They’ll taste mellow and turn candy-soft.
Step 2: Combine with honey and start fermentation
Drop the cracked cloves into a clean pint jar. Pour the raw honey over them until they’re covered by about an inch, leaving at least 2 inches of headspace at the top. Stir gently to coat every clove. The garlic will float, and that’s fine. This fermented honey garlic recipe only works with raw honey; pasteurized won’t ferment. If your honey’s pH tests above 4.6, stir in 1 tablespoon of raw apple cider vinegar to safely nudge it down. If you’re curious about other ways raw honey behaves, this honey trick recipe shows another clever use for its natural enzymes.
Watch Out: Bubbles will be slow and subtle, not a rolling fizz. Don’t wait for big activity. Thinning honey and a slight tang mean it’s working.
Step 3: Burp the jar and flip daily
Cover the jar loosely with a lid, don’t crank it tight, or gas can’t escape. Set it on the counter away from direct sunlight. Every 24 hours, open the lid briefly to release built-up CO₂, then stir or flip the jar upside down to re-coat the garlic. Within 3–5 days, the honey will look thinner, tiny bubbles will dot the sides, and the garlic may float higher. After 14 days, the ferment is mellow and ready. The honey is delicious right away; the cloves soften and lose their raw bite over time. The syrupy honey is fantastic brushed over honey glazed steak strips for a savory-sweet finish.
Cook’s Tip: If a clove tastes too bitter raw, rinse it off or mash it into softened butter. The bitterness vanishes with a little fat.
Storage, Troubleshooting & Serving Ideas
How to store for maximum freshness
Keep the finished ferment in a cool, dark cupboard. It’ll age gently for months without refrigeration. The flavor deepens with time. If you need to serve it within a couple of days, leave the jar on the counter but loosen the lid and wrap it well. Do not refrigerate; cold halts the living bacteria and flattens the sweet, funky complexity.
| Storage Method | Maximum Time | Notes |
|---|---|---|
| Counter (wrapped well) | Up to 2 days | Lid loose, out of direct sun |
| Fridge | 0 days (not recommended) | Kills fermentation, dulls flavor |
| Freezer | Not recommended | Texture degrades, honey crystallizes |
Spoon the honey over roasted root vegetables or drizzle it onto a classic garlic pasta recipe for an instant upgrade. The cloves themselves are candy-soft and spectacular folded into a creamy garlic parmesan pasta, just chop a few and stir them in right before serving. Always use a clean, dry spoon to avoid introducing moisture.
Common problems & quick fixes
| Problem | Solution |
|---|---|
| Garlic floats and won’t stay submerged | Flip the jar or shake it daily to recoat the cloves |
| Honey thins and looks watery | Normal, garlic juice releases. Stir gently to combine |
| Cloves turn blue or green | Harmless enzymatic reaction; flavor stays mellow |
| Gas buildup causes lid to pop or leak | Burp the jar every 24 hours, just crack the lid open briefly |
| Fermentation won’t start (no bubbles, honey still thick) | Check that you used raw, unpasteurized honey; pasteurized won’t ferment |
| Bitter, harsh taste in raw cloves | Rinse the clove or mash it into softened butter to mellow the bitterness |
| Botulism concern | Test pH, add 1 tablespoon raw apple cider vinegar if above 4.6; honey’s acidity normally prevents it |
Fermented Honey Garlic Recipe FAQ
Can I substitute pasteurized honey in a fermented honey garlic recipe?
No. Pasteurized honey has been heated to kill wild yeasts, so it won’t ferment. Fermented honey garlic recipe relies on live microbes in raw honey. If you only have pasteurized, you could add a spoonful of active raw honey or whey to kickstart things, but plain pasteurized honey won’t thin or bubble.
Why do my garlic cloves turn blue or green during fermentation?
It’s a harmless enzymatic reaction between sulfur compounds in the garlic and the honey’s natural acids. The color doesn’t affect flavor or safety. Cloves often turn candy-soft and mellow after 14 days. If you see some blue, you’re probably doing everything right. No need to toss the batch.
How long until this fermented honey garlic recipe is ready to use?
The honey starts tasting good after 3–5 days, but the cloves need about 14 days to mellow. After 14 days, the garlic will be chewy and less harsh. I like to wait a full month for deeper flavor. You can start using the honey right away once it thins and gets tiny bubbles.
Do I need to keep fermented honey garlic in the fridge?
No, refrigeration halts the living ferment and dulls flavor. Keep the jar in a cool, dark cupboard with the lid loose. Use a clean, dry spoon every time. The acidity of raw honey (pH 3.9) keeps it safe for months at room temperature. See storage tips above for more.
There are no bubbles in my jar – did my fermented honey garlic recipe fail?
Bubbles can be microscopic, like suspended fizz, not big rising beads. Check if the honey has thinned (garlic juice released) and if a slight tang has developed. If the honey stays thick and sweet after 5 days, your honey might be pasteurized. A slow start isn’t failure; see troubleshooting for other fixes.
Conclusion
That blue-green tint isn’t wrong, it’s proof your fermented honey garlic recipe is working its magic. Thin honey dotted with tiny bubbles signals active fermentation. By day fourteen you’ll have chewy-sweet cloves and savory syrup worth every patient stir.
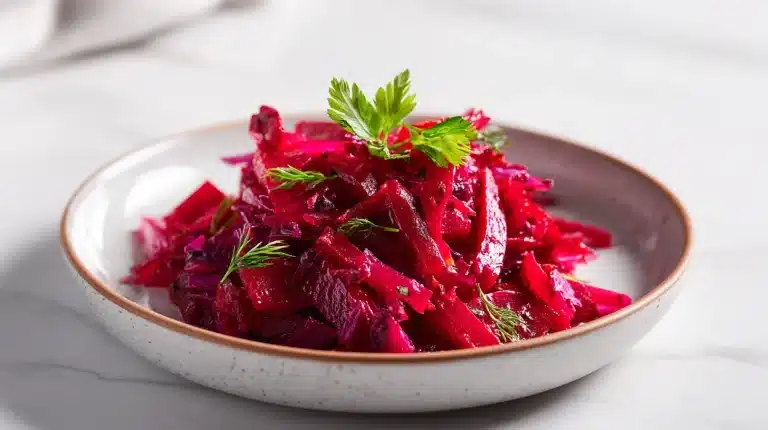
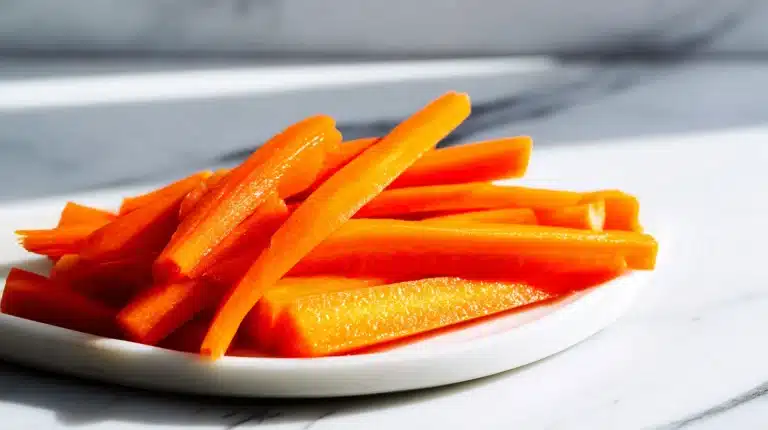
I keep mine next to the stove all winter long. A spoonful stirred into tea or brushed over roasted carrots never fails me. Grab some raw honey this weekend and get your own jar going. You’ll wonder why you waited so long.
Do you drizzle yours mostly on savory dishes or sneak spoonfuls straight from the jar?
For more recipes like this, follow us on Facebook and Pinterest for easy fermented staples and probiotic-rich condiment ideas.