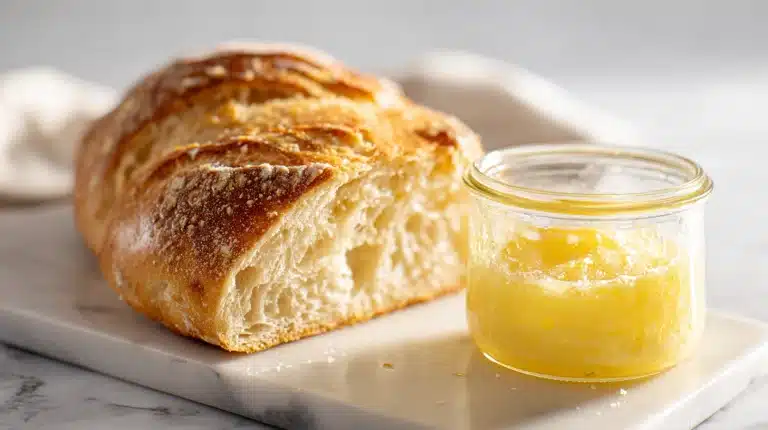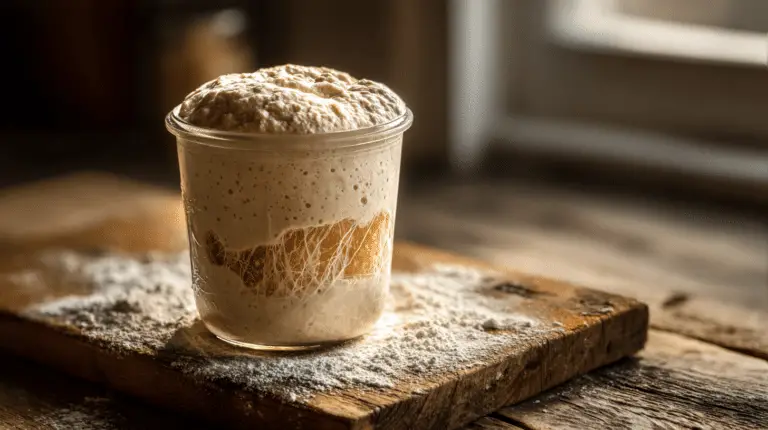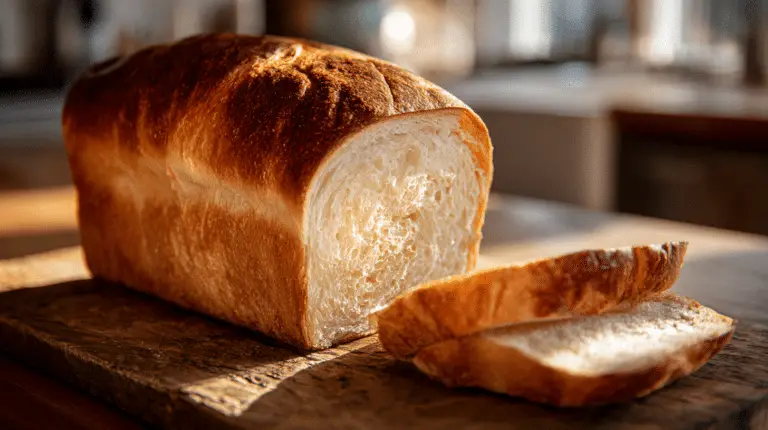
That tangy flavor in your sourdough discard sandwich bread shouldn’t be a gamble. The secret isn’t in your starter’s age, but in how you use its unfed discard to control the sourness.
Most recipes leave you waiting overnight for a flavor that might never come. This version gives you a soft, reliable loaf with a predictable tang in just 200 minutes.
Here, you’ll find the exact flour blend for achieving the perfect structure, learn how to use instant yeast with your discard for a fast rise, and discover why a bit of honey makes all the difference.

Table of Contents
Why You’ll Love This Easy Sourdough Discard Sandwich Bread
This isn’t your typical, slow-going sourdough recipe. I’ve made this discard sandwich bread over fifty times because it uses up starter waste predictably, works fast, and has the perfect texture for lunch. You get a tangy, soft loaf without the usual 12-hour wait.
Perfect for Using Up Discards
Most recipes instruct you to use “discard,” but they don’t specify which kind. That’s where the flavor gamble happens. I specifically use older, unfed sourdough discard straight from the fridge for a consistent, tangy flavor (see Key Ingredients Explained for more on why this works). If you’re new to this, you can make your own sourdough starter recipe in about a week. Just remember, for this bread, you want the discard from after a feeding, not the active bubbly starter you’d use for a classic sourdough sandwich bread.
- It turns waste into a consistent flavor boost.
- You don’t need to plan feedings around your bake.
- It works with any hydration starter (stiff or liquid).
Quick & Reliable Hybrid Method
Waiting overnight for sourdough to rise is a commitment. This method combines your tangy discard with instant yeast. The discard adds flavor and a slight acidity that strengthens the gluten, while the instant yeast guarantees a fast, predictable rise. From the moment you mix to pulling the loaf from the oven, the whole process takes 200 minutes. If you only have active dry yeast, see the substitution table for how to swap it in. I use a stand mixer with a dough hook for ease, but hand kneading works too. You’ll do a bulk fermentation for about 90 minutes, then shape, proof in the loaf pan for 45 minutes, and bake. It’s a schedule you can actually fit into an afternoon.
Soft Crumb for Sandwiches
The goal here is a tight, tender crumb that holds mayo and doesn’t squish your turkey. The combination of fats and sweeteners is key. I use a tablespoon of honey, which feeds the yeast for a better rise and, along with a bit of butter or olive oil, keeps the interior incredibly soft. Bread flour gives the best structure, but all-purpose flour makes a slightly more tender loaf that’s still sliceable. The real test is the windowpane test (see step-by-step instructions for details). You end up with slices that are sturdy enough for a hefty sandwich but soft enough to bite through easily.
Print
Quick Sourdough Discard Sandwich Bread (Ready in 3.5 Hours)
- Total Time: 3 hours 20 min
- Yield: 12 slices 1x
Description
This quick sourdough discard sandwich bread combines tangy, unfed starter with instant yeast for a reliable loaf ready in about 3.5 hours. It makes a soft, sliceable bread perfect for sandwiches and toast.
Ingredients
For the dough:
1 cup (240g) unfed sourdough discard, cold
3 cups (360g) bread flour or all-purpose flour
1 teaspoon (4g) instant yeast
¾ cup (180ml) warm water or milk (about 105°F)
2 tablespoons (42g) honey
2 tablespoons (28g) unsalted butter, softened (or olive oil)
1 ¼ teaspoons (8g) fine sea salt
Instructions
1. Combine the sourdough discard, warm water or milk, honey, and butter in the bowl of a stand mixer fitted with the paddle. Mix on low for 30 seconds.
2. Switch to the dough hook. Add the flour, instant yeast, and salt. Mix on low for 2-3 minutes until a shaggy dough forms.
3. Knead on medium-low speed for 5-7 minutes until the dough is smooth and passes the windowpane test.
4. Transfer the dough to a lightly oiled bowl, cover, and let rise in a warm spot until nearly doubled, about 90 minutes.
5. Grease a 9×5-inch loaf pan. Turn the risen dough onto a clean surface, shape into a log, and place seam-side down in the pan.
6. Cover and let proof until the dough rises just above the pan rim, about 45 minutes. Preheat the oven to 350°F.
7. Bake for 40-45 minutes, tenting with foil after 25 minutes if browning too quickly. The bread is done when the internal temperature reaches 190°F–200°F.
8. Immediately turn the loaf out onto a wire rack and let cool completely, about 1 hour, before slicing.
Notes
Store at room temperature for up to 3 days or freeze for up to 3 months. Reheat at 350°F for 10 minutes.
Use unfed discard straight from the fridge for the best, tangiest flavor.
If you only have active dry yeast, dissolve it in the warm liquid for 5 minutes before adding in step 1.
The windowpane test is key: stretch a small piece of dough until thin and translucent. If it tears, knead for another minute.
Letting the bread cool completely is non-negotiable for a clean slice and to prevent a gummy crumb.
- Prep Time: 25 min
- Rest Time: 2 hours 15 min
- Cook Time: 40 min
- Category: Main Course, Snack
- Method: Baking
- Cuisine: American
Nutrition
- Serving Size: 1 slice
- Calories: 165 kcal
- Sugar: 3 g
- Sodium: 195 mg
- Fat: 3 g
- Saturated Fat: 1.5 g
- Unsaturated Fat: 1.5 g
- Trans Fat: 0 g
- Carbohydrates: 30 g
- Fiber: 1 g
- Protein: 5 g
- Cholesterol: 5 mg
Ingredients & Equipment for Sourdough Discard Sandwich Bread
Active Time: 25 minutes
Total Time: 200 minutes
Yield: 1 loaf (12 slices)
- 1 cup (240g) unfed sourdough discard, straight from the fridge
- 3 cups (360g) bread flour or all-purpose flour
- 1 teaspoon (4g) instant yeast
- ¾ cup (180ml) warm water or milk (about 105°F)
- 2 tablespoons (42g) honey
- 2 tablespoons (28g) unsalted butter, softened (or olive oil)
- 1 ¼ teaspoons (8g) fine sea salt
Substitutions: You can use active dry yeast instead of instant. Swap honey for an equal amount of sugar. For a vegan version, use plant-based milk, maple syrup, and coconut oil.
Key Ingredients Explained
The flavor and texture of your quick sourdough bread hinge on these specific ingredients. Your sourdough discard should be unfed and tangy. I use mine straight from the fridge after a few days. This mature acidity strengthens the gluten and gives a consistent sour note. I prefer bread flour for its higher protein, which builds a stronger network for a taller loaf, but all-purpose flour makes a wonderfully tender crumb.
The instant yeast is our time-saver, guaranteeing a fast rise alongside the flavor-giving discard. If you only have active dry yeast, check the substitution table for instructions. The honey isn’t just for subtle sweetness; it feeds the yeast for a better rise and keeps the crumb soft. The fat, whether from butter or olive oil, tenderizes the dough and adds richness. Don’t skip the salt; it controls yeast activity and makes all the other flavors pop.
Ingredient Substitutions & Variations
You can adapt this discard sandwich loaf to what you have on hand. The table below covers the most common swaps.
| Original | Substitute | Notes |
| Bread Flour | All-Purpose Flour | Loaf will be slightly less chewy but very soft. |
| Instant Yeast | Active Dry Yeast | Dissolve in the warm liquid for 5-10 minutes before adding. |
| Honey | Granulated Sugar | Use 2 tablespoons. The flavor will be less complex. |
| Butter | Olive Oil or Coconut Oil | Use 2 tablespoons. Melt coconut oil slightly before adding. |
| Cow’s Milk | Water or Plant-Based Milk | Any unsweetened, unflavored milk works fine. |
For fun variations, try folding in a handful of seeds or rolled oats during the final minute of kneading. If you want to explore other sourdough flavors, you could even maintain a specialized chocolate sourdough starter recipe for sweet bakes.
Essential Baking Tools
You don’t need fancy gear, but a few tools make this process foolproof. A digital kitchen scale is my number one recommendation; measuring flour by weight (grams) is accurate and prevents a dense loaf. I use my stand mixer with the dough hook for easy kneading; it takes about 7-8 minutes on medium-low speed to pass the windowpane test (explained in the step-by-step instructions). You can absolutely knead by hand for 10-12 minutes instead.
You’ll need one standard loaf pan (usually 9×5 inches). Grease it well with butter or oil to ensure your bread releases cleanly after baking. A reliable instant-read thermometer is crucial for knowing when your bread is done; you’re looking for an internal temperature of 190°F–200°F. For storage, keep the cooled loaf in a plastic bag at room temperature; it makes fantastic toast for days. For more traditional methods, our classic sourdough bread recipe dives deeper into long fermentation.
Step-by-Step Instructions for Making Sourdough Discard Sandwich Bread
Mixing & Kneading the Dough
This method comes together fast. The goal is a smooth, elastic dough that passes the windowpane test.
- Lightly grease the bowl of your stand mixer with oil or cooking spray. Then, add the sourdough discard, warm water or milk, honey, and softened butter or olive oil. Use the paddle attachment to mix for 30 seconds until it looks like a lumpy soup.
- Add the dry ingredients. Switch to the dough hook. Add all of the bread flour (or all-purpose flour), instant yeast, and salt on top of the wet mixture.
- Mix on low speed. Let the machine run on low for 2-3 minutes until a shaggy dough forms and pulls away from the sides of the bowl.
- Knead to develop gluten. Increase the speed to medium-low and knead for 5-7 minutes. The dough should become smooth, slightly tacky but not sticky, and cling to the hook.
Cook’s Tip: If you’re kneading by hand, turn the shaggy dough onto a lightly floured surface and push, fold, and turn it for 10-12 minutes.
- Perform the windowpane test. Stop the mixer. Tear off a small piece of dough and gently stretch it between your fingers. If you can stretch it thin enough to see light through it without it tearing, you’re done. If it tears immediately, knead for another minute and test again.
First Rise & Shaping the Loaf
This bulk fermentation builds flavor and airiness before we shape our sandwich loaf.
- Let the dough rise. Leave the kneaded dough in the greased mixer bowl or transfer it to a lightly oiled bowl. Cover it with a damp towel or plastic wrap.
- Find a warm spot. Let it sit until nearly doubled in size, which takes about 90 minutes in a room around 70°F. It won’t look as bubbly as a pure sourdough; that’s normal with our hybrid yeast method.
- Prepare your pan. While waiting, grease your loaf pan thoroughly with butter or oil.
- Shape the loaf. Turn the risen dough onto a clean surface; no extra flour is needed if it’s not sticky. Gently press it into a rectangle about as wide as your loaf pan is long.
- Fold and seal. Fold the top third down over itself, then fold the bottom third up (like a letter). Pinch the seam closed with your fingers.
- Place in the pan seam-side down. Gently roll the log back and forth to even it out, then place it in your prepared loaf pan.
Watch Out: Don’t aggressively punch down or re-knead this dough after its first rise; you’ll degas it too much and get a dense crumb.
Second Rise & Baking
The final proof gives our shaped loaf its last puff before hitting the oven’s heat.
- Proof until puffy again. Cover your loaf pan with that same damp towel or plastic wrap.
- Let it rise until just above the rim of your pan, about 45 minutes. The dough should look pillowy and hold a slight indentation when you gently poke it with a floured finger.
- Preheat your oven while you wait: set it to 350°F / 175°C.
- Bake until deeply golden brown: place your loaf pan on a middle rack and bake for 40-45 minutes total.
- Check for doneness early: At around 22-25 minutes, if your bread is browning quickly, loosely tent it with aluminum foil to prevent over-browning.
- Test for perfection at 40 minutes. Your bread is done when:
- It has a deep golden-brown crust that sounds hollow when tapped on top.
- The internal temperature reads between 190°F and 200°F on an instant-read thermometer inserted into the center of the loaf.
Chef’s Note: That internal temperature is non-negotiable for me now; it guarantees no gummy middle every single time.
- Cool completely before slicing! Turn your finished sourdough discard sandwich bread out onto a wire rack immediately after baking to prevent sogginess from steam trapped in its crust; this takes at least an hour (I know, the hardest part!). For storage once cool: keep leftovers in an airtight bag at room temperature for up to five days; slice and freeze for up to three months. This bread is also a great base for other flavors, like raspberry lemon sourdough bread.
Storage, Troubleshooting & Serving Ideas
Your quick sourdough discard sandwich bread is done. Now, let’s keep it fresh, fix any hiccups, and turn it into your next favorite meal.
How to Store & Freeze
This loaf stays soft for days if you store it right. Let it cool completely on a wire rack first; any trapped steam will make the crust soggy.
Once cool, wrap the whole loaf tightly in plastic wrap or aluminum foil, or store it in a reusable bag. At room temperature, it stays perfectly soft for up to 3 days. You can refrigerate it for up to 3 days total from baking, but the fridge will dry it out faster and make the crumb firmer.
For longer storage, freezing is your best friend. Slice the entire loaf first. This lets you pull out just what you need for toast. Wrap the slices in a double layer of plastic wrap, then pop them into a freezer bag. They’ll keep for up to 3 months.
To refresh frozen bread or revive day-old slices, reheat them directly in a 350°F oven for 10 minutes. It comes back to life with a warm, soft interior and a slightly crisp edge.
| Storage Method | Duration | Best For |
| Room Temp (wrapped) | Up to 3 days | Immediate eating, soft slices |
| Refrigerator (wrapped) | Up to 3 days (total) | Short-term hold if kitchen is warm |
| Freezer (sliced & wrapped) | Up to 3 months | Long-term storage, ready-to-toast |
Common Problems & Solutions
Even with instant yeast helping out, sometimes bread doesn’t cooperate. Here are the fixes I’ve learned from my own mistakes.
| Problem | Solution |
| Dense or gummy loaf | This usually means under-developed gluten or under-baking. Next time, don’t skip the windowpane test during kneading. Also, use an instant-read thermometer, your bread is done at an internal temperature of 190°F–200°F. |
| Bread didn’t rise well | Check your yeast and water temperature. If your water was too hot (over 115°F), it can kill the yeast. Warm to the touch (105°F) is perfect. Also, ensure your instant yeast or active dry yeast isn’t expired. |
| Loaf collapsed after baking | The dough was over-proofed. During the final proofing, stop when the dough crests just about 1 inch above the rim of your loaf pan. If it domes way over the top before baking, it can collapse in the oven’s heat. |
| Dough is too sticky to handle | Don’t panic and add tons of extra flour right away. Let the shaggy dough rest in the bowl for 15 minutes (this is called autolyse). The flour will hydrate fully and become less sticky. Then proceed with kneading by hand or with your dough hook. |
| Large, uneven air holes in the crumb | You might have skipped degassing during shaping. After the first rise (bulk fermentation), gently press the dough into a rectangle to pop those big bubbles before you fold and shape it. This gives you that fine, even sandwich texture. |
Delicious Ways to Serve
The beauty of this soft sourdough sandwich loaf is its versatility. That reliable crumb makes everything better.
- The Ultimate Toast: This is my favorite way to eat it after day one. The honey caramelizes slightly, and the tangy sourdough discard flavor shines. Spread with salted butter, peanut butter, or mash a ripe banana on top.
- Sandwich Central: You built this bread for this job. It holds up to hefty fillings without getting soggy or falling apart. Try turkey with cranberry sauce, classic grilled cheese (the tang cuts through the fat perfectly), or a stacked veggie club.
- French Toast or Bread Pudding: Stale bread is a gift! Cube leftover slices for a rich bread pudding, or make decadent French toast. The honey and butter already in the loaf mean you need less added sugar and cream in your custard.
- Appetizer Crostini: For a party, slice the loaf thinly on day one when it’s firmest. Brush with olive oil, toast until crisp, and top with goat cheese and honey or tomato bruschetta.
- Sweet Companion: Its subtle sweetness makes it a great base for fruit-forward spreads. It pairs wonderfully with our blueberry orange sourdough bread on a brunch table. For a sweet-and-tangy combo, try it toasted alongside a slice of strawberry lemon sourdough bread.
Your Sourdough Discard Sandwich Bread Questions, Answered
What is sourdough discard?
It’s the portion of the starter you remove and typically throw away before a feeding to maintain its size. For this bread, use unfed, tangy discard straight from the fridge. This mature discard gives a consistent sour flavor, unlike a recently-fed, bubbly starter, and turns waste into a reliable ingredient.
Can I use an active starter instead of a discard?
I don’t recommend it. An active, bubbly starter acts like extra yeast and can cause your loaf to over-rise and collapse. The unfed discard’s acidity strengthens the gluten and gives a controlled tang. For a true sourdough loaf, use a dedicated recipe that’s designed for an active starter.
Can I make this recipe without yeast?
Not for this 3.5-hour loaf. The instant yeast (or active dry yeast) is essential for the quick, reliable rise. To make a true, yeast-free sourdough sandwich bread, you’d need a different recipe with a much longer fermentation time, often 8-12 hours or overnight.
Why is my bread dense or gummy?
Two main culprits: under-kneading or under-baking. First, ensure your dough passes the windowpane test before the first rise. Second, bake until the internal temperature reaches 190°F–200°F. Using a thermometer is the only sure way to know it’s done all the way through.
Your sourdough discard sandwich bread is a fast, reliable way to use up that tangy starter. Combining unfed discard with instant yeast gives you flavor and a quick rise in under 200 minutes. Just remember the windowpane test for perfect texture and bake to an internal temperature of 190°F–200°F.
I always slice into the warm loaf as soon as it’s cool enough; the smell is incredible. Give this hybrid method a try this weekend; it genuinely works.
Do you prefer using butter or olive oil in your dough for flavor?
For more recipes like sourdough discard sandwich bread, follow us on Facebook and Pinterest for daily baking projects and clever ways to use your sourdough discard.