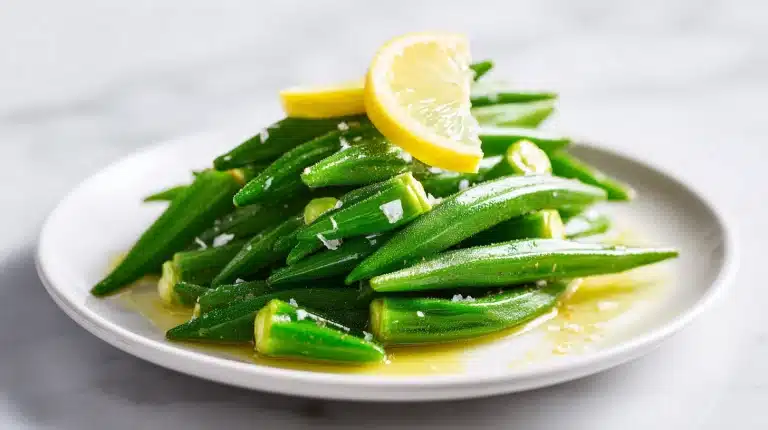
My grandmother’s sautéed okra recipe changed everything I thought I knew about this polarizing vegetable. She swore the secret was dry heat and patience, and one bite of those charred, blistered pods proved her right.

If you have ever wrestled with gummy, slimy okra that turned into a tangled mess in the pan, you are not alone. This method uses high heat and a single layer in a dry skillet to coax out a golden, lightly crisp texture every time.
Inside: the exact temperature and timing that eliminates slime, the one ingredient that locks in texture, and three spice variations so you never get bored.
Table of Contents
Why This Sautéed Okra Recipe Works
Okra has an unfair reputation. Most people who say they hate it have only encountered it boiled, stewed, or steamed, cooking methods that trigger the vegetable’s natural mucilage and turn it into something gummy and unrecognizable. The truth is that okra is one of the most rewarding vegetables you can cook, provided you give it the right treatment.
The mucilage in okra, the very substance that makes people grimace, is actually a soluble fiber that thickens stews like gumbo beautifully. But when you want crispy okra, that same mucilage becomes your biggest obstacle. The solution is to outrun it with heat rather than fighting it with heavy coatings or lengthy soakings.
High, dry heat is the single most important factor in any sautéed okra recipe. When okra hits a screaming hot skillet with just a thin film of oil, the surface sears before the interior has a chance to release its moisture. The pods blister, char slightly at the edges, and develop a texture that is firm yet tender, with none of the slick coating that ruins the experience.
Temperature matters more than time. A skillet that is merely warm will let the okra sweat, and sweating is exactly what releases the mucilage. You want the oil shimmering, almost smoking, before the pods go in. Once they do, give them space. Crowding the pan drops the temperature and traps steam, which is the fastest path to slimy okra. If you are curious about raw preparations, this okra salad recipe with Japanese flavors takes a completely different approach that skips heat entirely.
Acid also plays a supporting role. A splash of apple cider vinegar at the end of cooking does more than brighten the flavor. Acid helps break down residual mucilage, so even if a pod or two releases some moisture, the vinegar keeps the texture clean and the taste sharp. It is a small step with a big payoff.
The other factor people overlook is salt timing. Salting okra before it goes into the pan draws out moisture, which sounds helpful but actually creates more liquid in the skillet and promotes sticking. Salt after the okra has already developed a crust, and you will preserve every bit of that golden surface.
This method, built on five principles, is what makes the technique reliable every single time: hot pan, dry surface, single layer, acid finish, late salt. Get those right and you will never look at okra the same way again.
Print
How to Make the Best Sautéed Okra Without Any Slime
- Total Time: 25 min
- Yield: 4 servings 1x
- Diet: Vegan
Description
A simple skillet method for cooking okra until blistered and lightly crisp. Tossed with onion, garlic, cherry tomatoes, cumin, coriander, and a splash of apple cider vinegar. Serves four as a side dish.
Ingredients
For the okra:
1 lb fresh okra (washed, dried thoroughly, tips and stems trimmed)
2 tbsp canola oil or vegetable oil (divided)
1 small yellow onion (diced fine)
3 cloves garlic (minced)
1 cup cherry tomatoes (halved)
1 tsp ground cumin
1 tsp ground coriander
1 tbsp apple cider vinegar (or fresh lemon juice)
1 tsp kosher salt
1/2 tsp freshly cracked black pepper
1/2 tsp flaky sea salt (for finishing)
Instructions
1. Wash the okra and pat completely dry with a clean kitchen towel. Let it air dry for 5 minutes if you have time, then trim the stems and tips and cut each pod into half-inch rounds.
2. Heat a cast iron or heavy-bottomed skillet over medium-high heat for 3 to 4 minutes until very hot. Add the oil and let it shimmer for 30 seconds.
3. Add the okra in a single layer without overlapping. If your skillet is too small, cook in two batches. Let the okra sit undisturbed for 2 minutes until the undersides develop dark char spots.
4. Toss the okra and spread it back into a single layer. Cook for another 3 to 4 minutes, stirring once or twice, until the pods are bright green with golden brown edges.
5. Add the diced onion and cook for 2 minutes, stirring, until the onion softens and turns translucent at the edges. The kitchen should smell sweet and savory.
6. Add the garlic, ground cumin, and ground coriander and cook for 30 seconds until fragrant. Toss in the halved cherry tomatoes and cook for 1 minute until their skins just begin to wrinkle.
7. Remove the pan from heat. Sprinkle with kosher salt and black pepper, then add the apple cider vinegar and toss to coat. The vinegar will sizzle against the hot pan and release a sharp, bright aroma.
8. Taste and adjust seasoning. Transfer to a serving dish and finish with flaky sea salt. Serve immediately while hot.
Notes
Store leftover sautéed okra in an airtight container in the refrigerator for up to 3 days. Reheat in a skillet over medium heat with a teaspoon of oil for 2 to 3 minutes, never the microwave.
For a Southern variation, replace the cumin and coriander with a pinch of cayenne and smoked paprika. For an Indian variation, add 1/2 tsp turmeric and 1/2 tsp garam masala.
The most important step is drying the okra completely before cooking. Wet pods will steam instead of sear, which is the main cause of slimy texture.
If you cannot find fresh okra, frozen whole okra works if you thaw it first and pat it bone dry before slicing.
- Prep Time: 10 min
- Cook Time: 15 min
- Category: Side Dishes
- Method: Stovetop
- Cuisine: American
Nutrition
- Serving Size: 1 cup
- Calories: 120 kcal
- Sugar: 4 g
- Sodium: 480 mg
- Fat: 8 g
- Saturated Fat: 1 g
- Unsaturated Fat: 7 g
- Trans Fat: 0 g
- Carbohydrates: 12 g
- Fiber: 4 g
- Protein: 3 g
- Cholesterol: 0 mg
Ingredients for the Best Sautéed Okra
The ingredient list for this sautéed okra recipe is intentionally short. Okra does not need much help when you cook it properly, and too many additions just clutter the pan and lower the temperature.
Choosing the Right Okra
Fresh okra is what matters most. Look for pods that are firm, bright green, and no longer than four inches. Smaller pods are more tender and have fewer seeds, while larger ones tend to be woody and fibrous. Avoid pods with dark spots or soft patches, which signal age. If you snap the tip off a fresh pod, it should break cleanly with a satisfying crisp sound. That snap tells you the okra is at peak quality and will hold its shape in the skillet.
Oil and Aromatics
The oil choice matters more than you might think. Olive oil works well for flavor, but its smoke point can be a limitation at high heat. Canola or vegetable oil is a better choice if your skillet runs hot, since they can handle temperatures above 400°F without burning. A neutral oil also lets the okra’s natural flavor come through without competition. You can always finish with a drizzle of good olive oil after cooking for aroma.
Onion and garlic form the aromatic base. A small yellow onion, diced fine, adds sweetness that balances okra’s earthy, almost grassy flavor. Garlic brings a pungent warmth that clings to the blistered pods. Add the garlic after the okra has already started to char, since garlic burns quickly at high heat and turns bitter. The difference between golden garlic and burnt garlic is about 20 seconds, so have it minced and ready before the okra goes in.
Spices and Acid
The spice blend is where you can make this recipe your own. Cumin and coriander are my default pair. Cumin adds a warm, smoky depth that pairs naturally with okra’s earthy notes, while coriander brings a citrusy brightness that keeps the dish from feeling heavy. Toast them briefly in the oil before adding the okra and your kitchen will smell warm and toasty.
Tomatoes are optional but worth considering. Cherry tomatoes halved and tossed in during the last two minutes of cooking add a burst of acid and juice that complements the okra perfectly. Some cooks worry that tomatoes make okra slimy, but because they go in at the very end, they barely release any liquid and their skins just begin to wrinkle.
For the finishing acid, both apple cider vinegar and lemon juice work beautifully. Apple cider vinegar has a rounded, slightly fruity acidity that pairs well with cumin. Lemon juice is sharper and more floral. Choose based on what you have and what flavor direction you prefer.
Salt and black pepper round out the list. Use kosher salt for the skillet and finish with flaky sea salt for texture. Freshly cracked black pepper adds a gentle heat that ties everything together.
How to Cook Okra Step by Step
The method behind this sautéed okra recipe is simple, but each step has a purpose. Follow the sequence and you will have perfectly cooked okra in under 25 minutes.
Prep the Okra
The secret to sautéing fresh okra is starting with perfectly dry pods. Begin by washing the okra and drying it thoroughly. This is not a step to rush. Wet okra in a hot pan means steam, and steam means slime. Spread the washed pods on a clean kitchen towel and pat them completely dry. Let them sit for a few minutes if you have time, so any residual moisture evaporates.
Trim the stem ends and tips. You do not need to remove much, just the hard cap at the top where the stem attached. Cut the pods into half-inch rounds. Some people prefer to leave small pods whole, and that works too, but rounds cook more evenly and expose more surface area to the hot pan, which means more browning and more flavor.
Some cooks soak okra in vinegar water before cooking to reduce slime. While that can help for certain preparations, it adds moisture that works against you in a hot skillet. If you are curious about okra in liquid form, the okra water recipe is a different application entirely, but for sautéing, dry is always better.
Heat the Skillet
Place a cast iron or heavy-bottomed skillet over medium-high heat and let it get hot. This takes about three to four minutes. You want the pan hot enough that a drop of water dances and evaporates on contact. Add two tablespoons of oil and let it shimmer, which takes another 30 seconds. The oil should coat the bottom of the pan in a thin, even layer.
If you are using whole cumin and coriander seeds, toast them in the hot oil for about 15 seconds until fragrant. The kitchen will smell warm and toasty, almost like toasted bread. If you are using ground spices, wait until later in the cooking process.
Sear the Okra
Add the okra in a single layer. This is the most important moment in the entire recipe. If the pods overlap, they will steam instead of sear. If your skillet is not large enough to hold all the okra in one layer, cook it in two batches. The extra few minutes are worth it.
Let the okra sit undisturbed for two minutes. You will hear it sizzle and pop, and the edges touching the pan will start to darken. Resist the urge to stir constantly. Okra needs stillness to develop that golden crust. After two minutes, toss or stir the pods and spread them out again. Cook for another three to four minutes, stirring once or twice, until the okra is brightly colored with dark char spots.
Add Aromatics and Finish
Once the okra has good color, add the diced onion. Cook for two minutes, stirring, until the onion softens and turns translucent at the edges. Then add the garlic and cook for 30 seconds, just until fragrant. If you are using ground cumin and coriander, add them now. The spices will bloom in the hot oil and release a deep, savory aroma.
If you are adding cherry tomatoes, toss them in at this point and cook for one minute, just until their skins begin to wrinkle. Remove the pan from heat. Sprinkle with salt and freshly cracked black pepper. Add a splash of apple cider vinegar or lemon juice and toss to coat. The acid will hiss slightly against the hot pan and release a bright, sharp aroma. Taste and adjust seasoning. The okra should be tender with a slight bite, charred at the edges, and coated in a glossy layer of oil and spices.
Variations, Serving Suggestions, and Storage
Once you master the basic sautéed okra recipe, you can take it in plenty of directions. This section covers spice variations, pairing ideas, and how to store leftovers so nothing goes to waste.
Three Spice Variations
The Southern version keeps things minimal: okra, onion, a pinch of cayenne, and salt. It lets the okra speak for itself and pairs naturally with cornbread, collard greens, or fried catfish. Southern sautéed okra is really about respecting the ingredient rather than piling on complex spice.
The Indian okra stir fry, known as bhindi masala, takes a different approach. Use the same high-heat technique but add turmeric, amchoor, which is dried mango powder, and garam masala. The result is a deeply spiced, aromatic dish that works as a main with rice or flatbread. The okra takes on a warm golden tint from the turmeric and the spice blend clings to every charred edge.
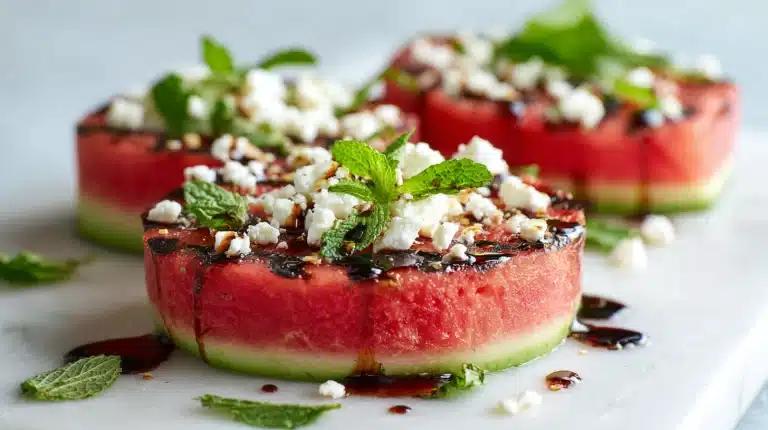
A Mediterranean twist uses smoked paprika, oregano, and a squeeze of lemon. Toss in some crumbled feta at the end and you have a side dish that feels special enough for company. Each variation uses the same core technique, so once you nail the sear, you can riff on it however you like.
Serving Suggestions
Sautéed okra is versatile. Serve it alongside grilled meats, spoon it over rice, or fold it into a grain bowl. It also makes an excellent side for classic garlic pasta recipe, where the okra’s char and spice contrast beautifully with the pasta’s rich, buttery simplicity.
For a heartier meal, serve the okra over a bed of warm lentils or chickpeas. The spices in the okra complement legumes naturally, and the combination is filling without being heavy. A dollop of yogurt on top adds creaminess that tames any residual heat from the spices.
If you are entertaining, serve the okra at room temperature as part of a spread with hummus, olives, and warm pita. The flavors actually deepen as the okra cools. It is one of those rare dishes that tastes just as good the next day.
Storage and Reheating
Store leftover sautéed okra in an airtight container in the refrigerator for up to three days. The texture will soften slightly, but the flavor holds up well. To reheat, skip the microwave. It will make the okra soggy and release the mucilage you worked so hard to avoid.
Instead, warm a skillet over medium heat with a teaspoon of oil and toss the okra for two to three minutes until heated through. The surface will re-crisp and the spices will bloom again in the hot oil. You can also freeze sautéed okra, though the texture will change. Freeze in a single layer on a baking sheet, then transfer to a freezer bag for up to two months. Thaw overnight in the refrigerator and reheat in a skillet. The okra will be softer than fresh but still flavorful, and it works well folded into soups or stews where texture matters less.
Frequently Asked Questions
How do you cook fresh okra so it’s not slimy?
Cook okra over high, dry heat. Sear the pods in a single layer in a hot skillet with minimal oil, and avoid crowding the pan. Acid also helps, so finish with a splash of vinegar or lemon juice. Never cover the pan, since trapped steam activates the mucilage that causes slime.
Do you need to boil okra before frying?
No, boiling okra before frying actually increases slime because it releases the mucilage early. Skip the boil entirely and go straight to a hot, dry skillet. The high heat sears the surface and locks in the pods’ natural texture without giving the mucilage a chance to develop.
What is the best cooking technique for okra?
High-heat sautéing gives you a crisp, tender texture without slime. Use a cast iron skillet, preheat it thoroughly, and cook the okra in a single layer without stirring too often. Grilling and roasting also work well, since both use dry heat that prevents the mucilage from releasing.
Do you have to soak okra before cooking?
Soaking is not necessary for sautéing. Some cooks soak okra in vinegar water to reduce slime, but this adds moisture that can actually work against you in a hot skillet. Instead, focus on drying the pods thoroughly and cooking them over high heat.
Conclusion
This sautéed okra recipe proves my grandmother was right all along. Dry heat, patience, and a hot skillet are all okra needs to shed its slimy reputation and become something you crave. The char, the snap, the bright finish of vinegar, they all come together in 25 minutes with one pan and no fuss.
Save this for a weeknight when you want something green and interesting on the table. It pairs with almost anything and reheats beautifully in a skillet.
For more recipes like this sautéed okra recipe, follow us on Facebook and Pinterest for weeknight side dish ideas.