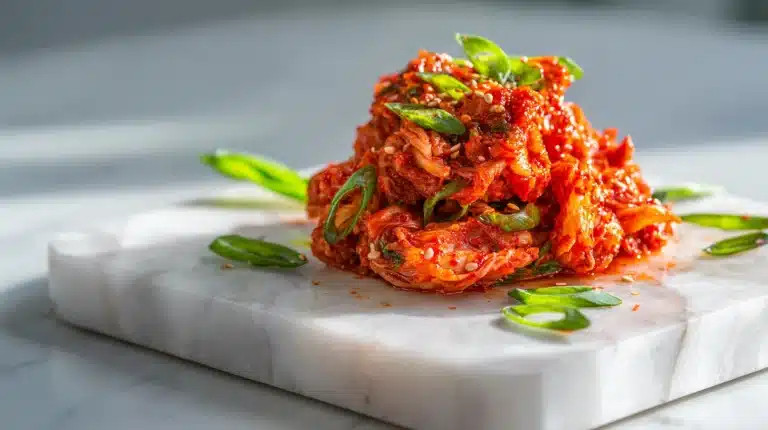
There’s one mistake buried in every bad easy homemade kimchi recipe, and it happens before you add a single ingredient. It’s the pointless step of cooking a flour glue, when a splash of pear juice creates a clingy, no-cook paste that stays moist for days.
Most homemade kimchi turns dry and bland within a day. This mak-kimchi style skips the paste pot entirely. The pear juice and gochugaru slide right into the napa cabbage leaves, keeping everything juicy, tangy, and packed with probiotic zing.
Inside: the pear juice shortcut that replaces cooked paste, how to make a small batch with just one head of napa cabbage, and the way to keep your kimchi moist for days without any extra work.
Table of Contents
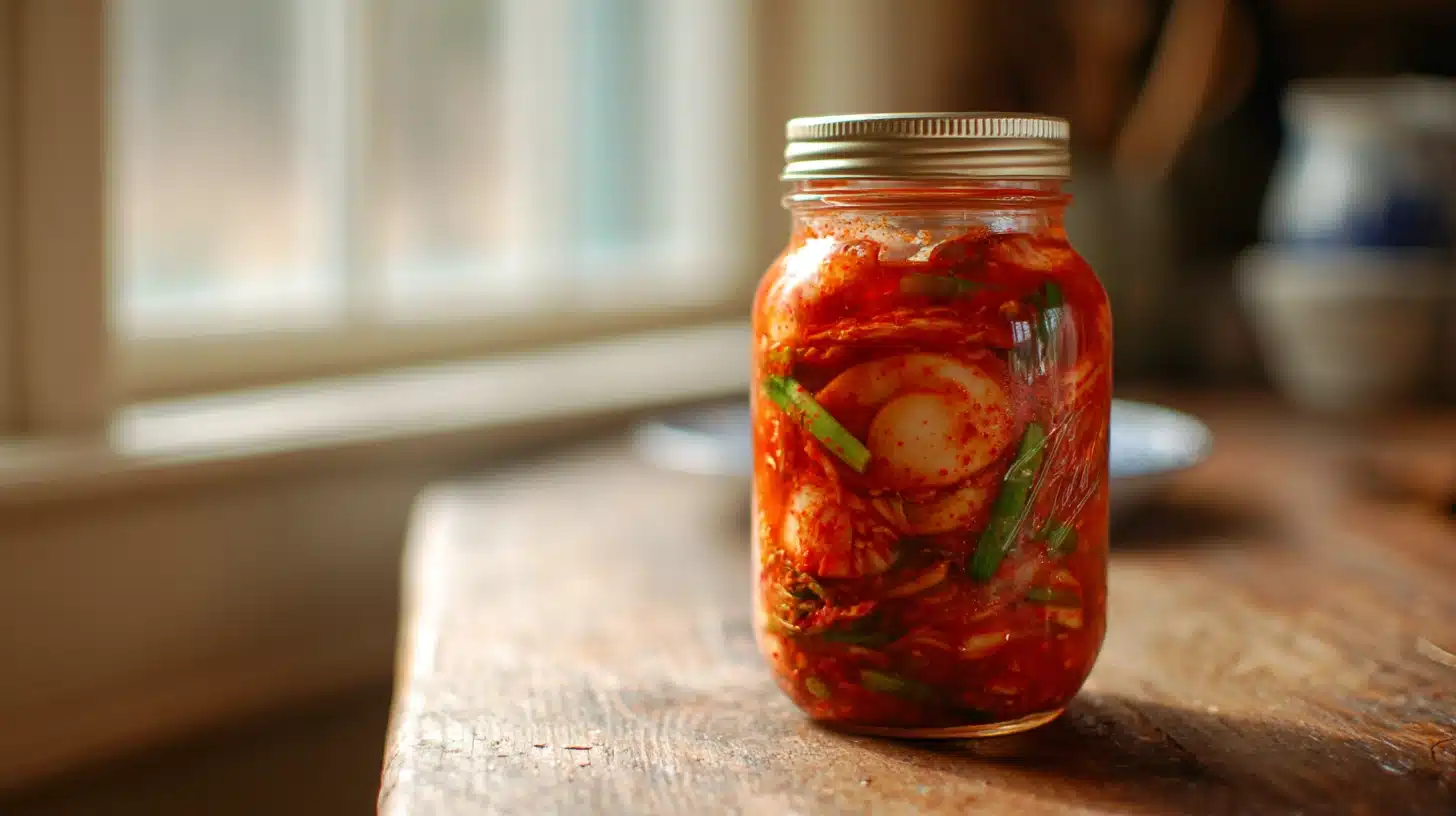
Table of Contents
Why This Easy Homemade Kimchi Recipe Works
The Quick Method That Saves You Hours
My friend Dana once spent an entire Saturday making traditional kimchi. She called me at 4 p.m., exhausted, with cabbage leaves still stubbornly refusing to wilt. The culprit? She’d skipped the most tedious step, cooking a glutinous rice flour porridge to bind the paste.
Here’s what I told her: blend a ripe pear instead. The natural sugars and pectin in pear juice do the same job, no saucepan required. This easy homemade kimchi recipe leans hard on that hack. You get a clingy, glossy paste that coats every shred of napa cabbage without ever turning on the stove.
The texture difference is immediate. Cooked porridge pastes can turn gummy or separate after a day. Pear juice keeps the gochugaru, garlic, and ginger suspended in a smooth slurry that stays moist throughout fermentation. I’ve opened jars two weeks later and found the leaves still slick and fresh, not dry and clumpy.
This isn’t traditional. Korean cuisine purists might raise an eyebrow. But this mak-kimchi style, with its pre-cut cabbage and no-cook paste, is built for real weeknights. You’ll finish prep in under 120 minutes, and most of that is salting time while you do other things.
No Guesswork – Precise Measurements for Small Batches
Most homemade kimchi recipes call for multiple heads of napa cabbage and leave you with gallons of funky, overflowing jars. That’s overwhelming for a beginner. This easy homemade kimchi recipe scales everything to one manageable batch using just a single cabbage, around 3 to 4 pounds.
- One head of pre-cut cabbage means no wrestling whole leaves into a crock
- 1/3 cup gochugaru gives steady medium heat, not scorching fire
- 1/4 cup fish sauce adds deep umami without making the batch taste fishy
- A tablespoon of minced garlic and a thumb of ginger keep the paste punchy
The daikon radish is optional. Skip it if you don’t have any. Add it julienned thin if you want that signature crunch in every bite of banchan. I’ve made it both ways, and the kimchi still ferments beautifully either route.
Here’s the thing about small batches: they ferment faster. Check your jar at day two. Tiny bubbles should be rising through the paste. That’s the probiotic activity kicking in. Taste a piece. It should be tangy and crisp, not fully sour yet. Leave it longer for more funk. This batch fits perfectly in a half-gallon container and lasts 90 days in the fridge, becoming more complex each week.
Print
Easy Homemade Kimchi Recipe (Mak-Kimchi Style) – The Perfect Beginner’s Guide
- Total Time: 50 hours
- Yield: 10 servings 1x
Description
A no-cook mak-kimchi that uses blended pear juice instead of rice porridge for a glossy, clingy paste. Pre-cut napa cabbage and simple ingredients make this a quick, manageable batch. Ferments into tangy, probiotic banchan in just 24–48 hours.
Ingredients
For the kimchi:
1 head napa cabbage (3–4 lbs), cut into 2-inch pieces
⅓ cup coarse sea salt
⅓ cup gochugaru (Korean red chili flakes)
¼ cup fish sauce
1 tablespoon minced garlic
1 tablespoon minced fresh ginger
4–5 green onions, cut into 2-inch segments
½ ripe pear, blended smooth (or ⅓ cup unsweetened pear juice)
Optional:
½ cup julienned daikon radish
1 teaspoon sugar
Instructions
1. Toss the napa cabbage pieces with the coarse sea salt in a large bowl. Let sit at room temperature for 1½ hours, tossing once halfway, until wilted and translucent. Rinse thoroughly under cold water (3-4 changes) and squeeze out excess moisture. Taste; it should be pleasantly salty, not harsh.
2. In a separate bowl, stir together the gochugaru, fish sauce, minced garlic, minced ginger, and blended pear juice until thick and glossy, about the consistency of tomato sauce. Add sugar if using.
3. Add the green onions and optional daikon radish to the drained cabbage. Pour the kimchi paste over the top. Wearing gloves, massage the paste into the leaves until evenly coated. Pack the mixture tightly into a clean glass jar, pressing down firmly to eliminate air pockets and leaving 1 inch of headspace.
4. Seal the jar and let ferment at room temperature for 24 to 48 hours. Tiny bubbles will rise, and the smell will turn tangy. Taste after 24 hours; once it reaches your desired sourness, transfer to the fridge. It keeps for up to 90 days as a probiotic banchan.
Notes
Store in the fridge for up to 90 days after fermentation; the flavor intensifies with time.
Allow 24–48 hours at room temperature for fermentation; taste daily to find your ideal tang.
Do not freeze, the texture will become soft and unappealing upon thawing.
Always use coarse sea salt; iodized salt can impart a bitter taste and over-salt.
Wear gloves when mixing to avoid chili stains and to keep the paste from irritating skin.
- Prep Time: 2 hours
- Rest Time: 48 hours
- Cook Time: 0 min
- Category: Condiment, Side Dishes
- Method: No-bake
- Cuisine: Korean
Nutrition
- Serving Size: 1/2 cup
- Calories: 69 kcal
- Sugar: 5.9 g
- Sodium: 640 mg
- Fat: 0.6 g
- Saturated Fat: 0.1 g
- Unsaturated Fat: 0.5 g
- Trans Fat: 0 g
- Carbohydrates: 12.9 g
- Fiber: 5.4 g
- Protein: 2.9 g
- Cholesterol: 2 mg
Easy Homemade Kimchi Ingredients & Substitutions
Active Time: 2 hours Total Time: 50 hours Yield: 10 servings
Core Ingredients You’ll Need
This easy homemade kimchi recipe leans on a short list of powerful pantry staples. Every ingredient pulls its weight.
- 1 head napa cabbage (3–4 lbs), cut into 2-inch pieces
- ⅓ cup coarse sea salt (for brining; don’t use iodized)
- ⅓ cup gochugaru (Korean red chili flakes)
- ¼ cup fish sauce
- 1 tablespoon minced garlic
- 1 tablespoon minced fresh ginger
- 4–5 green onions, cut into 2-inch segments
- ½ cup julienned daikon radish (optional, for extra crunch)
- ½ ripe pear, blended smooth, or ⅓ cup unsweetened pear juice
- 1 teaspoon sugar (optional; feeds fermentation slightly)
The pear juice replaces the cooked glutinous rice flour porridge completely, giving the paste a clingy, glossy texture without a saucepan. No pear? Stir 2 teaspoons of sugar into ⅓ cup water instead; the paste will just be a little thinner. The coarse sea salt matters because it draws water out of the cabbage slowly and rinses off clean. Fine table salt can over-salt and leave the leaves limp.
Ingredient Swaps for Dietary Preferences
You can twist this mak-kimchi to fit nearly any kitchen without losing its fermented charm. Fish sauce adds deep umami, but a vegan version works if you’re avoiding seafood. Gochugaru is not the same as gochujang (a thick, sweet paste) or generic chili powder, swapping blindly will tank the flavor.
| Original | Substitute | Notes |
|---|---|---|
| Fish sauce | Vegan fish sauce (soy sauce + pinch of kelp powder) | Same ¼ cup amount; slightly lighter umami |
| Gochugaru | Regular chili powder | Use half the amount, it’s hotter and lacks fruity depth |
| Napa cabbage | Regular green cabbage | Crunchier, less sweet; brine 30 minutes longer |
| Pear juice | 2 tsp sugar + ⅓ cup water | No pectin, paste may separate a touch over time |
Skip gochujang entirely, it’s a paste, not a dry flake, and will make the mix muddy instead of coating the leaves. If you do use green cabbage, you’re still making a legit banchan; it just won’t have the same tender, napa-born chew. The probiotic boost stays strong either way.
Step-by-Step Instructions for Easy Homemade Kimchi
Step 1: Salt the Cabbage
Brining is the only hands-off step that locks in crunch and seasoning. The coarse sea salt pulls water from the napa cabbage, setting you up for crisp leaves that won’t turn soggy later.
- Toss the napa cabbage pieces with the coarse sea salt in a large bowl until every leaf is coated.
- Let it sit at room temperature for 1½ hours, tossing once halfway through. The cabbage will wilt, look slightly translucent at the edges, and release a pool of liquid.
- Rinse under cold water until the water runs clear (about 3-4 changes), then squeeze out excess moisture by hand. Taste a piece, it should be pleasantly salty, like well-seasoned broth, not harsh. If it’s too salty, soak in fresh water for 10 minutes, then drain again.
Cook’s Tip: Undersalting means bland kimchi; the cabbage should taste well-seasoned but never briny after rinsing.
Step 2: Make the Kimchi Paste
This easy homemade kimchi recipe skips the cooked porridge. Blended pear juice gives the paste a clingy, glossy body without turning on a stove, pure mak-kimchi logic.
- In a separate bowl, stir together the gochugaru, fish sauce, minced garlic, minced ginger, and the smooth pear juice. Add the sugar if you want a touch of sweetness to feed early fermentation.
- Mix until the paste is thick and glossy, about the consistency of tomato sauce. It should coat the back of a spoon and drip off slowly. No lumps, no separation.
Pro Tip: If a blender isn’t handy, mash a very ripe pear with a fork and whisk it into the liquid ingredients; small fruit flecks won’t hurt.
Step 3: Mix & Ferment
The final toss is where fermentation sparks the probiotic tang that makes this banchan addictive. Work quickly to keep everything cool and oxygen-free.
- Add the green onions and julienned daikon radish (if using) to the drained cabbage. Pour the kimchi paste over the top.
- Wearing gloves, massage the paste into the leaves until every piece glistens red. Pack the mixture tightly into a clean glass jar or airtight container, pressing down firmly to eliminate air pockets. Leave about 1 inch of headspace.
- Seal and let it ferment at room temperature for 24 to 48 hours. Tiny bubbles will rise, and the smell turns tangy and sharp. Taste after 24 hours, it should be tart and slightly fizzy. Once it hits your ideal sourness, move it to the fridge. It will keep as a lively probiotic banchan for 90 days.
Watch Out: Loose packing invites mold. Use a spoon or muddler to compress the cabbage; a little juice should rise above the solids.
Storage, Fermentation Tips & Serving Ideas
How to Store Kimchi for Months
Pack the finished mak-kimchi into a clean glass jar with an airtight lid. Press the cabbage down firmly so its brine rises above the solids, this keeps the top from drying out or browning. Always use a clean utensil to scoop, never your fingers. The flavor deepens slowly in the fridge; it stays tangy and probiotic for 90 days. After two weeks, the leaves remain slick and fresh, not dry. Freezing is a bad idea, the napa cabbage turns mushy when it thaws.
| Storage Method | Duration |
|---|---|
| Counter (wrapped) | Up to 3 days |
| Fridge (submerged) | Up to 90 days |
| Freezer | Not recommended |
Signs Your Kimchi Is Perfectly Fermented
You’ll spot tiny bubbles pushing up through the paste after 24 to 48 hours on the counter. That’s the lactic acid bacteria doing their work. The smell shifts from raw garlic and ginger to a sharp, tangy almost-fizz. Taste a piece, it should be cleanly sour, not bland or soapy. The napa cabbage leaves stay slightly crisp at the edges while softening in the center. If you’re nervous about countertop fermentation, move the jar to the fridge after just one day; it will sour beautifully in about two weeks instead.
Delicious Ways to Enjoy Homemade Kimchi
- Spoon it cold as a side banchan with steamed rice and a fried egg.
- Stir a handful into hot fried rice for a quick fermented kick.
- Simmer older, funkier kimchi with pork belly or tofu for a 15-minute stew.
- Fold chopped kimchi into a savory pancake batter and pan-fry until crisp.
- Tuck it into a grilled cheese or quesadilla for tangy crunch.
Troubleshooting
| Problem | Solution |
|---|---|
| Overly salty kimchi | Rinse the brined cabbage extra thoroughly and taste before mixing paste. |
| Mold or brown spots on top | Press cabbage down so liquid covers it; always use clean utensils. |
| Kimchi not fermenting (no bubbles) | Move jar to a warmer spot, around 70°F kickstarts fermentation. |
| Fear of countertop fermentation | Ferment entirely in the fridge; it takes 1–2 weeks longer but is safe. |
| Bland, flat taste | Stir in extra gochugaru, a splash of fish sauce, and a pinch of sugar to rebalance. |
Your Easy Homemade Kimchi Recipe Questions, Answered
Can I add other vegetables or ingredients to the kimchi?
This recipe welcomes julienned carrots, Korean radish, or even quartered Brussels sprouts. Skip watery veggies like zucchini, they’ll turn mushy. Stir extras in during the paste-mixing step so they coat evenly. The fermentation stays strong, and you’ll get a colorful, crunchy banchan.
Can I omit the fish sauce or use a substitute?
You can swap fish sauce with an equal amount of vegan fish sauce or ¼ cup soy sauce mixed with a pinch of kelp powder. The deep umami shifts slightly lighter, but the gochugaru, garlic, and ginger still drive the tangy backbone. It ferments just as reliably without any seafood.
How long does kimchi last?
This kimchi keeps for 90 days in the fridge when packed tightly under its brine. Scoop with clean utensils every time. The napa cabbage softens and the tang deepens into a complex, probiotic sourness. After three months, it’s still safe but may turn too pungent for some; 90 days is a quality guideline, not a safety cutoff.
Can I eat the kimchi immediately after making it?
Yes, you can eat it as fresh, unfermented geotjeori. It tastes crisp, raw, and lightly spicy, like a punchy salad. The probiotic tang won’t have developed yet, but it’s delicious over hot rice. Let it sit just a few hours for a faint fizz.
I’m kind of afraid to leave my kimchi on the counter. Can I ferment it completely in the fridge?
Absolutely. Stash it in the fridge immediately after packing, and it will ferment at a glacial pace. Expect full sourness in 1 to 2 weeks instead of a day, but the mak-kimchi stays brighter and crunchier this way. There’s zero risk of over-fermenting or off smells.
How do I know when it’s fermented?
Tiny bubbles pushing up through the gochugaru paste are your clearest signal, that’s active fermentation. The aroma shifts from raw garlic to a sharp, pleasant tang. Taste a leaf: it should be sour, not just salty. In this recipe, that point usually arrives between 24 and 48 hours.
Can I use regular chili powder instead of Korean red chili powder?
You can, but use only half the amount. Regular powder lacks gochugaru’s fruity, smoky depth and packs more blunt heat. This kimchi will taste flatter and hotter, not complex. A pinch of smoked paprika can help mimic the missing flavor, but it’s not a perfect match.
Make This Easy Homemade Kimchi Recipe This Weekend
This easy homemade kimchi recipe uses pear juice instead of cooked porridge, so the paste stays clingy and keeps every leaf moist for days. You get a tangy, probiotic banchan with no stovetop fuss.
I keep a jar in the fridge at all times and spoon it cold over hot rice. Give it a shot this weekend, it’s the simplest way to bring Korean cuisine into your kitchen.
Do you like your kimchi young and crisp or deeply sour and funky?
For more recipes like this one, follow us on Facebook and Pinterest for easy fermented foods and Korean-inspired home cooking.
Looking for more ways to use your homemade kimchi? Try our Kimchi Fried Rice and Quick Pickled Radish.