The first time I tried a roasting okra recipe, I was skeptical, because every okra dish I’d ever tasted had that slippery, mucilaginous texture that makes people swear off the vegetable entirely.

If you’ve been burned by slimy okra before, you’re not alone. High heat and dry oven air are the exact fix: they draw out moisture fast, crisping the edges before that notorious slick texture ever has a chance to develop.
This guide covers why spacing and temperature matter with this vegetable, how to season your okra for maximum flavor, and the exact signs that tell you your roasted okra is done.
Table of Contents
Why Roasting Is the Best Way to Cook Okra
Ask any confirmed okra skeptic what put them off the vegetable and the answer is almost always the same word: slime. That gooey coating is a natural compound called mucilage, and it thrives in moist, low-heat cooking environments like boiling, steaming, or slow braising. The moment you introduce okra to wet heat, the mucilage activates and clings to everything around it.
Roasting is a different story entirely. When okra hits a hot, dry oven at 425°F, two things happen almost simultaneously. First, the surface moisture evaporates within the first few minutes, creating a dry exterior. Second, the high radiant heat begins to caramelize the pod’s natural sugars, building a slightly crisp, lightly charred shell that locks in the interior’s grassy, almost nutty flavor.
The Science Behind Crispy Oven-Roasted Okra
Think of it the same way you think about roasting cauliflower. The goal is rapid moisture removal followed by browning, and both require the same conditions: high heat, dry air, and enough space on the pan that the pods never steam one another. If you’ve ever made roasted cauliflower recipes oven style, you already understand this principle instinctively.
Oven-roasted okra also has a nutritional upside. Each pod is low in calories and genuinely high in vitamins C and K, folate, and soluble fiber. Unlike deep frying, which is the other reliable method for crisping okra, roasting requires only a tablespoon or two of olive oil for the entire batch.
The texture you get from this baked okra approach sits somewhere between a roasted green bean and a slightly chewy chip. The ridged exterior turns golden and a little crackly. The interior stays tender and just barely soft, without any trace of gumminess. If you’ve never tasted okra prepared this way, the experience is genuinely surprising.
One more reason roasting wins: speed. You can have a tray of crispy roasted okra on the table in under 45 minutes, including prep. Compare that to fried okra, which involves a breading station, hot oil, and a stack of paper towels, and the oven method starts to look like the clear practical choice for a weeknight.
There is also a flavor development that happens in the oven that you simply cannot replicate with boiling or stewing. The tips of the okra pods turn deep green and slightly brown, the cut faces develop a lightly caramelized sweetness, and the whole tray smells like toasted vegetables and warm olive oil. It’s the kind of smell that pulls people into the kitchen to ask what you’re making.
Print
The Crispy Roasting Okra Recipe That Changed How I Eat Vegetables
- Total Time: 40 min
- Yield: 4 servings 1x
- Diet: Vegan
Description
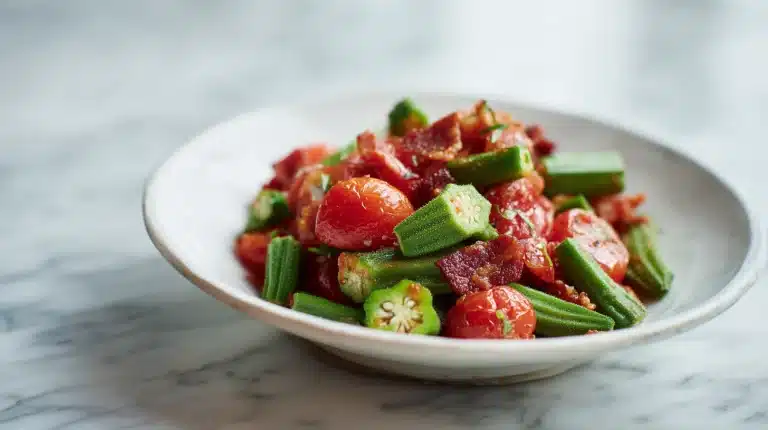
Crispy oven-roasted okra pods seasoned with smoked paprika, garlic, and a squeeze of fresh lemon. High heat removes all traces of sliminess and leaves you with golden, tender pods with slightly charred tips. A simple, healthy side dish ready in 40 minutes.
Ingredients
For the roasted okra:
1 lb fresh okra pods (small to medium, about 3 to 4 inches long)
2 tablespoons extra virgin olive oil
1 teaspoon kosher salt
1/2 teaspoon freshly cracked black pepper
1/2 teaspoon garlic powder
1/2 teaspoon smoked paprika
1/4 teaspoon cayenne pepper (optional)
For serving:
1 lemon, halved
Instructions
1. Preheat your oven to 425 degrees F and let it fully preheat. Line one or two large rimmed baking sheets with parchment paper and set aside.
2. Rinse the okra pods and dry them thoroughly with a clean kitchen towel or paper towels. Trim just above the stem cap on each pod. For faster roasting, halve the pods lengthwise.
3. Place the dried okra in a large bowl and drizzle the olive oil over the top. Toss until every pod is lightly and evenly coated.
4. Add the kosher salt, black pepper, garlic powder, smoked paprika, and cayenne if using. Toss again until the seasoning clings to every ridge of the pods and the oil looks amber-red from the paprika.
5. Spread the seasoned okra in a single layer on the prepared baking sheet, leaving at least a half inch of space between each pod. Do not overcrowd the pan.
6. Roast on the center rack for 20 minutes. The pods should begin to look dry at the surface and show faint color at the tips.
7. Use tongs to flip each pod or give the pan a firm shake. Return to the oven for 8 to 10 more minutes, until the tips are dark green with slight charring and the cut faces are golden brown.
8. Remove the pan from the oven and immediately squeeze half the lemon over the hot okra. You will hear a brief sizzle as the juice hits the pods. Taste and adjust salt if needed.
9. Transfer to a serving plate and serve within 15 minutes for the crispiest texture.
Notes
Store leftovers in an airtight container in the refrigerator for up to 2 days. Reheat on a baking sheet at 400 degrees F for 6 to 8 minutes to restore some crispiness. Do not microwave.
For frozen okra: thaw completely and pat very dry before using. Excess moisture causes steaming rather than roasting.
For a cheesy variation, sprinkle 2 tablespoons of finely grated parmesan over the okra in the last 5 minutes of roasting.
Spacing is the most important factor for crispy results. Use two baking sheets if needed rather than crowding one.
- Prep Time: 10 min
- Cook Time: 30 min
- Category: Side Dishes
- Method: Baking
- Cuisine: American
Nutrition
- Serving Size: 1/4 of recipe (about 4 oz okra)
- Calories: 95 kcal
- Sugar: 2 g
- Sodium: 310 mg
- Fat: 7 g
- Saturated Fat: 1 g
- Unsaturated Fat: 6 g
- Trans Fat: 0 g
- Carbohydrates: 8 g
- Fiber: 3 g
- Protein: 2 g
- Cholesterol: 0 mg
Ingredients for a Simple Roasted Okra Side Dish
The ingredient list for this roasting okra recipe is short on purpose. Okra has enough character on its own, and the goal is to support that flavor rather than bury it.
You will need:
- 1 pound fresh okra pods (small to medium, about 3 to 4 inches long)
- 2 tablespoons extra virgin olive oil
- 1 teaspoon kosher salt
- 1/2 teaspoon freshly cracked black pepper
- 1/2 teaspoon garlic powder
- 1/2 teaspoon smoked paprika
- 1/4 teaspoon cayenne pepper (optional, for heat)
- 1 lemon, halved (for squeezing at the end)
Choosing the Right Okra
Fresh okra is the non-negotiable element here. Look for pods that are firm and bright green, with no soft spots, discoloration, or signs of browning at the tips. Small to medium pods are ideal for a healthy roasted okra result: they roast more evenly and tend to be less fibrous than the oversized pods you sometimes find at the end of the season.
If fresh okra is not available, frozen whole okra can work in a pinch. The key is to thaw it completely, then pat every pod aggressively dry with paper towels before tossing it in oil. Excess water on frozen okra is the enemy of crispiness and it will steam in the oven instead of roasting.
Seasoning swaps worth knowing:
- Replace smoked paprika with za’atar for a Middle Eastern angle
- Swap garlic powder for onion powder if that’s what you have
- Add 2 tablespoons of grated parmesan before roasting for a cheesy, savory crust
- Use avocado oil instead of olive oil for a slightly higher smoke point
The lemon at the end is not optional in my kitchen. A quick squeeze right before serving brightens everything and cuts through the slight bitterness that okra can carry. It takes the dish from good to genuinely craveable.
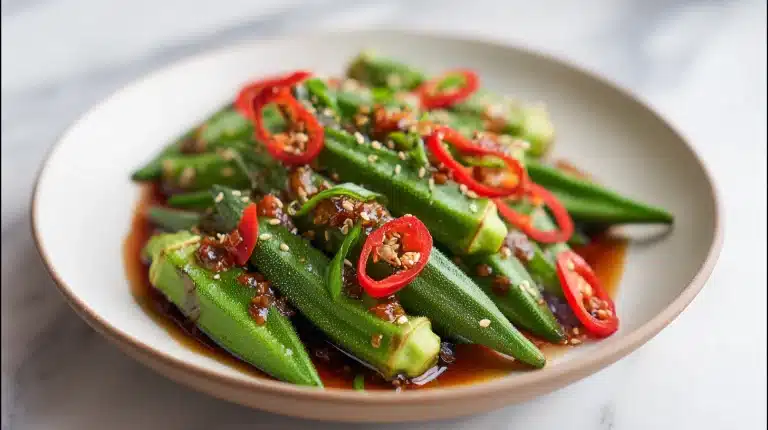
If you enjoy exploring okra beyond roasting, the okra salad recipe with japanese flavors is a wonderful contrast to this warmer, smokier preparation and worth bookmarking for warmer weather meals.
How to Roast Okra Step by Step
Learning how to roast okra properly comes down to four key decisions: oven temperature, pan preparation, pod orientation, and timing. Get these right and you will have crispy results every single time.
Step 1: Preheat and Prep the Pan
Set your oven to 425°F and let it fully preheat before anything goes in. This is not the moment to rush. A properly preheated oven means the okra starts cooking the second it touches the rack, which is exactly what triggers that fast surface drying.
Line a large rimmed baking sheet with parchment paper. If you have two baking sheets, use both. Overcrowding is the single biggest mistake people make with this roasted okra side dish. You want the pods in a single layer with at least a half inch of space between each one. If they’re touching, trapped steam will make them soft and slippery rather than crispy.
Step 2: Trim and Dry the Okra
Rinse the okra and dry it thoroughly with a clean kitchen towel or paper towels. This step matters more than most people realize. Wet okra steams instead of roasts.
Trim the stem end of each pod by cutting just above the cap, leaving the cap itself intact if you prefer the look. Some people like to halve the pods lengthwise for faster roasting and more exposed surface area. Both methods work well, though halved pods tend to crisp a few minutes faster and absorb seasoning more deeply.
Step 3: Season Generously and Evenly
In a large bowl, toss the dried okra with the olive oil first, making sure every pod is lightly coated. Then add all the dry seasonings and toss again until the coating is even. You should see the smoked paprika color the oil a warm amber-red and the garlic powder cling to every ridge of the pod.
Step 4: Roast to Crispy Perfection
Spread the seasoned okra in a single layer on your prepared baking sheet. Slide the pan onto the center rack and roast for 20 minutes. At the 20-minute mark, use tongs to flip each pod or give the pan a firm shake to turn them. Return to the oven for another 8 to 10 minutes.
You’re looking for pod tips that are dark green and slightly charred at the very ends, cut faces that show golden browning, and skin that sounds faintly crackly when you tap the pan. That is your signal that the baked okra is ready.
Step 5: Finish and Serve
Pull the pan from the oven and immediately squeeze half the lemon over the hot okra. The citrus will sizzle against the hot pods and release a burst of fragrant steam. Taste and add a pinch more salt if needed, then transfer to a serving plate and eat right away. Crispy roasted okra is best within 15 minutes of coming out of the oven.
Serving Ideas, Pairings, and Storage Tips
This roasting okra recipe is one of those rare side dishes that works alongside an enormous range of main courses. The smoky, slightly charred flavor pairs naturally with anything that has grilled, bold, or spiced qualities.
What to Serve With Roasted Okra
- Grilled chicken thighs with a squeeze of lemon
- Fish tacos or shrimp dishes (the okra’s slight earthiness pairs beautifully with seafood)
- A bowl of red beans and rice for a Southern-inspired dinner
- Alongside an old bay shrimp boil recipe for a summer spread with serious flavor
- Tucked into warm flatbread with tzatziki and roasted tomatoes
The crispy pods also work surprisingly well as a snack or appetizer. Serve them with a yogurt dipping sauce seasoned with garlic and fresh dill, or alongside a tangy condiment. Their texture is satisfying in a way that makes it easy to eat them by the handful straight off the pan.
Dipping Sauce Ideas
| Sauce | Key Flavors | Best For |
|---|---|---|
| Garlic aioli | Rich, garlicky | Party apps |
| Harissa yogurt | Spicy, creamy | Weeknight dinners |
| Honey mustard | Sweet, tangy | Kid-friendly option |
| Tahini lemon | Nutty, bright | Mediterranean spread |
Storing Leftovers
Roasted okra is best eaten fresh, and I’ll be honest about that. The crispy texture begins to soften as soon as the pods cool down, and refrigerated leftovers will not recapture that crunch even after reheating.
That said, if you have leftovers, store them in an airtight container in the refrigerator for up to two days. To reheat, spread the pods on a baking sheet and return them to a 400°F oven for 6 to 8 minutes. This restores some of the original texture, though they won’t be quite as snappy as they were fresh. An air fryer also works well for reheating: 380°F for about 4 minutes does a reasonable job of bringing back some crispiness.
Avoid microwaving roasted okra if you care at all about texture. The microwave creates steam inside the pods and produces a result that is unfortunately close to the boiled, gummy okra that put people off the vegetable in the first place.
One more tip: if you’re making this for a gathering, roast the okra in two batches rather than cramming everything onto one overcrowded pan. Stagger the batches so the second tray comes out of the oven as guests begin eating the first one.
Frequently Asked Questions
Does roasting okra remove the sliminess?
Yes, and this is exactly why the roasting okra recipe method is so popular. High oven heat rapidly evaporates the moisture that activates okra’s natural mucilage. As long as you dry the pods thoroughly before roasting and give them enough space on the pan to avoid steaming each other, you will get crispy results with no gummy texture at all.
Can I use frozen okra for this recipe?
You can use frozen whole okra, but preparation matters a great deal. Thaw the pods completely and then pat them very dry with paper towels before seasoning. Excess moisture from frozen okra will cause the pods to steam rather than roast, which brings the sliminess back. Fresh okra gives you the best crispy texture, but properly dried frozen okra is a workable substitute.
What temperature is best for roasting okra?
425°F is the sweet spot for this baked okra recipe. Lower temperatures like 375°F tend to cook the okra slowly enough that moisture lingers and the pods soften before browning. Higher temperatures like 450°F can char the exterior before the interior is fully cooked. At 425°F you get reliable browning, good crispiness, and a fully tender interior in about 28 to 30 minutes total.
How do I keep roasted okra crispy after cooking?
Serve it immediately. Roasted okra is at its crispiest within 10 to 15 minutes of coming out of the oven, and the texture softens as the pods cool and any residual moisture redistributes. If you need to hold it briefly before serving, keep the baking sheet in a warm oven at around 200°F with the door slightly ajar. Do not cover the pan or stack the pods, as trapping steam is what makes them lose their crunch.
Conclusion
The crispy, golden results from this roasting okra recipe have made me a year-round okra convert, and I genuinely believe this method can do the same for anyone who has written off the vegetable because of a bad experience with sliminess. High heat, dry pods, and an uncrowded pan are all it takes to get from skeptic to enthusiast.
Give this recipe a try this week, especially if you have fresh okra at the market right now. It comes together in 40 minutes and pairs with nearly anything you’re already planning to cook.
For more recipes like this roasting okra recipe, follow us on Facebook and Pinterest for healthy vegetable side dish ideas.
More recipes in this series: