My grandmother kept a handwritten peach pie recipe tucked inside her old copy of Joy of Cooking, and the margin note next to the filling read simply: “Don’t be afraid of the juice”.
 31")
Most homemade peach pie recipes fail at the same spot: the filling turns into a watery, gummy puddle that soaks straight through the bottom crust. This recipe fixes that with one technique and the right thickener ratio, so every slice holds its shape and the crust stays crisp all the way through.
Here’s what you’ll get: the exact cornstarch-to-peach ratio that sets the filling without turning it gluey, a cold-butter double crust that bakes up shatteringly flaky, and a cooling trick that makes clean slices actually possible.
Table of Contents
Why This Peach Pie Recipe Works (The Science Behind the Slice)
Baking a great peach pie requires understanding what happens inside the oven. There are specific things you can work with or accidentally fight against, and knowing them separates a beautiful, set slice from a soup bowl with a lid.
The Thickener Question: Cornstarch vs. Flour vs. Tapioca
This recipe uses cornstarch. Flour can give a slightly cloudy, starchy taste when paired with delicate stone fruit. Instant tapioca produces a cleaner set, but the texture can get gummy and gelatinous if you overshoot by even a small amount. Cornstarch hits the sweet spot: it thickens the peach juices into a silky, translucent sauce that coats every slice without tasting like paste.
The magic ratio for a standard 9-inch double crust peach pie is 3.5 tablespoons of cornstarch for roughly 3 pounds of fresh peaches. If your peaches are particularly ripe and juicy (you know the ones, they drip the moment you cut them), use 4 tablespoons. If they’re slightly firmer, 3 tablespoons is plenty.
The Maceration Step You Cannot Skip
After you slice your peaches and toss them with sugar, cornstarch, lemon juice, cinnamon, and nutmeg, let them rest for 20 minutes. During that rest, the sugar draws liquid out of the peaches and the cornstarch begins to coat those released juices. You’ll see a small pool of pale orange syrup forming at the bottom of your bowl. That’s exactly what you want.
Do not skip this step and do not drain that liquid. That syrup is flavor. It carries vanilla, spice, and concentrated peach sweetness, and it becomes the glossy sauce that binds the filling as it bakes. Draining it would leave you with dry, chalky peaches surrounded by nothing.
Why the Bottom Crust Gets Soggy (And How to Stop It)
The soggy bottom problem in most peach pie recipes comes from underbaking or not giving the filling a head start on thickening before it hits the raw dough.
This recipe addresses both. First, the pie bakes at 425°F for the first 20 minutes to set the bottom crust fast, before the juices fully liquefy. Then the temperature drops to 375°F for the remaining 35 minutes so the filling has time to bubble and thicken all the way through. You want to see the filling actively bubbling through the vents in the top crust before you pull the pie from the oven. Lazy, slow bubbles at the edge don’t count: you want thick, steady bubbles pushing up through the center slits. That’s your visual cue that the cornstarch has fully activated.
Print 30")
The Best Homemade Peach Pie (Juicy Filling, Flaky Crust, Zero Soggy Bottom)
- Total Time: 385 min
- Yield: 8 servings 1x
- Diet: Vegetarian
Description
A classic homemade peach pie with a buttery, flaky double crust and a juicy, perfectly set cornstarch-thickened filling. Fresh peaches are macerated with sugar and warm spices, then baked between two layers of cold butter pastry for a clean, sliceable result every time.
Ingredients
For the double crust pastry:
2 1/2 cups all-purpose flour
1 tablespoon granulated sugar
1 teaspoon fine salt
1 cup (2 sticks) cold unsalted butter (cut into 1/2-inch cubes, frozen 10 minutes)
6 to 8 tablespoons ice water
For the peach filling:
3 lbs fresh peaches (about 6 to 7 medium, peeled and sliced 1/2 inch thick)
3/4 cup granulated sugar
2 tablespoons light brown sugar (packed)
3 1/2 tablespoons cornstarch
1 tablespoon fresh lemon juice
1 teaspoon pure vanilla extract
3/4 teaspoon ground cinnamon
1/4 teaspoon ground nutmeg
1 pinch fine salt
For the egg wash and finish:
1 large egg
1 tablespoon heavy cream
1 tablespoon coarse sugar (for sprinkling)
Instructions
1. Make the dough: Whisk flour, sugar, and salt together in a large bowl. Add the frozen butter cubes and work them in with a pastry cutter or your fingertips until the mixture resembles rough, shaggy crumbs with a few pea-sized butter pieces still visible. Those larger pieces create your flaky layers, so do not overwork.
2. Add water and rest the dough: Drizzle ice water over the flour mixture one tablespoon at a time, tossing with a fork after each addition. Stop when the dough just barely holds together when pinched. It should look rough, not smooth. Divide into two equal discs, wrap in plastic wrap, and refrigerate for at least 1 hour.
3. Macerate the peaches: Combine the sliced peaches, both sugars, cornstarch, lemon juice, vanilla, cinnamon, nutmeg, and salt in a large bowl. Toss well to coat every slice. Let the mixture rest for 20 minutes. You will see a pale golden syrup form at the bottom of the bowl. Do not drain it.
4. Preheat the oven: Place a rimmed baking sheet on the lowest oven rack and preheat to 425 degrees F.
5. Roll and fit the bottom crust: On a lightly floured surface, roll one pastry disc into a 12-inch circle. Ease it into a 9-inch pie dish without stretching it and let the excess hang over the edge. Pour the macerated peach filling in, mounding it slightly in the center.
6. Add the top crust: Roll the second pastry disc into a 12-inch circle and lay it over the filling. Trim both crusts to leave about a 1-inch overhang. Fold the edges under and crimp firmly to seal. Cut at least 5 vents in the top crust with a sharp knife.
7. Apply the egg wash: Whisk the egg and cream together and brush the mixture evenly over the top crust. Sprinkle generously with coarse sugar for a sparkling finish.
8. Bake at high heat: Place the pie on the hot baking sheet in the oven and bake at 425 degrees F for 20 minutes until the crust begins to turn pale gold. Reduce the oven temperature to 375 degrees F.
9. Finish baking: Continue baking for 35 to 40 more minutes until the crust is deep amber brown and the filling is actively bubbling through the center vents with thick, steady bubbles. If the crimped edges brown too quickly, cover them with foil strips.
10. Cool completely before slicing: Transfer the pie to a wire rack and cool for a minimum of 5 hours at room temperature. The filling needs this full time to set firm enough to slice cleanly. Serve at room temperature or warm individual slices in a 300 degree F oven for 12 minutes.
Notes
Store loosely covered at room temperature for up to 2 days or refrigerate for up to 4 days. To freeze a baked pie, wrap tightly in plastic and then foil and freeze for up to 3 months. Thaw overnight in the refrigerator, then warm in a 325 degree F oven for 20 minutes.
If your peaches are very ripe and juicy, increase the cornstarch to 4 tablespoons. If using frozen peaches, do not thaw them first and add an extra 1/2 tablespoon of cornstarch.
Do not skip the maceration step. The syrup that forms is concentrated flavor and becomes the glossy sauce binding the filling as it bakes.
The five-hour cooling time is not optional if you want clean slices. Cutting the pie warm will give you a runny filling.
- Prep Time: 30 min
- Rest Time: 300 min
- Cook Time: 55 min
- Category: Dessert
- Method: Baking
- Cuisine: American
Nutrition
- Serving Size: 1 slice (1/8 of 9-inch pie)
- Calories: 420 kcal
- Sugar: 32 g
- Sodium: 210 mg
- Fat: 22 g
- Saturated Fat: 14 g
- Unsaturated Fat: 8 g
- Trans Fat: 0 g
- Carbohydrates: 54 g
- Fiber: 3 g
- Protein: 5 g
- Cholesterol: 75 mg
Choosing and Preparing Your Peaches
The single biggest variable in a great easy fresh peach pie is the fruit itself. Peaches that are slightly underripe will bake up firm and tart, which isn’t necessarily bad but requires a sugar adjustment. Overripe peaches collapse into mush and release so much liquid that even cornstarch struggles to keep up. The sweet spot is ripe-but-firm: fragrant, with a little give when you press near the stem, and no green tinges near the base.
Fresh vs. Frozen Peaches
Fresh is preferred here, but frozen peaches are a perfectly legitimate substitute in the off-season. If using frozen, do not thaw them first. Toss the frozen slices with the sugar and cornstarch mixture and let them macerate for 30 minutes instead of 20, as the thawing happens in the bowl and releases more liquid. You’ll likely want to add an extra half tablespoon of cornstarch to compensate.
Canned peaches packed in juice rather than syrup can also work in a pinch. Drain them very well, reduce the sugar by two tablespoons, and skip the maceration step since the fruit is already softened.
How to Peel Peaches Quickly
The blanching method is the fastest way to peel peaches cleanly. Score a small X at the base of each peach with a paring knife, drop them into boiling water for 30 to 45 seconds, then transfer them straight to an ice bath. The skins slip off with almost no resistance. If your peaches are very ripe, even 25 seconds of blanching is enough.
If you’re working with firmer, slightly underripe peaches, a standard Y-peeler works just fine without any blanching at all.
Slicing for Even Baking
Cut your peeled peaches into slices roughly half an inch thick. Thinner than that and they dissolve into a jam-like texture. Thicker than half an inch and you risk undercooked fruit surrounded by overcooked crust. Even slices mean even baking, and even baking means that satisfying, tender-but-intact bite in every forkful.
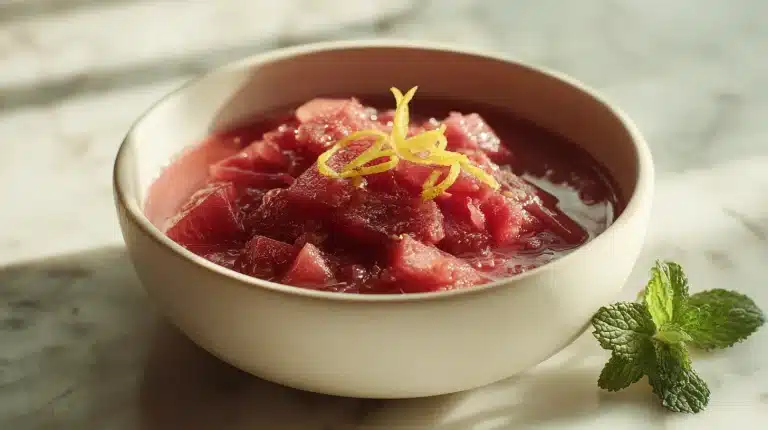
If you love other fruit pies and want something to make while peaches aren’t in season, this strawberry rhubarb pie filling uses the same cornstarch technique with a different fruit combination that’s equally stunning in summer.
Building the Double Crust Peach Pie
The crust is where many home bakers feel the most anxiety, and honestly, it’s the most forgiving part of the whole recipe once you understand what you’re actually trying to do. The goal is layers of fat suspended in flour that create steam pockets as they bake, puffing the dough into hundreds of thin, crispy sheets. To get there, your fat needs to stay cold and your hands need to work quickly.
The Cold Butter Method
This recipe uses all butter rather than the classic half-butter, half-shortening split. Shortening produces a more tender, stable crust that’s easier to handle, but butter produces better flavor and better flake. The trade-off is that butter-only doughs are a little more temperamental: they need colder hands, colder tools, and colder resting time.
Here’s the process. Cut your cold butter into half-inch cubes and freeze them for 10 minutes before you start. Combine your flour, salt, and sugar in a large bowl. Add the frozen butter and work it in with your fingertips or a pastry cutter until the mixture looks like rough, shaggy crumbs with a few pea-sized butter pieces still visible. Those larger pieces are not a mistake, they’re the source of your flake.
Add ice-cold water one tablespoon at a time, tossing the dough with a fork rather than kneading it. Stop when the dough just barely holds together when you pinch a bit between your fingers. It should look shaggy and rough, not smooth. Overworked dough develops too much gluten and bakes up tough.
Divide the dough into two discs, wrap them in plastic, and refrigerate for at least an hour. This rest relaxes the gluten and firms the butter back up.
Rolling, Fitting, and Venting
Roll your bottom crust disc out on a lightly floured surface to about 12 inches in diameter, a couple of inches larger than your 9-inch pie dish. Ease it into the dish without stretching it, since stretched dough shrinks in the oven and pulls away from the sides. Let the excess hang over the edge.
Add your macerated peach filling, mounding it slightly in the center since it will settle during baking.
Roll out your top crust the same way. Lay it over the filling, trim the overhang to about an inch, and fold the top and bottom edges under together, pressing to seal. Crimp decoratively or press with a fork for a simpler finish.
Cut at least 5 vents in the top crust with a sharp knife or small cookie cutter. These aren’t just decorative: they let steam escape, which keeps the top crust from puffing up and separating from the filling.
Brush the top crust with an egg wash (one egg beaten with a tablespoon of cream) and sprinkle with coarse sugar for a golden, sparkling finish.
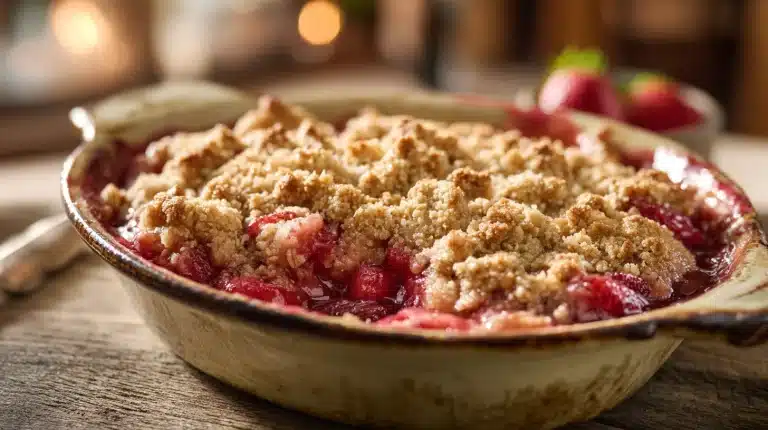
For a different style of fruit pie that uses a crumble instead of a second pastry layer, the strawberry rhubarb pie with crumble top is a great point of comparison.
Baking, Cooling, and Serving Your Peach Pie
This is the section most recipes gloss over, but it contains two of the most important decisions you’ll make: when to pull the pie from the oven, and when to cut it.
The Baking Timeline
Place your pie on a rimmed baking sheet before it goes into the oven. Peach filling bubbles and occasionally drips, and cleaning caramelized peach syrup off your oven floor is nobody’s idea of a good time.
Start the oven at 425°F and bake for 20 minutes. You’ll notice the top crust turning pale gold and the edges of the filling starting to puff slightly around the crimped edge. At 20 minutes, reduce the heat to 375°F and continue baking for 35 to 40 minutes more. The top crust should deepen to a rich amber brown and the filling should be actively bubbling through the center vents, not just at the edges. If the crust edges are browning too fast, cover them loosely with strips of foil or a pie shield.
Total baking time lands around 55 to 60 minutes. Every oven runs a little differently, so trust the visual and bubble cues over the clock.
The Cooling Rule (This Is Not Optional)
Here is where most homemade peach pie recipes let you down by not being direct enough: you must cool this pie for a minimum of 5 hours before slicing it. Yes, five hours.
Cornstarch needs to cool and set fully to hold the filling together as a sliceable, clean wedge. Pull it at two hours and you’ll have warm peach soup in a crust bowl. Pull it at five hours and you’ll have a firm, glossy, gorgeous filling that holds its shape on the plate and still has a gentle warmth to it if you’ve kept it covered on the counter.
If you want a truly cold, fully firm slice, refrigerate it overnight. Warm individual slices in a 300°F oven for 12 minutes, which refreshes the crust without re-liquifying the filling.
Serving Suggestions
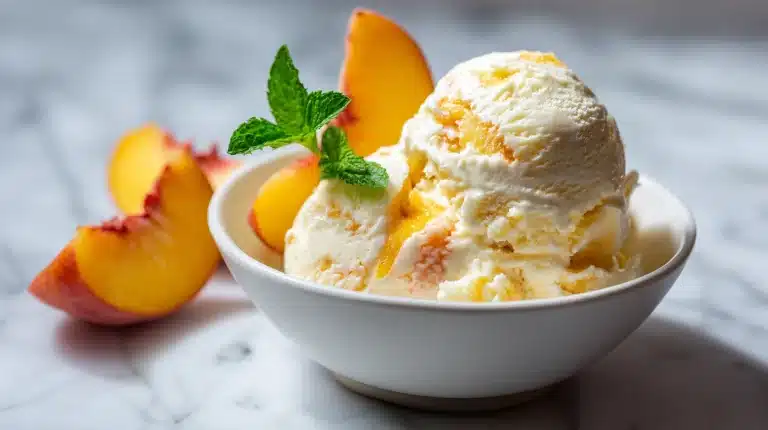
A scoop of good vanilla ice cream is the obvious move, and it’s obvious because it works perfectly. The cold, creamy ice cream against the warm, spiced filling is one of those combinations that’s hard to improve on. Lightly sweetened whipped cream is a quieter alternative that lets the peach flavor stay at the front.
For storage, keep the pie loosely covered at room temperature for up to two days, or refrigerate it for up to four days. The crust softens slightly in the fridge, but a short reheat in the oven brings it mostly back.
Frequently Asked Questions
Can I use canned peaches to make peach pie?
You can use canned peaches, and the result is quite good when fresh fruit isn’t available. Drain them very well and pat dry with paper towels to remove excess liquid, reduce the sugar in the filling by about two tablespoons since canned peaches are already sweetened, and skip the maceration step. Your filling will be softer and slightly less textured than a fresh-peach version.
Why is my peach pie filling runny even after cooling?
A runny filling usually means one of three things: not enough cornstarch for the juiciness level of your peaches, the filling didn’t reach a full bubble in the oven before you pulled it out, or the pie wasn’t cooled long enough before slicing. Make sure you see thick bubbles through the center vents, not just around the crimped edges, before removing it from the oven, and allow the full five-hour cool.
Can I make peach pie ahead of time?
Absolutely. You can bake the pie a full day in advance, let it cool completely, cover it loosely, and store it at room temperature overnight. The filling will be fully set and the flavors actually deepen after resting. If you want to prep further ahead, the unbaked pie (assembled, wrapped tightly) freezes well for up to two months. Bake it directly from frozen, adding about 15 extra minutes to the bake time.
Can I freeze peach pie after baking?
Yes. Let the baked pie cool completely, wrap it tightly in plastic wrap and then foil, and freeze for up to three months. Thaw overnight in the refrigerator, then warm in a 325°F oven for about 20 minutes to refresh the crust. The texture of the filling may be slightly softer after freezing and thawing, but the flavor holds up very well.
Conclusion
There is a reason peach pie has stayed on American summer tables for generations: ripe, fragrant peaches baked into a buttery, golden crust with just enough spice is one of those combinations that needs almost nothing else to be extraordinary.
Give this recipe a try this weekend while stone fruit is at its peak. The cold butter crust and the maceration technique make all the difference, and that five-hour wait before you cut in is absolutely worth the patience.
For more recipes like peach pie, follow us on Facebook and Pinterest for seasonal baking recipes and cozy homemade pie inspiration.