The first time I tried a protein mug cake, I spent three minutes watching it rise beautifully in the microwave, only to bite into a dense, rubbery puck that tasted like chalk and regret. Most single-serve protein bakes fail because straight protein powder lacks the starch structure needed to create a tender, real-cake crumb. This recipe fixes that by blending just enough oat flour and a single egg yolk into the base. The result is a fluffy, moist cake that actually tastes like a bakery dessert.
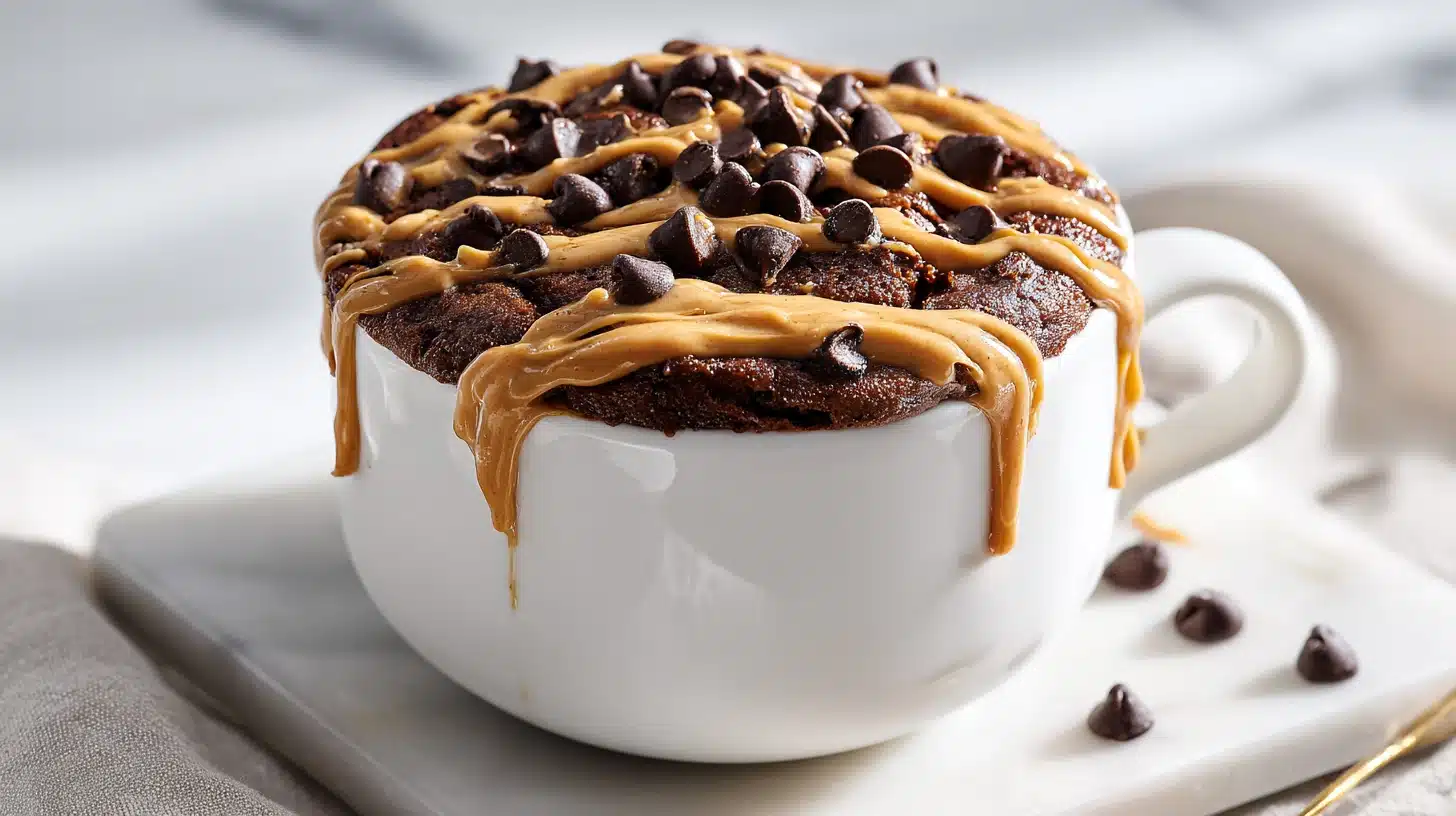
Inside: the exact oat flour to protein powder ratio for a tender crumb, why greasing your mug changes everything, and the microwave trick that prevents dry edges.
Table of Contents
Why Your Protein Powder Changes Everything
Here is what took me forever to figure out: your protein powder matters more than anything else in this recipe. Not all powders behave the same way under high heat. Treat them like they do and you will get a tough, spongy mess.
Whey protein isolate, for example, absorbs a massive amount of liquid and tightens up rapidly when heated. If you use pure whey without adding a softening starch, your protein mug cake will end up with a gummy texture that no amount of frosting can hide.
Plant-based and vegan blends, often made from pea protein, behave differently. They tend to bake up slightly drier and more crumbly, meaning they require a bit more moisture in the form of milk or extra oil to stay tender. Collagen peptides, another popular option, barely thicken at all when heated, so you will definitely need to rely on flour or a binding agent to give the cake structure.
To get that classic, tender bakery crumb, you need to cut the protein powder with a grain flour. Oat flour is my go-to because it is naturally soft and absorbs moisture beautifully without making the batter heavy. Coconut flour is another option, but it acts like a sponge and requires significantly more liquid to avoid drying out your protein mug cake. If you want to keep things gluten-free, just make sure your oat flour is certified.
For a classic chocolate base, unsweetened cocoa powder does double duty. It adds deep, rich flavor and masks any lingering stevia or artificial aftertaste that can sometimes come from sweetened protein powders. If you are looking for a more traditional baked good that skips the microwave entirely, our gluten free chocolate cake offers a fantastic oven-baked alternative for a full-size dessert. But for those moments when you need a single serve protein dessert and you need it immediately, balancing your powder with oat flour and a little cocoa is what makes it work.
- Using 100 percent whey protein without any flour, which creates a tough, rubbery puck. Cut your powder with at least two tablespoons of oat flour to build a tender crumb.
- Overcooking the batter by even ten seconds, which turns the edges dry and chalky. Check the cake at 60 seconds and add time in five-second bursts only if the center is still wet.
- Forgetting to grease the mug, causing the cake to stick to the sides and tear when you try to scoop it out. Coat the inside of the mug with a thin layer of coconut oil or non-stick spray.
- Using a narrow, tall mug, which leads to an uneven cook with a raw center and overcooked edges. Use a wide, 12-ounce mug so the batter sits in a shallow layer for even heat distribution.
- Mixing the batter directly in the mug without scraping the bottom, leaving dry pockets of flour and powder. Whisk the batter in a small bowl first, then pour it into your greased mug.

The Protein Mug Cake That Actually Tastes Like Dessert
- Total Time: 4 min
- Yield: 1 serving 1x
Description
This single serve chocolate protein mug cake uses a blend of protein powder and oat flour to create a tender, fluffy crumb in under two minutes. It is the perfect quick dessert for satisfying sweet cravings while hitting your protein goals.
Ingredients
For the dry ingredients:
1 scoop (about 30g) vanilla or chocolate protein powder
2 tablespoons oat flour
1 tablespoon unsweetened cocoa powder
1/4 teaspoon baking powder
1 pinch salt
For the wet ingredients:
1 large egg yolk (or 1 whole egg for a firmer texture)
2 tablespoons almond milk
1 tablespoon maple syrup
1/2 teaspoon vanilla extract
1 teaspoon melted coconut oil
For the mix-ins:
1 tablespoon dark chocolate chips
1 teaspoon peanut butter for swirling
Instructions
1. Grease a large 12-ounce microwave-safe mug with coconut oil or non-stick spray and set it aside.
2. In a small mixing bowl, whisk together the protein powder, oat flour, cocoa powder, baking powder, and salt until there are no visible lumps.
3. Add the egg yolk, almond milk, maple syrup, vanilla extract, and melted coconut oil to the dry ingredients and stir until you have a smooth, thick batter.
4. Fold in the dark chocolate chips, then transfer the batter into your prepared mug.
5. Drop the teaspoon of peanut butter on top of the batter and swirl it in with a toothpick.
6. Microwave on high power for 60 seconds. Check the center, and if it still looks wet, microwave in 5-second bursts until just set.
7. Let the cake rest in the mug for 1 minute to finish cooking with carryover heat before eating.
Notes
Store any leftover cake in an airtight container in the refrigerator for up to 2 days. Reheat in the microwave for 10 seconds to soften before eating.
For a vegan version, replace the egg yolk with 1 tablespoon of ground flaxseed mixed with 3 tablespoons of warm water, and use a plant-based protein powder.
If your protein powder is already heavily sweetened, reduce the maple syrup to half a tablespoon to prevent the cake from becoming too sweet.
Use a wide mug rather than a tall, narrow one to ensure the cake cooks evenly without leaving a raw center.
- Prep Time: 3 min
- Cook Time: 1 min
- Category: Dessert
- Method: Microwave
- Cuisine: American
Nutrition
- Serving Size: 1 mug cake
- Calories: 285 kcal
- Sugar: 12 g
- Sodium: 210 mg
- Fat: 14 g
- Saturated Fat: 6 g
- Unsaturated Fat: 7 g
- Trans Fat: 0 g
- Carbohydrates: 22 g
- Fiber: 4 g
- Protein: 24 g
- Cholesterol: 110 mg
The Secret to a Fluffy Microwave Crumb
Microwaves cook by agitating water molecules, which means the moisture in your batter turns to steam and rapidly inflates the cake. This is why a high protein mug cake rises dramatically in seconds, but it is also why the margin for error is so incredibly small. The steam provides the lift, and the structure from your egg and oat flour has to set at the exact moment the cake reaches its peak height. If you overcook it, the steam evaporates too quickly, the proteins seize, and the cake collapses into a dense disc.
To get a consistently fluffy texture, you need to respect the carryover cooking time. Your microwave might say 90 seconds, but the cake continues to cook from residual heat for another minute after you take it out. Pulling the mug out when the center still looks slightly glossy and underdone is the most important trick you will learn here. It will finish setting as it sits on your counter, and you will be left with a perfectly moist interior.
The egg is the other critical factor for a fluffy crumb. A whole egg provides structure, but the white can sometimes make the texture a little too springy when combined with protein powder in the microwave. If you find your healthy mug cake with protein powder is coming out too chewy, try using just the yolk. The fat in the yolk tenderizes the crumb and keeps it soft, similar to how a traditional sponge cake works. If you are looking for other ways to use up those extra egg whites, our greek yogurt protein egg bites are a fantastic make-ahead option for busy mornings.
Finally, consider your liquid choice. Almond milk keeps the calorie count low, but dairy milk adds a little more protein and a richer color. A dash of vanilla extract rounds out the flavors and makes the cake taste sweeter without adding extra sugar.
Building the Perfect Flavor Profile
A plain protein mug cake is a blank canvas, but the flavor combinations are what make this a dessert you will actually crave. The classic chocolate chip version is a crowd pleaser, but playing with different extracts, sweeteners, and mix-ins keeps things interesting. The goal is to add layers of flavor without introducing excess moisture that could throw off the delicate liquid-to-dry ratio.
For a classic vanilla bean base, use vanilla protein powder and add a quarter teaspoon of butter extract. It gives the cake a rich, bakery-style aroma that makes it taste like a fresh sugar cookie. If you want to pack in even more protein and a creamy texture, blend a tablespoon of cottage cheese into your batter. It sounds weird, I know, but it works. The cottage cheese melts into the crumb as it cooks, and the result is an incredibly soft texture. Our cottage cheese protein pancakes use a similar trick for fluffy breakfast stacks.
If chocolate is more your style, add a tablespoon of dark chocolate chips to the batter. You get little pockets of melted chocolate throughout the cake. The heat softens the chips just enough so they burst when you take a bite. For a fruit-forward variation, toss in a few fresh raspberries or a small dollop of sugar-free jam. The tartness cuts through the richness of the cocoa powder beautifully. If you love fruit and protein combined, you might also enjoy our pumpkin cheesecake protein pudding for a creamy, spoonable alternative.
Sweeteners matter just as much as the flavors. Maple syrup and coconut sugar add a deep, caramel-like sweetness that pairs well with vanilla and chocolate. If you prefer a sugar-free approach, monk fruit sweetener or a powdered stevia blend works perfectly. Just remember that liquid sweeteners like maple syrup add a touch more moisture, so you may need to add a pinch more oat flour to keep the batter thick and scoopable.
Upgrades and Customizations
Once you master the base recipe, you can customize this batter to fit your macros, your pantry staples, or your specific dietary needs without sacrificing the texture. The trick is swapping ingredients thoughtfully and keeping the overall moisture level consistent so the cake does not turn out too wet or too dry.
For a peanut butter lover version, swirl a teaspoon of peanut butter into the batter just before microwaving. It sinks slightly during cooking and creates a rich, gooey center that tastes remarkably like a fresh baked peanut butter cookie. You can also top the finished cake with a drizzle of melted peanut butter and a sprinkle of sea salt. If you want a bright, refreshing option, swap the milk for lemon juice and add a handful of fresh blueberries to the batter. The lemon zest makes the kitchen smell incredible while the cake cooks. For a similar bright profile in a different format, our sugar free lemon blueberry pudding cake from scratch no guilt dessert is a must-try.
Making a vegan protein mug cake is straightforward if you know the right swaps. Replace the egg with a tablespoon of ground flaxseed mixed with three tablespoons of warm water, and let it sit for a minute to thicken before adding it to your bowl. Use a plant-based protein powder, like pea or a soy blend, and swap the coconut oil for a dairy-free alternative. Vegan batters sometimes need an extra minute of rest before cooking to allow the oat flour to fully absorb the liquids, which prevents a gritty texture.
Do not underestimate the power of toppings. A dollop of Greek yogurt on top adds a tangy contrast that mimics cream cheese frosting. A few toasted almonds or walnuts bring a much-needed crunch to the soft crumb. If you want something nostalgic, press a square of dark chocolate into the top of the warm cake for an instant, rich ganache. For another quick option, our boiled egg chocolate pudding high protein is a creamy, spoonable chocolate fix.
Timing, Storage, and Serving Suggestions
The beauty of this protein mug cake is its speed. From the moment you walk into the kitchen to the moment you take your first bite, you are looking at about four minutes total. This makes it the ideal late-night treat or a quick post-workout snack when you want something sweet but do not want to turn on the oven or wash a pile of dishes.
While this recipe is designed to be eaten immediately for the best texture, you can prep the dry ingredients in advance. Measure out your oat flour, protein powder, cocoa powder, baking powder, and salt into a small airtight container or a zip-top bag. When the craving hits, just dump the dry mix into your mug, add the wet ingredients, stir, and microwave. This prep method is perfect for taking to the office or packing in a lunchbox, as long as you have access to a microwave. If you enjoy prepping snacks ahead of time, our high protein breakfast gelatin cups are another great grab-and-go option.
If you have leftovers, you can store the cooled cake in an airtight container in the refrigerator for up to two days. The texture will become slightly denser as it sits, but a quick 10-second burst in the microwave will warm it through and bring back some of the original softness. Freezing is not recommended, as the thawing process tends to make the crumb spongy and wet.
Serving this warm really matters. The aroma of the warm vanilla and cocoa, combined with the soft, cake-like texture, makes it hard to believe you made it in a mug. Pair it with a cup of herbal tea or a cold glass of almond milk. For a more indulgent presentation, invert the mug onto a small plate so the cake falls out like a mini souffle, then dust the top with a little cocoa powder. You can find more inspiration for a quick protein dessert on the site whenever you need a fast fix.
Frequently Asked Questions
Why is my protein mug cake rubbery?
A rubbery texture almost always comes from using too much protein powder and not enough flour. Protein isolates tighten up when heated, so cutting the powder with oat flour gives the cake a softer, more traditional crumb. Overcooking the cake in the microwave also causes the proteins to seize up and turn chewy.
Should I grease the mug?
Yes, greasing the mug is an essential step. A thin layer of coconut oil or non-stick spray ensures the cake releases easily from the sides, so it does not tear when you scoop it out. It also helps the batter slide upward as it rises, which helps it bake more evenly.
Can I make this in advance?
You can mix the dry ingredients in advance and store them in an airtight container at room temperature for up to a month. However, once the wet ingredients are added, the cake should be cooked immediately. The baking powder activates as soon as it touches liquid, and waiting too long will result in a flat cake.
Can I bake this in the oven instead of microwaving?
Yes, you can bake the batter in a preheated oven at 350 degrees Fahrenheit. Pour the batter into a small ramekin and bake for about 12 to 15 minutes, or until a toothpick inserted into the center comes out clean. The texture will be slightly drier than the microwave version but still delicious.
Conclusion
Getting the protein mug cake right comes down to understanding the balance between your protein powder and the right binding ingredients. By cutting the powder with a little oat flour and pulling it from the microwave at just the right second, you avoid the rubbery, dry texture that ruins so many quick desserts. This recipe gives you a warm, fluffy cake that satisfies your sweet tooth and your daily macros in under four minutes.
Start with a half batch tonight and see how simple it is to whip up a single serve protein dessert when the evening cravings hit. Keep an eye on the timer, trust the carryover heat, and enjoy a genuinely tender crumb straight from your favorite mug.
For more recipes like protein mug cake, follow us on Facebook and Pinterest for quick high protein dessert ideas.
More recipes in this series: