That first perfect crack into a Classic Vanilla Bean Crème Brûlée can feel intimidating, until you realize the only thing standing between you and that silky, vanilla-speckled custard is a fear of the water bath. Most recipes get this step wrong, leading to scrambled eggs or a rubbery texture instead of that legendary creamy center. I’m here to demystify it. This version delivers on that iconic experience with just 50 minutes of actual hands-on work; the rest is hands-off chilling. Forget guessing, below, you’ll master the bain-marie for perfect custard and learn exactly how to get that flawless, shattering sugar top, whether you own a kitchen torch or just your oven’s broiler.
Table of Contents

Table of Contents
What is Crème Brûlée?
At its heart, Classic Vanilla Bean Crème Brûlée is a study in perfect contrasts. A chilled, velvety custard made from just heavy cream, egg yolks, and sugar sits beneath a layer of caramelized sugar that shatters at the tap of a spoon. Its name literally means “burnt cream” in French, and while its origins are debated between France, England, and Spain, the version we cherish today is a hallmark of French cuisine. Making it at home demystifies the elegance, transforming simple ingredients into a showstopping dessert where you control the quality, like using a real vanilla bean for those fragrant black specks.
Print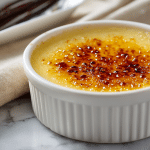
Classic Vanilla Bean Crème Brûlée
- Total Time: 4 hours 50 min
- Yield: 6 servings 1x
Description
Classic Vanilla Bean Crème Brûlée with a perfect crackly top and silky custard. Master the water bath for a foolproof dessert that’s elegant enough for special occasions yet simple enough to make at home. The dramatic caramelized sugar finish is always a crowd-pleaser.
Ingredients
6 large egg yolks (about 105g)
1/2 cup (100g) granulated sugar, divided
2 cups (480ml) heavy cream
1 whole vanilla bean
1/8 teaspoon kosher salt
Instructions
1. Preheat oven to 325°F (163°C). Place 6 (6-oz) ramekins in a 9×13-inch baking dish.
2. Split the vanilla bean lengthwise and scrape out the seeds. In a medium saucepan, combine the heavy cream, vanilla bean seeds, and empty pod. Heat over medium until it just begins to simmer (small bubbles around edges), then remove from heat, cover, and steep for 15 minutes.
3. In a medium bowl, whisk together the egg yolks, all but 4-6 teaspoons of the granulated sugar (reserve this for topping), and salt until pale yellow and slightly thickened, about 2 minutes.
4. Slowly drizzle the warm cream into the egg yolk mixture while whisking constantly to temper the eggs.
5. Pour the custard mixture through a fine-mesh sieve into a large measuring cup or jug to strain out the vanilla bean pod and any cooked bits.
6. Divide the strained custard evenly among the ramekins in the baking dish.
7. Carefully transfer the baking dish to the oven rack. Pour hot water into the dish until it comes halfway up the sides of the ramekins to create a water bath.
8. Bake for 30-35 minutes, until the edges are set but the center still has a slight, gentle jiggle when nudged (like Jell-O). An instant-read thermometer should read 170–175°F (77–79°C).
9. Carefully remove the baking dish from the oven. Let custards cool in the water bath for 20 minutes, then transfer them to a wire rack to cool completely.
10. Cover and refrigerate for at least 4 hours, or overnight.
11. When ready to serve, sprinkle about 2 teaspoons of reserved sugar evenly over each chilled custard. Use a kitchen torch to melt and caramelize the sugar, moving in small circles until deep golden brown. Let sit for 60 seconds to harden before serving.
Notes
For best results, use room temperature egg yolks, they blend more smoothly with the sugar.
If you don’t have a kitchen torch, place sugared ramekins on a baking sheet under a preheated broiler on high for 1-3 minutes, watching closely until sugar bubbles and browns.
Store covered in refrigerator for up to 3 days. Do not freeze; freezing ruins the custard’s silky texture. Serve chilled, do not reheat.
For an ultra-smooth texture, strain your custard base directly into a large liquid measuring cup with a spout before filling ramekins.
The custards are done when they wobble like Jell-O in the center, avoid overbaking as they firm up while chilling.
- Prep Time: 15 min
- Cook Time: 35 min
- Category: Dessert
- Method: Baking
- Cuisine: French
Nutrition
- Serving Size: 1 ramekin (6-oz)
- Calories: 450 kcal
- Sugar: 17 g
- Sodium: 65 mg
- Fat: 36 g
- Saturated Fat: 22 g
- Unsaturated Fat: 12 g
- Trans Fat: 0 g
- Carbohydrates: 18 g
- Fiber: 0 g
- Protein: 5 g
- Cholesterol: 186 mg
The Perfect Dessert for Any Occasion
This dessert’s magic lies in its versatility. It feels special enough for an anniversary dinner yet simple enough for a Tuesday treat. The process is mostly hands-off, requiring just 50 minutes of active work before the oven and fridge take over. The final act, caramelizing the sugar, is a dramatic flourish that always impresses. If you love make-ahead desserts with a vanilla twist, you might also enjoy this low carb vanilla protein jello recipe.
- Make-Ahead Friendly: The custards bake and chill hours before serving.
- Endlessly Customizable: Infuse the cream with citrus zest, lavender, or espresso.
- Surprisingly Simple: With no crust or complex layers, it’s pure, uncomplicated flavor.
Why This Recipe Works
Most custard failures come from two places: scrambling the eggs or baking unevenly. This recipe solves both. We use a water bath (or bain-marie), which surrounds the ramekins with gentle, steaming heat to cook the custard evenly without curdling. Tempering the egg yolks, slowly adding the hot cream, is the other non-negotiable step for silkiness. The first time I skipped the water bath, thinking it was optional, I pulled out six ramekins of grainy, curdled custard. Once I committed to the bain-marie and learned the “jiggle test,” everything clicked: the center should wobble like Jell-O, not ripple like liquid. That’s your cue for a perfectly set, creamy center after chilling.
Ingredients & Equipment
Active Time: 50 minutes Total Time: 4 hours 50 minutes (includes chilling) Yield: 6 servings (one 6-oz ramekin each)
Simple Ingredients for Elegant Results
This Classic Vanilla Bean Crème Brûlée gets its luxurious texture from just five core ingredients. Each one plays a specific role, and using the best you can find makes a noticeable difference.
- 6 large egg yolks (about 105g): These are the backbone of your custard, providing richness and structure. Save the whites for an omelet!
- 1/2 cup (100g) granulated sugar, divided: You’ll use most to sweeten the custard. Reserve 4-6 teaspoons (about 25g total) for caramelizing the tops later.
- 2 cups (480ml) heavy cream: This is non-negotiable for that silky, melt-in-your-mouth feel. Don’t substitute with half-and-half or milk.
- 1 whole vanilla bean: The star. Splitting and scraping the bean seeds infuses the cream with incredible fragrance and those beautiful black specks.
- 1/8 teaspoon kosher salt: A tiny pinch balances the sweetness and heightens the vanilla flavor.
Pro Tip: For the deepest flavor, use room temperature egg yolks. They blend more smoothly with the sugar, preventing graininess.
Essential Tools You’ll Need
You likely have most of these tools already. The right equipment simply makes the process smoother and the results more professional.
- 6 (6-oz) Ramekins: These shallow, wide dishes are the classic vessel. Their shape gives you the ideal custard-to-caramelized-sugar ratio.
- Medium Saucepan: For gently heating the cream and vanilla bean.
- Whisk & Mixing Bowl: For whisking the egg yolks and sugar, then tempering in the hot cream.
- Fine-Mesh Sieve: Straining the custard mix is a secret to a flawlessly smooth texture, catching any cooked egg bits or vanilla bean pod fragments.
- 9×13-inch Baking Dish (or similar): This will act as your water bath (bain-marie). The hot water surrounding the ramekins ensures gentle, even cooking.
- Kitchen Torch (or Broiler): The torch is the easiest way to get an evenly caramelized top. If you don’t have one, your oven’s broiler works in a pinch, just watch it closely!
| Vanilla Bean | 2 teaspoons pure vanilla extract | Add it after heating the cream, right before straining. |
| Kitchen Torch | Oven broiler | Place chilled ramekins on a baking sheet, broil on high 1-3 minutes until sugar bubbles and browns. |
| Fine-Mesh Sieve | A fine strainer or even a clean paper towel-lined colander | The goal is to remove any solids for the smoothest custard. |
Step-by-Step Instructions
Preparing the Vanilla Custard
The secret to a silky Classic Vanilla Bean Crème Brûlée is gentle heat. Rushing this step risks scrambled eggs. Start by placing your ramekins in a 9×13-inch baking dish and preheating your oven to 325°F (163°C). In a medium saucepan, combine the heavy cream and the scraped seeds and pod of your vanilla bean. Heat this over medium until it just begins to simmer; you’ll see small bubbles form around the edges. Immediately remove it from the heat, cover, and let it steep for 15 minutes. This infuses maximum flavor.
While it steeps, whisk the egg yolks, granulated sugar, and salt in a medium bowl until the mixture is pale yellow and slightly thickened, about 2 minutes. Now, the crucial tempering: slowly drizzle the warm cream into the egg mixture while whisking constantly. This gradually raises the eggs’ temperature without cooking them. Pour the combined custard base through a fine-mesh sieve into a large measuring cup or jug to remove the vanilla pod and any cooked bits for an ultra-smooth texture. Divide the liquid evenly among the six ramekins.
Pro Tip: For the cleanest pour and easiest cleanup, strain the custard directly into a large liquid measuring cup with a spout before filling the ramekins.
Baking in a Water Bath
The water bath (or bain-marie) is what guarantees a creamy, not rubbery, custard. Carefully transfer the baking dish with the filled ramekins to your oven rack. Then, pour hot water into the dish until it comes halfway up the sides of the ramekins. Bake for 30-35 minutes.
The custards are done when the edges are set, but the center still has a slight, gentle jiggle, like Jell-O, when you nudge the dish. An instant-read thermometer should register 170–175°F (77–79°C). Avoid overbaking, as they will firm up while chilling. Carefully remove the baking dish from the oven and let the custards cool in the water bath for 20 minutes. Then, transfer them to a wire rack to cool completely before covering and refrigerating for at least 4 hours, or overnight.
When ready to serve, sprinkle about 2 teaspoons of reserved sugar evenly over each chilled custard. Use a kitchen torch to melt and caramelize the sugar, moving the flame in small circles until the sugar is melted and deep golden brown. Let it sit for 60 seconds to harden into that perfect crackly top.
Pro Tip: If you don’t have a torch, place sugared ramekins on a baking sheet under a preheated broiler on high for 1-3 minutes, watching closely until the sugar bubbles and browns.
Serving, Storage & Expert Tips
How to Serve Crème Brûlée
The drama is in the crack! Serve your Vanilla Bean Crème Brûlée chilled, straight from the fridge, right after you caramelize the sugar. That contrast between the warm, brittle top and the cold, creamy custard is everything. Give each guest their own ramekin with a spoon; the fun is in breaking through that glassy surface yourself.
For a restaurant-quality touch, add a few fresh berries on the side or a dollop of barely sweetened whipped cream. A crisp dessert wine or a shot of espresso are perfect pairings. The most important tip? Let the torched sugar sit for a full 60 seconds before serving. This lets it harden properly for that iconic, satisfying shatter.
Make-Ahead & Storage Instructions
This dessert is a make-ahead dream. The baked, cooled custards (without the sugar topping) can be covered tightly with plastic wrap and refrigerated for up to 3 days. Add the sugar and torch them just before serving, never torch ahead of time, or the topping will turn soft and sticky.
| Refrigerator (covered) | Up to 3 days | Add sugar & torch only when ready to serve. |
| Freezer | Not recommended | Freezing ruins the custard’s silky texture. Do not freeze. |
Troubleshooting Common Issues:
- Custard is watery: This means it needed more time in the oven. Next time, bake until the center jiggles like Jell-O, not liquid. Ensure your water bath is filled with hot water.
- Eggs scrambled: You poured the hot cream in too fast. Always temper slowly while whisking constantly, and don’t skip straining the mixture.
- Sugar topping burns: Use your torch in small, constant circles about 4 inches away. Never hold the flame in one spot. If using a broiler, watch it like a hawk.
Frequently Asked Questions About Classic Vanilla Bean Crème Brûlée
What is crème brûlée made of?
A classic version is made from just five ingredients: heavy cream, egg yolks, granulated sugar, a real vanilla bean, and a pinch of salt. The magic happens when this simple custard is baked gently in a water bath and topped with a thin layer of sugar that’s caramelized just before serving.
Can you make vanilla bean crème brûlée in advance?
Absolutely, and it’s highly recommended! The baked, cooled custard in the ramekins (without the sugar top) can be covered and refrigerated for up to 3 days. Always add the sugar and caramelize it with a torch or broiler right before you serve for that perfect crackly texture.
Can I Make Crème Brûlée Without a Kitchen Torch?
A kitchen torch gives you the most control for even caramelizing. If you don’t have one, your oven’s broiler works. Place sugared, chilled ramekins on a baking sheet and broil on high for 1-3 minutes, watching constantly until the sugar bubbles and turns deep golden brown.
Is crème brûlée gluten-free?
Yes, a Classic Vanilla Bean Crème Brûlée is naturally gluten-free. The ingredients, heavy cream, egg yolks, sugar, and vanilla, contain no gluten. Always check your labels if you have celiac disease, but this recipe’s foundation is safe and perfect for those avoiding gluten.
So remember, the magic is in the water bath for that perfect custard and a hot torch for that signature crack, all with just 50 minutes of hands-on effort. I always let my custards chill overnight; the flavor gets even richer.
Trust the process and make this your weekend baking project; you’ll be amazed at how simple elegance can be. Have you tried any flavor variations, lavender, espresso, or citrus zest in your crème brûlée? Drop your favorite in the comments!
For more recipes like Classic Vanilla Bean Crème Brûlée, follow us on Facebook and Pinterest for festive brunch ideas and easy homemade baking inspiration you’ll love to save.