Making ice cream at home is fun until it freezes rock solid or turns icy. That’s where this gelatin ice cream recipe steps in. By adding a small amount of unflavored gelatin, you get a creamy, scoopable texture that holds up beautifully in the freezer. No synthetic stabilizers needed, just one easy, natural trick that transforms your homemade ice cream into something smooth, rich, and truly satisfying. Whether you’re into fruity swirls, classic vanilla, or high-protein spins, this recipe delivers results every time. Let’s break down exactly how to use gelatin for the silkiest ice cream you’ve ever made.
Table of Contents

Table of Contents
How I Discovered the Magic of Gelatin Ice Cream
A few summers ago, I found myself wrestling with a homemade vanilla ice cream that looked promising but froze into something closer to a block of flavored ice. I’d followed the steps exactly, using cream, eggs, and sugar, but the texture was off. That’s when I learned the secret from a friend who worked in a bakery: add gelatin.
Skeptical but curious, I tried a batch using the same base and stirred in a small amount of bloomed gelatin. The difference was wild. The mixture froze softer, smoother, and without a trace of freezer burn. It had the same scoopable quality you’d expect from premium brands without the additives. That was the moment my go-to gelatin ice cream recipe was born.
Today, I use it as a base for endless flavor spins. Whether it’s a tropical twist inspired by this mango sago dessert or layered into something playful like a pop tart ice cream sandwich, this recipe never fails. If you’ve ever struggled with homemade ice cream being too icy or melting too fast, this trick is going to change the game.
Print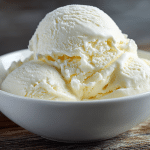
gelatin ice cream recipe
- Total Time: 6 hours
- Yield: 6 servings 1x
- Diet: Vegetarian
Description
A smooth and scoopable gelatin ice cream recipe using natural stabilizers for perfect texture every time.
Ingredients
2 cups heavy cream
1 cup whole milk
1/2 cup granulated sugar
1.5 tsp unflavored powdered gelatin
1 tbsp cold water
1 tsp vanilla extract
Instructions
1. Bloom gelatin in 1 tbsp cold water for 5 minutes.
2. Warm milk, cream, and sugar in a saucepan over medium heat until hot but not boiling.
3. Stir in bloomed gelatin until fully dissolved.
4. Remove from heat and stir in vanilla.
5. Chill mixture in fridge for 3-4 hours.
6. Churn in an ice cream maker according to manufacturer’s instructions.
7. Freeze for 4+ hours or until firm.
Notes
Do not skip the chilling step before churning.
Best enjoyed within 1–2 weeks.
- Prep Time: 10 minutes
- Cook Time: 10 minutes
- Category: Dessert
- Method: No Bake
- Cuisine: American
Nutrition
- Serving Size: 1/2 cup
- Calories: 220
- Sugar: 18g
- Sodium: 45mg
- Fat: 15g
- Saturated Fat: 9g
- Unsaturated Fat: 6g
- Trans Fat: 0g
- Carbohydrates: 20g
- Fiber: 0g
- Protein: 4g
- Cholesterol: 60mg
Why Gelatin Is a Game-Changer for Homemade Ice Cream
Gelatin is a natural stabilizer that works wonders in frozen desserts. It helps hold water and fat molecules together as the ice cream base freezes, resulting in a consistently smooth, creamy finish. This means no more grainy textures or ice crystals ruining your perfect scoop.
You may have seen it used in other desserts, such as low-carb protein Jell-O or even wellness-focused treats like this gelatin before-bed recipe, but its effect on ice cream is seriously underrated. With just a teaspoon or two, your homemade ice cream can stay velvety from freezer to bowl.
Make the Perfect Gelatin Ice Cream Recipe Step-by-Step
How to Make Ice Cream from Gelatin: The Smart Way
Making your own gelatin ice cream recipe doesn’t require fancy equipment, just a saucepan, a bowl, and a little patience. Begin by blooming unflavored powdered gelatin in a bit of cold milk or water. This step allows it to hydrate and activate before being added to the base.
Next, heat your ice cream base, whether it’s custard-style with eggs or a simpler cream-and-sugar mix. Once warm (but not boiling), stir in the bloomed gelatin until fully dissolved. Chill this base completely in the fridge for a few hours. Then churn in your ice cream maker as usual or use a no-churn method by whipping and freezing the mix. Either way, this process gives you the smoothest gelatin ice cream recipe texture you’ve ever tasted.
I’ve even used this technique in fruit-forward recipes like this homemade strawberry gelatin gummy and blended it with creamy elements for contrast, as seen in desserts like sweet potato crème brûlée.

How Much Gelatin to Add to Ice Cream?
A general rule of thumb is 1 teaspoon of powdered gelatin per 2 to 2.5 cups of liquid base. For example, if you’re working with a standard batch of 2 cups of cream and 1 cup milk, about 1.5 teaspoons will do. Adding more won’t necessarily make the ice cream better; it can lead to a rubbery texture, so stick with a moderate amount.
To avoid lumps, always bloom the gelatin first. Never add the powder directly to hot liquid. This tip might seem minor, but it’s essential for any gelatin ice cream recipe. If you’re experimenting with other protein-based textures (like those in bariatric-friendly gelatin desserts), you’ll notice how precise gelatin measurements can impact both structure and flavour.
Want to play around with different sweeteners or dairy alternatives? You can still use gelatin; it works beautifully with almond milk, coconut cream, or even oat milk, though you may need to tweak the ratios for ideal consistency.
How to Stabilize Your Gelatin Ice Cream Recipe Like a Pro
Using Gelatin to Stabilize Ice Cream Properly
Stabilizing your gelatin ice cream recipe is the secret to getting that rich, creamy scoop without artificial thickeners. Gelatin creates a flexible protein network that gently binds water and fat, preventing ice crystals and melt-off. The key is temperature control. Add gelatin when your custard base is warm but not boiling, ideally around 140°F. Any hotter, and gelatin’s structure can break down, losing its stabilizing properties.
Once incorporated, refrigerate the base until it’s completely chilled. This resting time not only sets the gelatin but also enhances the flavor. When you churn, you’ll notice how smoothly the mixture moves almost glossy. After freezing, you’ll get a beautifully scoopable texture that stays soft even days later.
If you’ve ever tried a recipe like this gelatin trick dessert or read up on weight-loss gelatin hacks, you’ve already seen how versatile gelatin can be. Here, it truly shines as a natural stabilizer for frozen desserts.
Freezing & Serving Tips for Homemade Gelatin Ice Cream
Once your gelatin ice cream recipe is churned and frozen, timing matters. Let it sit at room temp for 5–10 minutes before serving. This allows the gelatin to soften gently, giving you that luxurious, melt-in-your-mouth spoonful.
For long-term storage, keep the container tightly sealed. Gelatin slows down freezer burn, but it’s still best enjoyed within 1–2 weeks. Unlike other homemade ice creams that become rock-hard, your gelatin ice cream recipe remains creamy and inviting even after days in the freezer.
Serving this alongside light treats like strawberry matcha sago or topping it with fruit from your garden makes it a dessert worth repeating. It’s that balance between indulgence and real-food ingredients that keeps this recipe in my rotation all summer long.
Troubleshooting & Customizing Your Gelatin Ice Cream Recipe
Common Mistakes to Avoid When Using Gelatin
Even the best gelatin ice cream recipe can go sideways if you miss a few key steps. One of the most common mistakes? Adding gelatin to boiling liquid. This breaks down its molecular structure, making it ineffective as a stabilizer. Always bloom it first, then stir it into warm, not hot, liquid.
Another error is skipping the chill time before churning. When gelatin doesn’t get time to cool and activate properly, it won’t bind your mixture evenly, leading to icy patches or uneven texture. So, no shortcuts, chill your base fully before it hits the churner.
If you’re experimenting with layered or swirled variations, like pairing with something tart or fruity, try folding in stabilized fruit sauces after churning but before the final freeze. Think along the lines of a swirl from this banana milk latte or the rich textures found in cottage cheese mousse. The goal? To keep those elements creamy and defined without melting into your base.
Flavor Variations for Gelatin-Based Ice Cream
The real beauty of a gelatin ice cream recipe is how flexible it is. Want to infuse it with Earl Grey tea or coffee? Steep the flavor into the milk or cream before adding gelatin. Craving seasonal fruits like mango or peach? Puree and fold them in during the cooling stage. You’ll be amazed at how beautifully gelatin holds these flavors without curdling or separating.
For a protein-packed spin, try replacing part of the cream with Greek yogurt or cottage cheese, just blend it smooth. Gelatin balances out the texture and turns it into a nutrient-dense dessert you’d never guess was healthy. You could even take inspiration from this high-protein yogurt bowl and turn it into a breakfast-friendly frozen treat.
If you’re feeling bold, consider savory-sweet combos. Something like a salted caramel swirl or even a smoky nut topping can really elevate your base. And since this gelatin ice cream recipe is built on structure, it can hold up to a lot more than traditional churns.
Frequently Asked Questions about Gelatin Ice Cream
How to make ice cream from gelatin?
To make ice cream using gelatin, first bloom 1 to 1.5 teaspoons of unflavored powdered gelatin in cold milk or water. Once fully bloomed, gently heat your custard or cream base, then stir in the gelatin until it dissolves. Chill thoroughly before churning or freezing. This method helps create a silky texture and minimizes ice crystals in your final gelatin ice cream recipe.
What does adding gelatin to ice cream do?
Gelatin acts as a natural stabilizer in ice cream. It prevents large ice crystals from forming, improving texture and shelf life. In a good gelatin ice cream recipe, this helps maintain scoopability, smoothness, and structure even days after freezing.
How much gelatin is in homemade ice cream?
Most recipes use 1 to 1.5 teaspoons of gelatin for every 3 cups of liquid base (cream, milk, etc.). For a richer texture or when using watery fruit purées, you may increase slightly, but avoid overdoing it as excess gelatin can make the ice cream overly firm or gummy.
How to stabilize ice cream with gelatin?
To stabilize, bloom the gelatin first, then incorporate it into the warm (not boiling) base. Chill completely before freezing. This ensures the gelatin activates evenly, binding the water and fat for that signature smooth finish. It’s the backbone of any reliable gelatin ice cream recipe.
Once you master this gelatin ice cream recipe, you’ll never look at homemade ice cream the same way. It’s rich, creamy, and free from synthetic stabilizers, all thanks to a simple, natural ingredient. Whether you’re going classic vanilla or getting adventurous with flavors like mango, matcha, or even coffee, gelatin gives your dessert that professional-grade texture you crave.
So next time you reach for your ice cream maker, grab the gelatin too. With this method in your back pocket, smooth, dreamy ice cream is always within reach.
Follow along for more delicious recipes and behind-the-scenes tips on Facebook and Pinterest.