The first time I pulled a rack of garlic brown sugar ribs from the oven, the caramel-dark glaze was crackling at the edges and the whole kitchen smelled like a slow Sunday afternoon at a backyard cookout, and I had made them on a Tuesday.

Most rib recipes leave you wrestling with dry, tough meat or a glaze that slides right off the bone and pools at the bottom of the pan. This recipe locks moisture inside with a tight foil wrap first, then finishes the ribs open so the glaze thickens and clings to every inch.
Here’s what you’ll get: the exact dry rub ratio that builds a deep savory base, the two-stage oven method that keeps the meat juicy, and the precise broil window that turns the glaze into something close to candy.
Table of Contents
Why this garlic brown sugar combination works so well
If you’ve ever wondered why certain rib recipes taste flat even after hours in the oven, the answer is usually a missing bridge between sweet and savory. Brown sugar alone gives you sweetness, but it burns fast and tastes one-dimensional. Garlic alone is sharp and pungent. Together, they do something more interesting.
The science behind the caramelization
Brown sugar melts at a lower temperature than white sugar, which means it starts to caramelize and develop deep, molasses-rich flavor before the exterior of the meat has a chance to dry out. At the same time, the natural sugars in garlic (fructooligosaccharides, if you want the full science) undergo their own browning reaction, turning from sharp and raw to sweet, nutty, and almost buttery somewhere around 300°F. When these two browning processes happen side by side, you get a layered flavor that tastes like it took far more effort than it actually did.
The ratio matters here. Too much brown sugar and the glaze burns in the oven before the ribs are tender. Too little and the coating never sets into that glossy, sticky finish. The sweet spot is roughly two parts brown sugar to one part minced garlic in the final glaze, with paprika, onion powder, and a pinch of cayenne doing the supporting work in the rub underneath.
Why pork ribs are the right cut
Baby back ribs are leaner and curve gently, which makes them cook evenly and gives you that clean pull-from-the-bone texture. Spare ribs have more fat marbling and a meatier bite, and they respond beautifully to the low-and-slow foil method. Both cuts work well in this recipe, but baby backs are a little more forgiving if it’s your first time making oven-baked garlic brown sugar ribs.
One thing that makes a consistent difference across both cuts: removing the membrane. That thin, papery silver skin on the back of the rack acts like a barrier. It keeps seasoning from penetrating the meat and creates a chewy, rubbery texture after cooking. Slide a butter knife under the membrane near the middle of the rack, grab the edge with a paper towel for grip, and peel it back in one clean pull. It takes about 30 seconds and changes everything about the final texture.
The brown sugar garlic combination also pairs naturally with pork because pork has a mild, slightly sweet baseline flavor that amplifies rather than fights against the glaze. If you love the idea of garlic and pork working together, my garlic brown sugar pork tenderloin juicy glazed easy dinner follows a very similar flavor philosophy and is a great weeknight companion recipe.
Print
Garlic Brown Sugar Ribs: Sweet, Sticky, and Fall-Off-the-Bone Tender
- Total Time: 113 min
- Yield: 7 servings 1x
Description
Tender oven-baked pork ribs coated in a two-layer garlic and brown sugar rub and glaze. The ribs are wrapped in foil and baked low and slow until the meat pulls from the bone, then finished uncovered at high heat so the glaze caramelizes into a sticky, deeply savory-sweet crust. Simple pantry ingredients, big flavor.
Ingredients
For the Dry Rub:
2 tablespoons packed dark brown sugar
1 teaspoon smoked paprika
1 teaspoon garlic powder
1 teaspoon onion powder
1 teaspoon kosher salt
1/2 teaspoon black pepper
1/4 teaspoon cayenne pepper
For the Ribs:
2 full racks baby back pork ribs (about 4 to 5 lbs total, membrane removed)
For the Garlic Brown Sugar Glaze:
1/3 cup packed dark brown sugar
4 cloves garlic (minced very fine or pressed)
2 tablespoons soy sauce
1 tablespoon apple cider vinegar
1 tablespoon unsalted butter
1/2 teaspoon smoked paprika
Instructions
1. Preheat your oven to 300 degrees F. Line a large rimmed baking sheet with heavy-duty aluminum foil, leaving enough overhang on the sides to fully wrap and seal the ribs.
2. In a small bowl, mix together the dark brown sugar, smoked paprika, garlic powder, onion powder, kosher salt, black pepper, and cayenne until fully combined and no clumps remain.
3. Pat both racks of ribs dry with paper towels. Sprinkle the dry rub evenly over both sides of each rack, pressing firmly with your palm so the mixture adheres. Let the ribs sit at room temperature for 10 minutes.
4. Place the ribs bone side down on the prepared foil. Bring the foil up over the ribs and crimp the edges tightly to form a completely sealed packet. Slide the baking sheet into the oven and bake for 90 minutes, until the meat is very tender and starting to pull back from the bone tips.
5. While the ribs bake, make the glaze. Combine the dark brown sugar, minced garlic, soy sauce, apple cider vinegar, butter, and smoked paprika in a small saucepan over medium-low heat. Stir until the butter melts and the sugar dissolves completely, about 3 minutes. Remove from heat and set aside.
6. Remove the baking sheet from the oven and increase the temperature to 425 degrees F. Carefully open the foil packet and fold the sides down. Brush a generous layer of glaze over the top and sides of each rack using a pastry brush.
7. Return the ribs uncovered to the 425 degree F oven and bake for 10 minutes, until the glaze begins to bubble and turn deep amber. Brush on a second coat of glaze and bake for another 5 minutes.
8. Switch the oven to broil on high. Broil the ribs for 2 to 3 minutes, watching closely, until the surface is dark, glossy, and caramelized with lightly charred edges. Do not walk away during this step.
9. Remove the ribs from the oven and let them rest on the baking sheet for 5 minutes. Slice between each bone into individual ribs and arrange on a serving board. Drizzle with any remaining glaze before serving.
Notes
Store leftover ribs in an airtight container in the refrigerator for up to 4 days, or wrap tightly and freeze for up to 3 months. Reheat wrapped in foil at 300 degrees F for 15 minutes, then uncovered for 3 minutes to re-crisp the glaze.
For spare ribs instead of baby backs, increase the initial foil-wrapped bake time to 2 hours and 15 minutes. The thicker cut needs the extra time to break down fully.
To make these in the slow cooker, stand the rubbed racks upright in the slow cooker curving against the walls and cook on low for 7 to 8 hours. Transfer to a foil-lined baking sheet, brush with glaze, and broil for 3 to 4 minutes to finish.
For a spicier version, double the cayenne in the dry rub and stir 1 teaspoon of sriracha into the glaze before applying.
- Prep Time: 8 min
- Cook Time: 105 min
- Category: Dinner, Main Course
- Method: Baking
- Cuisine: American
Nutrition
- Serving Size: 2 to 3 ribs
- Calories: 520 kcal
- Sugar: 18 g
- Sodium: 620 mg
- Fat: 32 g
- Saturated Fat: 11 g
- Unsaturated Fat: 18 g
- Trans Fat: 0 g
- Carbohydrates: 22 g
- Fiber: 0 g
- Protein: 38 g
- Cholesterol: 130 mg
The dry rub and glaze: ingredients and ratios
The flavor of these garlic brown sugar pork ribs is built in two distinct layers. The dry rub goes on first and forms the base. The glaze goes on during the final stretch of cooking and creates the sticky, lacquered surface. Skipping either layer produces a result that is technically cooked but missing half its personality.
The dry rub
The dry rub for this recipe uses pantry staples and comes together in about two minutes:
- 2 tablespoons packed dark brown sugar
- 1 teaspoon smoked paprika
- 1 teaspoon garlic powder
- 1 teaspoon onion powder
- 1 teaspoon kosher salt
- 1/2 teaspoon black pepper
- 1/4 teaspoon cayenne pepper
Dark brown sugar has a higher molasses content than light brown sugar, which means it adds a slightly deeper, more complex flavor to the rub. It also holds moisture better against the surface of the meat, which helps create a crust rather than a dry, grainy coating.
Rub this mixture all over the ribs, pressing firmly so it adheres, and let it sit for at least 10 minutes before wrapping. If you have time, 30 minutes at room temperature gives the salt a chance to start drawing a small amount of moisture to the surface, which then dissolves the sugar and forms a paste that seeps into the meat slightly.
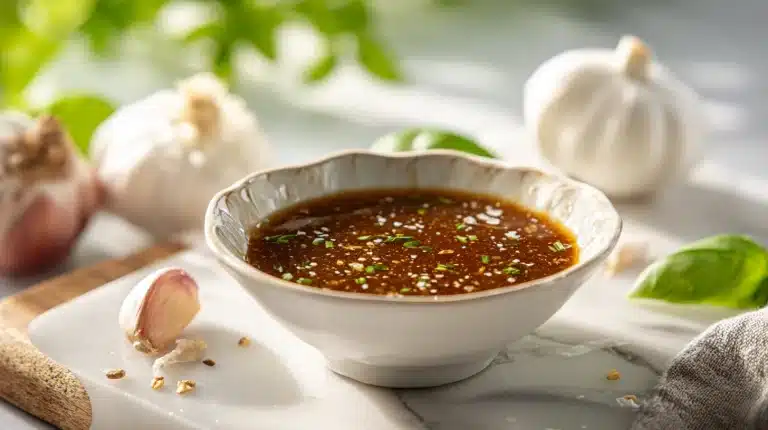
The garlic brown sugar glaze
The glaze is where the magic becomes visible. You will need:
- 1/3 cup packed dark brown sugar
- 4 cloves garlic (minced very fine or pressed)
- 2 tablespoons soy sauce
- 1 tablespoon apple cider vinegar
- 1 tablespoon unsalted butter
- 1/2 teaspoon smoked paprika
Combine everything in a small saucepan over medium-low heat, stirring until the butter melts and the sugar dissolves, about 3 minutes. You want it warm and fluid but not boiling, since boiling drives off the volatile garlic compounds that give it that sharp, savory punch.
The soy sauce does double duty here. It adds sodium without making the glaze taste salty, and it contributes glutamates that deepen the overall savory quality of the sweet glaze. The apple cider vinegar cuts through the richness and keeps the sweetness from becoming cloying. This is a glaze that tastes balanced, not just sweet.
If you enjoy building these kinds of savory-sweet depth profiles in your cooking, you might also find inspiration in this fermented honey garlic recipe, which uses a slower technique to develop a similarly complex garlic sweetness.
How to cook garlic brown sugar ribs in the oven
The two-stage oven method is the reason these ribs stay juicy even though they spend nearly two hours in the oven. Stage one is low heat inside a foil packet, which traps steam and braises the meat gently. Stage two is high heat with the foil open, which lets the moisture evaporate from the surface and the glaze concentrate and caramelize.
Stage one: wrapped and low
Preheat your oven to 300°F. Place the dry-rubbed rack of ribs, bone side down, on a large sheet of heavy-duty aluminum foil. Bring the sides of the foil up and crimp them tightly to form a sealed packet. The seal matters. Any gap in the foil lets steam escape, and steam escaping means moisture escaping, and moisture escaping means dry ribs.
Set the foil packet on a rimmed baking sheet and slide it into the oven. Bake for 90 minutes. The internal temperature you are aiming for is around 190 to 195°F, which is the range where the collagen in the connective tissue has fully converted to gelatin and the meat pulls from the bone without effort.
When the 90 minutes are up, open the oven and carefully peel back the foil. There will be a pool of rendered fat and juices inside. This is a good sign. Use a pastry brush or a spoon to coat the exposed surface of the ribs with the first layer of garlic brown sugar glaze.
Stage two: open and high
Increase the oven temperature to 425°F and return the ribs, now uncovered, to the oven for 10 minutes. The glaze will bubble, thicken, and turn a deep amber color. You will hear it sizzling. Apply a second coat of glaze and return to the oven for another 5 minutes.
For an even stickier, more caramelized finish, switch the oven to broil on high for the final 2 to 3 minutes, watching closely so the glaze does not cross from caramelized to burned. The surface should look dark, glossy, and almost lacquered, not black or matte.
Remove the ribs from the oven and let them rest for 5 minutes before slicing. This resting time lets the juices redistribute through the meat. Cutting immediately causes those juices to run out onto the cutting board instead of staying where they belong.
This same two-stage principle works beautifully in slow cooker garlic brown sugar ribs as well. If you prefer the slow cooker route, cook the rubbed ribs on low for 7 to 8 hours, then transfer to a foil-lined baking sheet, glaze, and broil for 3 to 4 minutes to finish. The honey garlic slow cooker pork tenderloin uses a similar finishing technique and the timing translates well.
Serving, storing, and adapting this recipe
Once your rack of BBQ ribs with brown sugar and garlic is out of the oven and rested, the question is what to put alongside it. These ribs are rich, sweet, and deeply savory, so the best sides cut through that richness or contrast the texture.
Best sides for these ribs
- Creamy coleslaw with apple cider vinegar dressing (the acidity mirrors the vinegar in the glaze)
- Roasted corn on the cob with a little butter and smoked salt
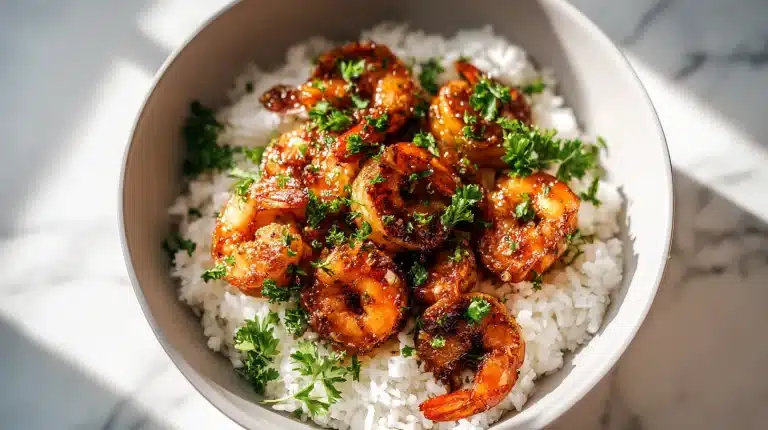
- Simple white rice or fluffy dinner rolls to soak up extra glaze
- A crisp green salad with a lemon vinaigrette
If you want something on the crispier side to serve alongside, crispy garlic parmesan fries are a natural match with the garlic theme running through the ribs, and the texture contrast between the crunchy fries and the tender meat is genuinely satisfying.
How to store and reheat
Leftover garlic brown sugar ribs keep well in the refrigerator for up to 4 days, stored in an airtight container or tightly wrapped in foil. To reheat without drying them out, place the ribs in a 300°F oven, wrapped loosely in foil, for about 15 minutes. Unwrap for the final 3 minutes to re-crisp the glaze. You can also reheat individual portions in a microwave with a damp paper towel over the top to keep moisture in, though the glaze will not have the same crackle.
For longer storage, these ribs freeze beautifully for up to 3 months. Wrap each section of ribs individually in plastic wrap, then place the wrapped portions in a zip-top freezer bag with as much air removed as possible. Thaw overnight in the refrigerator before reheating.
Adapting the recipe
This sweet and savory ribs recipe is flexible. Here are a few variations that work within the same basic framework:
- Spicier version: Double the cayenne in the rub and add 1 teaspoon of sriracha to the glaze.
- Smoky version: Add 1 teaspoon of liquid smoke to the glaze and use extra smoked paprika in the rub.
- Grilled version: Follow stage one in the oven, then finish the glazed ribs on a medium-hot grill for 4 to 5 minutes per side, brushing with glaze as you go.
- Spare ribs version: Increase the stage one oven time to 2 hours and 15 minutes, since spare ribs are thicker and need longer to break down.
The core of what makes this recipe work, that two-stage cooking process and the balanced garlic-and-brown-sugar glaze, stays the same regardless of which direction you take it.
Frequently asked questions
Can I make garlic brown sugar ribs in a slow cooker?
Yes, and the result is incredibly tender. Season the ribs with the dry rub, then place them upright in the slow cooker, curving them against the walls. Cook on low for 7 to 8 hours. Transfer to a foil-lined baking sheet, brush with the glaze, and broil at high for 3 to 4 minutes until the glaze is caramelized and sticky. The texture will be slightly more falling-apart than the oven method, which many people prefer.
Do I have to remove the membrane from the back of the ribs?
You do not have to, but it makes a meaningful difference in the final texture. The membrane becomes tough and chewy when cooked, and it also prevents the dry rub from fully adhering to the bone side of the rack. Removing it takes less than a minute with a butter knife and a paper towel, and the result is noticeably more tender, evenly seasoned ribs.
Can I use light brown sugar instead of dark brown sugar?
Light brown sugar works and will produce a slightly milder, less molasses-heavy flavor. The glaze will still caramelize and set properly. Dark brown sugar gives a deeper, richer sweetness that pairs particularly well with the savory garlic, so use it if you have the choice. Either way, pack the measuring cup firmly so you get an accurate amount.
How do I know when the ribs are done?
The most reliable method is an instant-read thermometer. Garlic brown sugar pork ribs are done and tender at an internal temperature between 190 and 200°F. At this range, the collagen has broken down fully and the meat pulls away from the bone with very little effort. If you press down on the rack and the surface cracks slightly rather than bouncing back, that is another good visual cue that the ribs are ready.
Conclusion
There is something quietly satisfying about pulling a rack of garlic brown sugar ribs from the oven and watching that dark, caramelized glaze crack and shimmer under the kitchen light, knowing you built every layer of that flavor yourself with a rub and a quick stovetop glaze.
Give these ribs a try this Sunday. Set the rack in the oven before you start a movie and come back to something that smells like you spent all day cooking, even though the active work was under 15 minutes.
For more recipes like garlic brown sugar ribs, follow us on Facebook and Pinterest for sticky glaze dinner ideas and weekend cookout inspiration.