The first time I made this homemade kale chips recipe, I was standing in my kitchen, craving something crunchy but guilt-free. I had just come back from the market with two bunches of vibrant green kale and wasn’t quite sure what to do with them. Potato chips were out; I wanted something lighter, but still packed with flavor. So, I tossed those kale leaves with a bit of olive oil, garlic, and sea salt, spread them on a baking sheet, and hoped for the best. Ten minutes later, my kitchen smelled amazing, and what came out of the oven was a revelation: crisp, savory chips with a parmesan finish that hit every craving.
What’s beautiful about this recipe is that it takes just 5 minutes to prep and about 15 to bake. It’s a snack you’ll actually feel good about, way better than those overpriced store-bought bags that lose their crunch in a day.
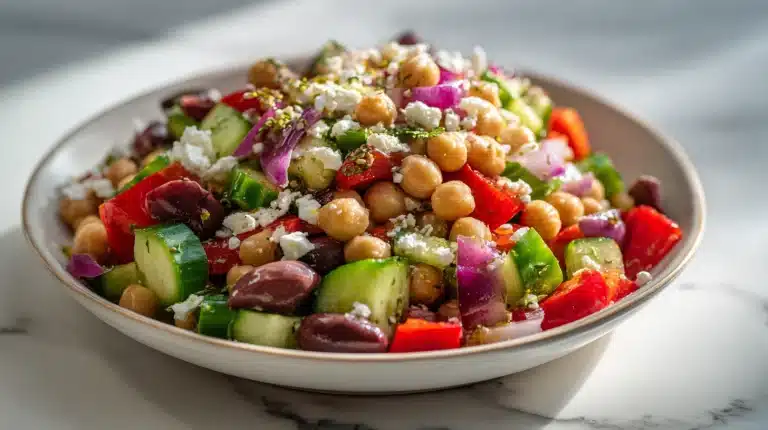
For other crave-worthy healthy snacks, I’ve also been making this simple boiled nuts recipe and occasionally switch things up with avocado bacon toast with lime and sea salt when I want something more filling.
Table of Contents

Table of Contents
Why This Homemade Kale Chips Recipe Works So Well
The secret? It’s all about how you prep the kale. You absolutely must wash and dry it thoroughly. Even the tiniest drop of water can turn those beautiful leaves into soggy messes. I always use a salad spinner, then dab with a clean towel to get rid of excess moisture.
Then comes the garlic and parmesan magic. When those bits crisp in the oven alongside the kale, you get an unbeatable combo of umami, salt, and crunch. Bake low and slow, 300°F is your sweet spot, and don’t overcrowd the pan. Space equals crisp.
Print
homemade kale chips recipe
- Total Time: 21 minutes
- Yield: 6 servings 1x
Description
Garlic and parmesan seasoned kale chips are baked until crisp. This homemade kale chips recipe makes a healthy, easy snack in under 25 minutes.
Ingredients
2 bunches fresh kale
5–6 cloves garlic, minced
sea salt, to taste
3 teaspoons olive oil
1/4 cup freshly grated parmesan cheese
Instructions
1. Remove large stems from kale. Chop into chunks and wash well. Dry thoroughly using a salad spinner or towel.
2. Place kale in a large bowl. Toss with olive oil, garlic, and sea salt.
3. Spread kale flat on a large baking sheet. Don’t overcrowd, bake in two batches if needed.
4. Bake at 300°F for 10 minutes. Rotate the pan and bake another 10–15 minutes until crisp.
5. Let cool for a few minutes. Sprinkle with parmesan before serving.
6. Store in an airtight container once fully cooled.
Notes
For vegan version, substitute parmesan with nutritional yeast.
Add crushed red pepper or lemon zest for variety.
- Prep Time: 5 minutes
- Cook Time: 16 minutes
- Category: Snack, Lunch
- Method: Baking
- Cuisine: American
Nutrition
- Serving Size: 1 cup
- Calories: 61
- Sugar: 0g
- Sodium: 83mg
- Fat: 3g
- Saturated Fat: 1g
- Unsaturated Fat: 2g
- Trans Fat: 0g
- Carbohydrates: 4g
- Fiber: 1g
- Protein: 3g
- Cholesterol: 2mg
How to Make This Homemade Kale Chips Recipe Step-by-Step
Start with Fresh, Dry Kale
The foundation of a good homemade kale chips recipe is, of course, fresh kale. I recommend using curly kale because it crisps up beautifully and catches all the seasonings in its ruffles. Start by removing the thick stems, which don’t crisp well and can taste bitter. Tear or cut the leaves into large chip-sized pieces. Then wash them thoroughly. But here’s where most people slip: you must dry the kale completely. I use a salad spinner first, then gently blot the leaves with a clean towel. If your kale is even slightly damp, it’ll steam in the oven instead of crisping. And no one wants soggy chips.
Once your kale is bone-dry, toss it in a bowl with olive oil, minced garlic, sea salt, and a light hand of freshly grated parmesan cheese. The oil helps with crisping, while the garlic and cheese bring the flavor.
If you’re into quick, plant-based snacks, check out this okra water recipe for a nourishing drink to go along with your chips.
Bake Low and Slow for Perfect Crunch
Preheat your oven to 300°F. This moderate temperature ensures the kale crisps evenly without burning. Arrange the kale in a single layer on a baking sheet. If you’re making a big batch, use two trays or bake in shifts. Overcrowding traps moisture, leading to limp chips. Bake for 10 minutes, rotate the tray, then bake for another 10–15 minutes until crisp. Let them cool on the sheet for a few minutes before sprinkling with more Parmesan, if you like.
This method reminds me of how I approach my weight loss casserole recipe. Balance is everything, and every ingredient matters when you’re building flavor and texture.
Troubleshooting Your Homemade Kale Chips Recipe
Why Your Homemade Kale Chips Might Not Be Crispy
If your homemade kale chips recipe isn’t producing crunchy chips, don’t worry, the fix is simple. The most common culprit? Moisture. Even a few droplets of water left on the leaves will cause them to steam, not bake. That’s why drying the kale thoroughly before seasoning is non-negotiable. I can’t stress enough how essential a salad spinner is for this step. If you skip it, you’re gambling with sogginess.
Another reason your kale might not crisp is oven temperature or airflow. You must bake them low and slow at 300°F and rotate the pan halfway through. This allows the chips to dry evenly. Also, resist the urge to pile them on the tray. Crowded kale = limp chips.
If you’re already mastering this kale snack, you might also love trying my fried rice and vegetables recipe. It’s another satisfying, veggie-packed dish that’s light yet flavorful.
Don’t Skip the Cooling Time
Once your homemade kale chips recipe is out of the oven, let the chips rest for a few minutes on the hot tray. Why? They’ll continue crisping as they cool. This step is easy to overlook, especially when your kitchen smells like roasted garlic and Parmesan heaven. But skipping this phase can leave your chips soft, and who wants that?
Sprinkle a final dusting of parmesan over the chips once cooled. Then store in an airtight container to preserve the crunch. And while you’re at it, pair these chips with my simple pink bariatric gelatin recipe. It’s a smart way to round out a light snack with something cool and protein-rich.
Homemade Kale Chips Recipe: Nutrition, Storage, and Serving Ideas
Healthy Benefits of This Homemade Kale Chips Recipe
One of the biggest reasons I return to this homemade kale chips recipe again and again is because it’s actually good for you, and it doesn’t taste like a “health food.” Kale is naturally rich in antioxidants, vitamin A, and vitamin C, and baking it preserves most of those nutrients without adding excess fat. With just 3 teaspoons of olive oil across the entire batch, each serving clocks in at about 61 calories. Plus, you get a nice protein and calcium boost from the Parmesan cheese.
When compared to standard chips loaded with processed oils and preservatives, this homemade kale chips recipe is a smart swap for anyone looking to snack clean without sacrificing crunch. If you’re on a wellness journey, pair this snack with my high-protein cottage cheese baked ziti. It’s another way to add satisfying meals that align with your health goals.
How to Store Kale Chips for Lasting Crunch
Once you’ve baked your kale chips to crispy perfection, you’ll want to keep them that way. Let them cool fully on the baking tray before transferring them to a container. I recommend using an airtight glass container lined with a paper towel to absorb any leftover moisture. Don’t refrigerate them moisture will ruin the texture.
If your kale chips lose their crunch, pop them back in the oven for a few minutes at 250°F to re-crisp. You can even play around with seasonings, try red pepper flakes or smoked paprika for a new twist on your go-to homemade kale chips recipe.
And if you’re cooking for the family, check out my chicken stir fry with swiss chard, it’s quick, veggie-forward, and just as satisfying.
Frequently Asked Questions About Homemade Kale Chips
What is the secret to kale chips?
The secret to crispy kale chips lies in drying the leaves thoroughly before baking. Any moisture left on the kale will cause it to steam rather than crisp. Also, use a low oven temperature (around 300°F), avoid overcrowding the baking sheet, and rotate the tray halfway through baking. Letting the chips cool on the tray also helps enhance their crunch.
Are kale chips actually healthy?
Yes, homemade kale chips are a healthy snack. Kale is packed with vitamins A, C, and K, along with fiber and antioxidants. When baked with just a small amount of olive oil and seasoned lightly, these chips offer a satisfying crunch without the empty calories or additives found in store-bought versions.
Why aren’t my kale chips getting crispy?
Your kale chips may not be crisp because the kale wasn’t fully dried before baking, or the oven temperature was too high or too low. Overcrowding the baking tray also traps moisture, preventing the kale from crisping. Spread the kale in a single layer and bake at 300°F for the best results.
Is it better to bake or dehydrate kale chips?
Both methods work, but baking is faster and more accessible. Baking at a low temperature dehydrates the kale quickly while still maintaining flavor and texture. Dehydrating takes longer but retains more nutrients and can yield a very delicate, even crunch.
The Kale Chip Recipe You’ll Come Back To
Whether you’re new to kale or a long-time leafy greens lover, this homemade kale chips recipe delivers every time. It’s simple, fast, and full of flavor, a perfect alternative to processed snacks. Plus, it’s endlessly customizable. Once you’ve mastered the garlic-parmesan version, you can try variations with chili powder, lemon zest, or nutritional yeast.
This recipe isn’t just a healthy snack, it’s a crunchy, addictive way to enjoy your greens. With every batch, you’ll gain confidence in the kitchen while creating something nourishing and delicious. Happy snacking!
Follow Forkful Daily for more easy, healthy recipes on Facebook and Pinterest.