The first time I made homemade cottage cheese, I was shocked that a gallon of milk could turn into something so delicate right on my stove.
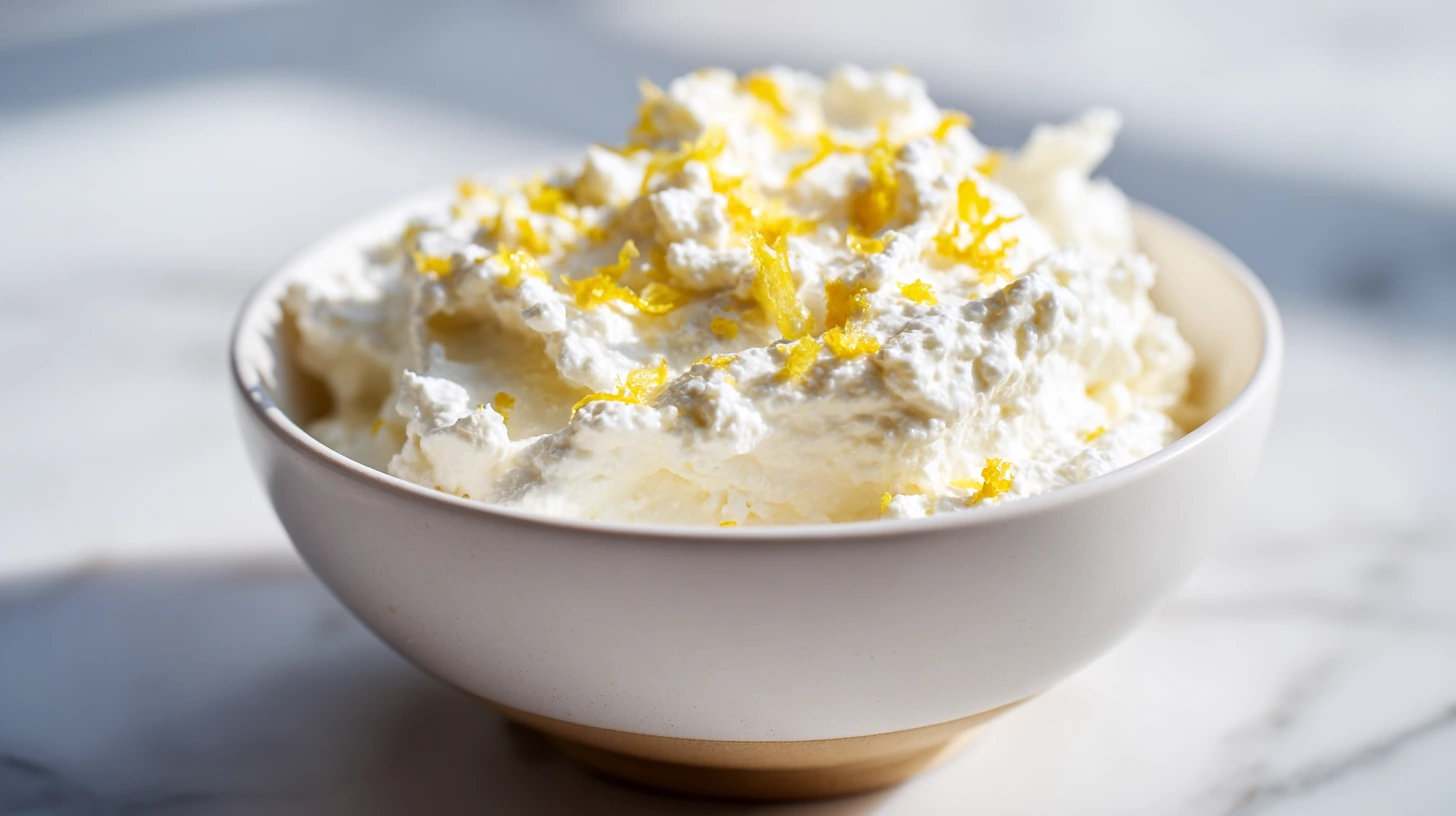
Store bought versions often have a gummy texture, a metallic aftertaste, or curds that feel like rubber. This method fixes all that. You get tender curds and a rich, milky flavor that you control completely.
By the end, you’ll know how to coax clean, soft curds from milk, how to rinse and finish them for the right texture, and how to adjust the richness with cream.
Table of Contents
Why You Should Make Cottage Cheese at Home
There is a real difference between cracking open a plastic tub from the grocery store and making cottage cheese in your own kitchen. The moment those curds separate from the whey, something shifts. The kitchen fills with a warm, sweet dairy smell that tells you something good is happening. Store bought cottage cheese often contains stabilizers, gums, and preservatives to extend shelf life. These additives help the product survive shipping and weeks in a refrigerator case, but they sacrifice the texture and taste that make dairy worth eating in the first place.
When you make it yourself, you control every ingredient. You choose the quality of the milk, the type of acid or culture, and how salty it gets. The resulting cheese tastes alive. The curds are tender and clean, not chewy or gummy. They practically melt on your tongue with a bright, sweet flavor that works with both sweet and savory dishes. If you enjoy starting your mornings with cottage cheese toast, using a fresh batch will change your breakfast routine.
Making cheese from scratch also connects you to an old tradition. For centuries, home cooks figured out how to preserve milk by turning it into cheese. When you pour milk into a pot and watch it separate into solid curds and liquid whey, you’re doing what they did. It feels like science and cooking at the same time.
The Cost and Quality Benefits
People often wonder if making their own dairy products is worth the effort. It depends on the milk you start with. If you buy standard, inexpensive milk, you will save money compared to premium cottage cheese brands. A single gallon of milk yields a surprisingly generous amount of fresh curds, which makes it economical for families.
Beyond the financial side, the quality improvement is obvious. You can avoid plastic packaging and control your sodium intake. You can also make organic cottage cheese simply by starting with organic milk. For anyone who loves high protein breakfasts, having a fresh supply opens up things like scrambled eggs with cottage cheese for a morning meal that keeps you full for hours.
Print
How to Make Homemade Cottage Cheese from Scratch
- Total Time: 88 min
- Yield: 3 servings 1x
- Diet: Vegetarian
Description
This simple recipe yields tender, creamy curds with a sweet, milky flavor. Using just whole milk, an acid, and a splash of cream, you can make fresh cheese in under 90 minutes.
Ingredients
1 gallon whole milk (not ultra pasteurized)
1/2 cup white vinegar
1 teaspoon fine sea salt
1/4 cup heavy cream
1 teaspoon fresh lemon zest (optional)
Instructions
1. Pour the milk into a large, heavy bottomed pot and heat it slowly over medium heat until it reaches 190 degrees Fahrenheit on a thermometer.
2. Remove the pot from the heat and slowly pour in the vinegar, stirring gently with a slotted spoon for exactly 10 seconds until the curds separate from the yellow whey.
3. Let the pot sit undisturbed for 10 minutes so the curds can fully form and firm up.
4. Line a colander with a double layer of cheesecloth and set it over a large bowl to catch the whey.
5. Use a slotted spoon to transfer the solid white curds into the cheesecloth, leaving the liquid whey behind in the pot.
6. Let the curds drain naturally for 10 minutes, then gather the cheesecloth corners and tie them into a bundle.
7. Hang the bundle over a faucet or a wooden spoon resting across a deep pot for 30 minutes to remove excess moisture.
8. Open the cloth and transfer the firm curds to a clean bowl, then sprinkle with salt, heavy cream, and lemon zest, folding gently to combine.
Notes
<Store in an airtight glass container in the refrigerator for up to 7 days. Stir gently before serving.
<You can substitute lemon juice for the white vinegar if you prefer a brighter, citrus flavor.
<Save the yellow whey for smoothies, bread baking, or soups as it is packed with protein.
<For a richer texture, add an extra tablespoon of heavy cream until you reach your desired consistency.
- Prep Time: 5 min
- Rest Time: 68 min
- Cook Time: 15 min
- Category: Breakfast
- Method: Stovetop
- Cuisine: American
Nutrition
- Serving Size: 1 cup
- Calories: 280 kcal
- Sugar: 12 g
- Sodium: 480 mg
- Fat: 14 g
- Saturated Fat: 8 g
- Unsaturated Fat: 5 g
- Trans Fat: 0 g
- Carbohydrates: 12 g
- Fiber: 0 g
- Protein: 24 g
- Cholesterol: 45 mg
The Best Ingredients for DIY Cottage Cheese
The beauty of this recipe is its simplicity. You do not need hard to find items or specialty equipment. The milk is the star. You must use whole milk for the best texture and yield. Skim milk will not form proper curds, and you will end up with very little cheese. Look for milk that is not ultra pasteurized. Ultra high temperature processing damages the proteins, preventing them from bonding together into solid curds.
To separate the curds from the whey, you need an acid. The most common choices are white vinegar and lemon juice. White vinegar gives you a reliable, consistent acid reaction without adding competing flavors. Lemon juice adds a subtle, bright citrus note that works well with dairy, but it can vary in strength depending on the fruit. Some recipes call for buttermilk or yogurt as a starter culture. If you prefer a cultured cottage cheese recipe, you can use a mesophilic culture instead of an acid. This method takes longer and requires precise temperature control, but it gives you a tangier, more complex flavor.
The finishing ingredients matter just as much as the starter. Salt is essential. Use a fine sea salt so it dissolves easily into the curds. Heavy cream is the secret to that luxurious, creamy mouthfeel found in commercial styles. Once you drain your curds, stirring in a splash of cream coats them in a rich, silky layer. This turns dry, crumbly curds into a moist, scoopable treat.
Milk Quality and Acid Options
When shopping for milk, check the label carefully. Standard pasteurized milk works well, but ultra pasteurized milk is a recipe for disappointment. The high heat alters the calcium structure, leaving the proteins unable to form a solid mass. If you can find locally sourced, gently pasteurized milk, you will notice a big improvement in the sweetness and texture of your final product.
Your choice of acid also changes the flavor. Distilled white vinegar is neutral and efficient. Apple cider vinegar works too, but it leaves a faint, earthy taste. Lemon juice brings a sunny brightness that cuts through the richness of the dairy. For an aromatic twist, try adding a little fresh lemon zest along with your salt and cream. This simple addition turns a basic snack into something refreshing.
Step by Step Guide to Cottage Cheese from Scratch
Learning how to make cottage cheese is straightforward, but it requires close attention to temperature. First, pour your whole milk into a large, heavy bottomed pot. Heat the milk slowly over medium heat until it reaches exactly 190 degrees Fahrenheit. Use a reliable thermometer to monitor the temperature. If you let the milk boil, it will scorch on the bottom and taste burnt. As the milk heats, you will notice the surface shifting and a sweet, warm dairy smell filling the air.
Once the milk reaches 190 degrees, remove the pot from the heat immediately. Gently stir in your acid. Pour the vinegar or lemon juice in a slow, steady stream while folding the milk gently with a slotted spoon. Stop stirring as soon as you see the curds separate from the whey. The whey should look slightly yellow and clear, not milky white. If the whey still looks cloudy, add another tablespoon of acid and stir gently once more. Let the pot sit undisturbed for 10 minutes. The silence matters. Agitation breaks the delicate curds into tiny shards.
Heating, Cutting, and Draining the Curds
After the resting period, line a colander with cheesecloth. Use a double layer to ensure the small curds do not escape. Place the colander over a large bowl to catch the whey. Using a slotted spoon, carefully transfer the solid curds into the cheesecloth. Let them drain naturally for 10 minutes. You will hear the liquid dripping and see the curds consolidating into a soft, white mass.
Once the initial draining is complete, gather the corners of the cheesecloth and tie them together. Hang the bundle over your faucet or a wooden spoon resting across a deep pot. Let it hang for 30 minutes to remove the excess moisture. This resting period is critical for getting the right texture. If you rush it, your cheese will be wet and runny.
After hanging, open the cheesecloth and transfer the curds to a clean bowl. They will look firm and slightly dry. This is where it comes together. Sprinkle the curds with fine salt and pour a generous splash of heavy cream over them. Gently fold everything together with a spatula. The cream seeps into the nooks and crannies, turning the dry mass into something creamy and luxurious. If you love using this ingredient in baking, this exact texture works perfectly in a frattata recipe with cottage cheese or even for whipping up cottage cheese waffles on a lazy weekend.
How to Store and Serve Fresh Cottage Cheese
Once you have prepared your batch, serving it is the best part. The flavor is at its peak when it is fresh and slightly chilled. Spoon it into a shallow bowl, top it with sliced peaches or fresh berries, and drizzle a little honey over the top. The contrast of the sweet fruit and the tangy, salty curds is brilliant. You can also serve it the classic way, with a generous pinch of black pepper and a side of warm, toasted sourdough bread.
If you want to experiment with savory applications, this homemade version shines. It melts beautifully into warm pasta dishes. If you are looking for a comforting dinner, try using your fresh batch in a cottage cheese alfredo sauce for a rich, protein packed meal. You can also fold it into cottage cheese protein pancakes for a post workout breakfast that actually tastes good.
Storage Tips for Maximum Freshness
Homemade cottage cheese does not contain the stabilizers found in commercial brands, so it has a shorter shelf life. Store it in an airtight glass container in the refrigerator for up to one week. The cream may settle to the bottom, so give it a gentle stir before serving. The curds will become slightly more acidic as the days pass, which is natural and still delicious.
If you have leftover whey, do not throw it away. The yellow liquid is packed with protein and nutrients. You can use it in smoothies, add it to bread dough instead of water, or use it as a base for soups. Storing your cheese properly keeps its soft texture and fresh flavor until the last scoop.
Frequently Asked Questions
Is it worth making your own cottage cheese?
Yes, making your own is worth it for the flavor and texture alone. You avoid the gums and stabilizers found in store bought brands, which gives you a cleaner, sweeter taste. It also lets you control the sodium and fat levels, and you get a better product for minimal effort.
Is it cheaper to make your own cottage cheese?
It can be cheaper, especially if you buy milk in bulk or find a good deal on whole milk. A single gallon yields roughly three cups of curds. When compared to premium, organic cottage cheese brands at the store, making it from scratch is economical.
How much cottage cheese will 1 gallon of milk make?
One gallon of whole milk will yield approximately three cups of finished cottage cheese, depending on the fat content of the milk and how much cream you add back in at the end.
How long does homemade cottage cheese last?
Because it lacks commercial preservatives, it lasts about five to seven days when stored in an airtight container in the refrigerator. Always use a clean spoon when serving to avoid introducing bacteria that could cause it to spoil faster.
Conclusion
Making homemade cottage cheese changes how you think about everyday dairy. You start with a single, humble ingredient and coax it into something tender, flavorful, and satisfying. The process is simple, and the reward is a fresh, creamy bowl of curds that beats anything from a plastic tub.
Give it a try this week and taste the difference for yourself. Once you experience those warm, sweet curds fresh off the stove, you will not want to go back to the store bought version.
For more recipes like homemade cottage cheese, follow us on Facebook and Pinterest for weeknight dinner ideas.
More recipes in this series: