There is a specific magic to biting into a perfectly cooked falafel. The exterior shatters with a loud crunch, and the inside is bright green, herb-flecked, steaming, and impossibly fluffy.
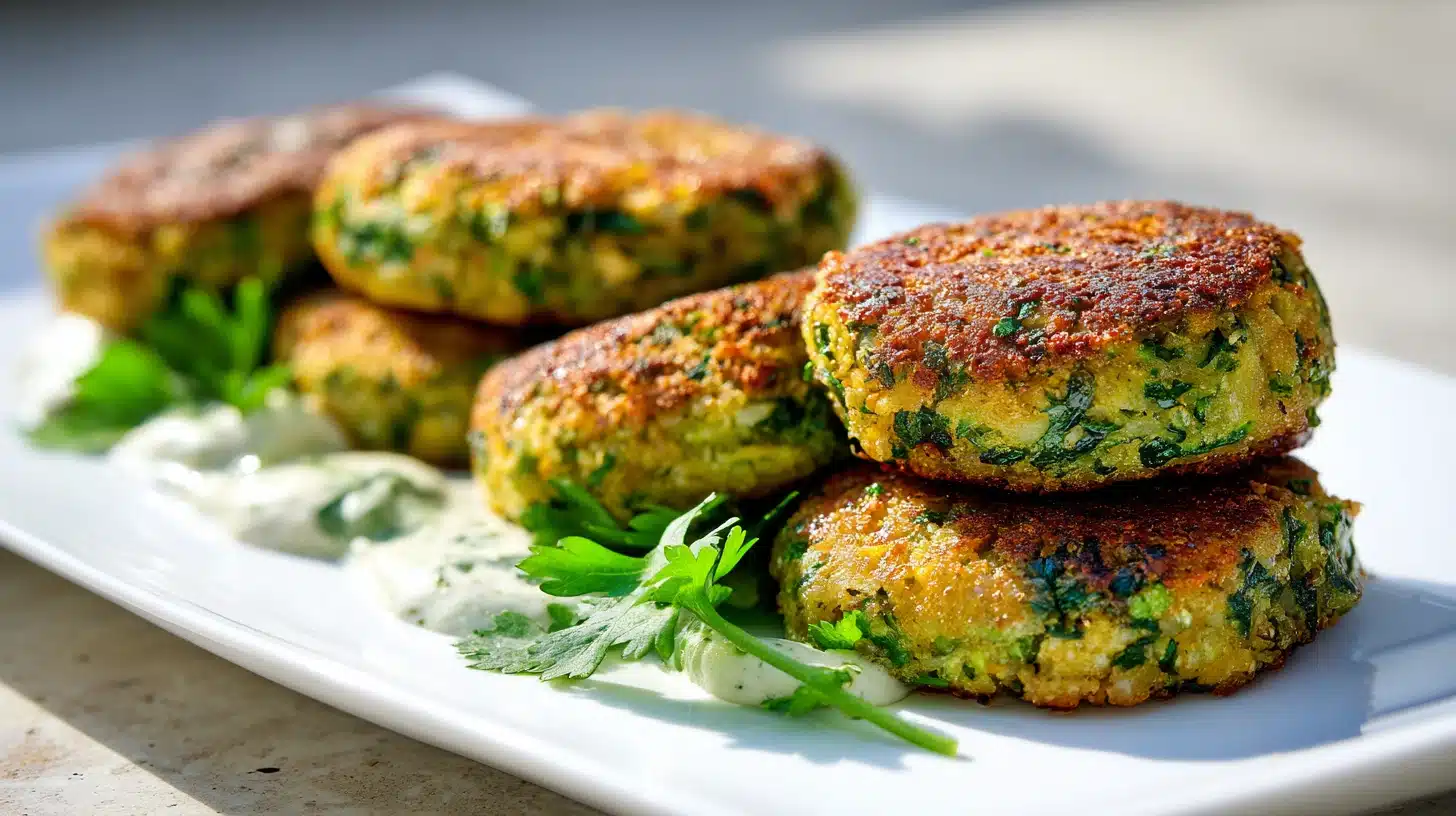
Most homemade versions fall flat. They turn out as dense, greasy hockey pucks or crumbly patties that disintegrate in the oil. This recipe solves both problems with a simple pantry staple and a specific resting technique.
By the end, you’ll know why dried chickpeas outperform canned ones, how to bind the mixture without eggs, and the exact oil temperature for a shell that stays crisp for hours.
Table of Contents
The secret to authentic falafel: dried versus canned
The single most important factor in making authentic falafel is the type of chickpea you use. If you reach for a can, you are setting yourself up for disappointment. Canned chickpeas are fully cooked and saturated with moisture. When you pulse them into a dough and drop them into hot oil, they release all that water. The result is a greasy, dense, often gummy texture. The oil splatters aggressively, and the interior never achieves that signature light, fluffy crumb.
Instead, you must use dried chickpeas. You do not cook them before making the falafel dough. You simply soak them in cold water until they are completely hydrated but still raw. This soaking process typically takes 12 to 24 hours. The chickpeas will double in size, feel firm to the touch, and have a distinct crunch if you bite into one. Because they are raw, they contain exactly the right amount of moisture. When blended with herbs and spices, they form a textured dough that holds its shape beautifully in the fryer.
During the soaking stage, the chickpeas absorb water slowly and evenly. You want to check them after 12 hours. If they still look slightly wrinkled or feel chalky inside, give them another few hours. The water should always be cold. If your kitchen is very warm, soak them in the refrigerator. Changing the water once halfway through keeps them fresh and prevents any sour flavors from developing. I always add a generous pinch of baking soda to the soaking water. This alkaline environment softens the tough skins of the chickpeas, which helps them break down more easily in the food processor later.
When you drain the soaked chickpeas, pat them thoroughly dry with a clean kitchen towel. Any excess water on the surface will interfere with the texture of your falafel. At this stage, they are ready to transform. The raw chickpeas will cook entirely in the hot oil, creating a contrast between the deeply browned, crunchy exterior and the tender, cooked interior. This contrast is the defining characteristic of a great falafel. Skipping the soak or trying to rush the process with a quick boil will ruin the structure. Once you experience the difference that dried chickpeas make, you will never look at a can again.
Print
Crispy Homemade Falafel: The Only Recipe You Need
- Total Time: 533 min
- Yield: 18 falafel balls 1x
- Diet: Vegan
Description
This homemade falafel recipe uses soaked dried chickpeas, fresh herbs, and warm spices to create a crispy exterior and a fluffy, vibrant green interior. Served with a simple tahini sauce, it makes a perfect vegetarian meal.
Ingredients
For the falafel:
1 cup dried chickpeas (soaked for 24 hours)
1 cup fresh parsley leaves and stems
1 cup fresh cilantro leaves and stems
1/2 medium yellow onion (roughly chopped)
4 cloves garlic (peeled)
1 teaspoon ground cumin
1 teaspoon ground coriander
1 teaspoon salt
1/2 teaspoon black pepper
1 teaspoon baking powder
For the tahini sauce:
1/2 cup tahini
1/4 cup warm water
2 tablespoons fresh lemon juice
1 clove garlic (minced)
1/4 teaspoon salt
For frying:
2 cups canola oil
Instructions
1. Drain the soaked chickpeas and pat them thoroughly dry with a clean kitchen towel.
2. Place the chickpeas in a food processor and pulse until they break down into small, coarse pebbles.
3. Add the parsley, cilantro, onion, garlic, cumin, coriander, salt, and black pepper to the food processor.
4. Pulse the mixture again until it forms a textured, sandy crumb that holds together when squeezed but is not a smooth paste.
5. Transfer the mixture to a bowl and stir in the baking powder until evenly distributed.
6. Press plastic wrap directly onto the surface of the dough and refrigerate for at least 1 hour to firm up.
7. Heat the canola oil in a deep pot to 350 degrees Fahrenheit.
8. Form the chilled dough into 18 small balls using your hands or a falafel scoop.
9. Carefully drop the balls into the hot oil and fry for 4 minutes until deeply golden brown.
10. Remove the cooked falafel to a wire rack set over a baking sheet to drain.
11. Whisk the tahini, warm water, lemon juice, minced garlic, and salt together in a small bowl until smooth and creamy.
12. Serve the hot falafel with the tahini sauce.
Notes
Store in the refrigerator for up to 4 days or freezer for up to 3 months. Reheat at 350 degrees Fahrenheit for 10 minutes to restore the crunch.
Do not substitute canned chickpeas for dried chickpeas, as the excess moisture will cause the patties to fall apart in the oil.
You can bake these instead of frying by brushing them with oil and baking at 400 degrees Fahrenheit for 20 minutes, flipping halfway.
The uncooked dough can be frozen for up to 3 months. Fry directly from frozen, adding one minute to the cooking time.
- Prep Time: 38 min
- Rest Time: 480 min
- Cook Time: 15 min
- Category: Main Course
- Method: Stovetop
- Cuisine: Mediterranean
Nutrition
- Serving Size: 3 falafel balls
- Calories: 180 kcal
- Sugar: 2 g
- Sodium: 410 mg
- Fat: 11 g
- Saturated Fat: 1 g
- Unsaturated Fat: 10 g
- Trans Fat: 0 g
- Carbohydrates: 16 g
- Fiber: 4 g
- Protein: 5 g
- Cholesterol: 0 mg
Building flavor: herbs, aromatics, and spices
Once your soaked chickpeas are ready, the next step is building the flavor profile. The chickpea is only the starting point. What really matters is the sheer volume of fresh herbs and aromatics that get folded into the mix. You want a high ratio of greens to chickpeas. This is what gives the interior that brilliant, bright green color and a fresh, grassy flavor that cuts through the richness of the frying oil.
You will need a large bunch of fresh parsley and a similarly sized bunch of fresh cilantro. Use the stems and the leaves. The stems hold a lot of moisture and flavor, and they will break down completely in the food processor. Roughly chop the herbs before adding them to the bowl to prevent them from wrapping around the blade. Along with the herbs, you need a generous amount of garlic and a chunk of yellow onion. The onion provides sweetness and bulk, while the garlic delivers a sharp, savory bite.
The spices are simple but specific. Ground cumin and ground coriander are the traditional backbone of this recipe. Toasting them briefly in a dry skillet until they become fragrant will wake up their essential oils and add a layer of depth to the raw dough. A generous pinch of salt and freshly cracked black pepper round out the seasoning. Some recipes call for a pinch of cayenne or red pepper flakes, but I prefer to let the herbs and garlic lead.
When you process the mixture, you are looking for a specific consistency. You do not want a smooth paste. You want a textured, sandy crumb that holds together when you squeeze a handful of it. Over-processing will release too much starch and make the dough gummy. Pulse the chickpeas alone first to break them down into small pebbles. Then add the herbs, onion, garlic, and spices, and pulse again until everything is finely minced and evenly distributed. I often serve these crispy bites alongside a batch of our smothered okra and shrimp recipe for a Southern and Middle Eastern fusion spread.
The binding agent and frying technique
After processing, your mixture will look like coarse wet sand. To make sure it holds together during frying, you need a binding agent. The secret is baking powder. One teaspoon of baking powder, stirred into the processed mixture, creates thousands of microscopic air bubbles when it hits the hot oil. This is what makes the interior of the falafel light and airy rather than dense and heavy. The baking powder also helps the exterior crisp up by promoting rapid browning.
Once you add the baking powder, let the mixture rest. Transfer the dough to a bowl, press plastic wrap directly against the surface, and refrigerate it for at least an hour. This resting period matters more than you might think. It allows the starches in the chickpeas to relax and absorb the moisture from the onion and herbs. The dough will firm up considerably in the refrigerator. If you skip this step, your patties will likely fall apart in the fryer because they will be too soft and wet to hold their shape.
When you are ready to fry, use a deep, heavy-bottomed pot and fill it with two inches of a neutral oil, like canola or grapeseed. You need the oil to be exactly 350 degrees Fahrenheit. Use a candy thermometer to monitor the temperature. If the oil is too cool, the falafel will absorb too much grease and become heavy. If the oil is too hot, the outside will burn before the inside cooks through. Form the dough into balls or patties using a falafel scoop or your hands. Drop them carefully into the oil and fry for about four minutes, turning them occasionally, until they are deeply golden brown on all sides.
The sound of the frying oil is a good indicator of success. You want a steady, vigorous sizzle. If the oil bubbles aggressively and splatters, your dough might be too wet. If there is no sizzle, the oil is not hot enough. Remove the cooked falafel to a wire rack set over a baking sheet. Do not place them on paper towels. Paper towels trap steam and will make the bottom crust soggy. A wire rack allows air to circulate, keeping the entire surface crisp while you finish frying the remaining batches.
Serving suggestions: tahini sauce and beyond
A perfectly fried falafel needs an equally excellent sauce. The classic pairing is a simple tahini sauce. Tahini is a paste made from toasted, ground sesame seeds. It is rich, nutty, and slightly bitter, which balances the herbal flavors of the chickpea mixture perfectly. To make the sauce, whisk tahini with warm water, fresh lemon juice, minced garlic, and a pinch of salt. The tahini will seize up and look thick and grainy at first. Keep whisking and adding water until it transforms into a smooth, pourable, creamy white sauce. It should be thick enough to coat the back of a spoon but thin enough to drizzle.
You can serve these crispy bites in several ways. The most traditional method is stuffing them into warm pita bread with shredded lettuce, diced tomatoes, and a generous drizzle of the tahini sauce. A simple tomato and cucumber salad dressed with lemon juice and olive oil makes a refreshing side dish. You can also serve them as part of a larger mezze platter with hummus, olives, and feta cheese. If you are looking for a lighter option, serve them over a bed of mixed greens with roasted vegetables. They pair well with the charred flavors from our roasting okra recipe for a vegetarian meal that actually fills you up.
Another fantastic topping is quick pickled red onions recipe. The sharp acidity and bright pink color of the pickled onions cut through the richness of the fried chickpeas and add a nice crunch. If you want to add some heat, a spoonful of pico de gallo recipes authentic brings a bright, acidic kick that complements the earthy cumin and coriander. For a different texture, you could serve them alongside the crispy coconut shrimp recipe for a Mediterranean and tropical fusion dinner. What matters is offering a variety of textures and temperatures. The contrast between the hot, crisp falafel and the cool, creamy sauces is what makes this dish so satisfying.
Frequently asked questions
What exactly is falafel made of?
Falafel is made from soaked dried chickpeas, fresh herbs like parsley and cilantro, onions, garlic, and warm spices such as cumin and coriander. The mixture is ground into a textured dough, formed into balls or patties, and then deep fried until crisp. It never uses flour or eggs as a base.
Are falafels healthy to eat?
Falafel is a highly nutritious food. Chickpeas provide a strong source of plant based protein and dietary fiber. The herbs add vitamins and antioxidants. However, traditional falafel is deep fried, which increases the fat content. You can bake or air fry the patties for a lower fat alternative while keeping the flavors intact.
Is falafel Israeli or Arab?
Falafel has deep roots in Egyptian and broader Middle Eastern cuisine. It originated as a street food in Egypt using fava beans before spreading throughout the Levant, where chickpeas became the primary ingredient. It is a shared regional dish enjoyed widely across Arab countries and Israel.
Can I make falafel with canned chickpeas?
It is strongly discouraged to use canned chickpeas for this recipe. Canned chickpeas are already fully cooked and hold too much moisture, which results in a gummy, dense texture. You need dried chickpeas that have been soaked but remain raw to achieve the signature light and fluffy interior.
Conclusion
Once you get the hang of this recipe, it becomes one of those things you cook again and again. Soaked dried chickpeas, a massive dose of fresh herbs, and a simple pinch of baking powder are all it takes to eliminate the common pitfalls of soggy centers and crumbling dough. The result is a deeply crisp shell with a steaming, bright green interior that tastes like the best street food you have ever had.
Give this recipe a try this week. Set the chickpeas to soak overnight, and take your time with the process. The reward is a platter of golden, crunchy falafel that will disappear faster than you can fry it.
For more recipes like this one, follow us on Facebook and Pinterest for weeknight dinner ideas.
More recipes in this series: