That grainy, lumpy texture in your sweet potato pie recipe comes from one common shortcut: boiling the potatoes instead of roasting them. I made that mistake for years. Skipping it transforms everything.
This version ditches the fussy steps for a genuinely silky custard filling. It’s all about how you treat the potatoes and when you add your butter.
Here you’ll get my exact roasting method, why evaporated milk is non-negotiable, and how to know if you need to blind bake your crust. Let’s make a pie.
Table of Contents

Table of Contents
Why You’ll Love This Sweet Potato Pie
This sweet potato pie recipe works because it’s simple. You get a silky custard filling without any special equipment or fussy techniques. The first time I tried roasting instead of boiling, the texture difference was immediate, no more grainy, waterlogged filling. The result is a pie that’s spiced, not overly sweet, with a texture that holds a perfect slice. You’ll love it because:
- It uses a straightforward roasting method for deep flavor.
- The filling comes together in minutes with a whisk or food processor.
- It gives clear guidance on whether you need to blind bake your crust.

A Truly Easy Sweet Potato Pie Recipe with a Silky Custard Filling
- Total Time: 4 hours 3 min
- Yield: 8 servings 1x
- Diet: Vegetarian
Description
This sweet potato pie recipe uses roasted sweet potatoes for a deep, caramel-like flavor and evaporated milk for a perfectly set, silky custard filling. It’s spiced with cinnamon, nutmeg, and ginger for a classic, comforting dessert. Nutrition values are calculated using 1 cup brown sugar and 3 eggs.
Ingredients
For the roasted sweet potatoes:
2 lbs (about 900g) orange-fleshed sweet potatoes
For the pie crust:
1 9-inch pie crust, homemade or store-bought
For the custard filling:
3/4 to 1 cup (150-200g) packed light brown sugar
1 cup (240ml) evaporated milk
2–3 large eggs, room temperature
4–5 tablespoons (57-71g) unsalted butter, melted
1 teaspoon pure vanilla extract
1 teaspoon ground cinnamon
1/2 teaspoon ground nutmeg
1/4 teaspoon ground ginger
1/4 teaspoon salt
Instructions
1. Preheat oven to 400°F (200°C). Pierce sweet potatoes all over with a fork and place directly on the oven rack. Roast for 45-60 minutes, until fork-tender and internal temperature reaches 195°F (90°C). Let cool, then peel.
2. Place pie crust in a 9-inch dish. Crimp edges and chill in the freezer for 15 minutes.
3. To blind bake a store-bought crust: Line chilled crust with parchment, fill with pie weights, and bake at 375°F (190°C) for 15 minutes. Remove weights and parchment, bake for 5-8 more minutes until bottom looks dry.
4. Add peeled sweet potato flesh to a large bowl or food processor. Mash or pulse until completely smooth.
5. Whisk in brown sugar, cinnamon, nutmeg, ginger, and salt. Whisk in eggs one at a time, then evaporated milk, melted butter, and vanilla extract. Mix until smooth.
6. Reduce oven temperature to 350°F (175°C). Pour filling into prepared crust. Gently tap pan on counter to release air bubbles.
7. Bake on center rack for 50-60 minutes. The edges should be set and the center should have a slight, 3-inch wobble.
8. Let pie cool completely on a wire rack for at least 2 hours before slicing.
Notes
Store in the refrigerator for up to 4 days or freezer for up to 3 months. Reheat at 350°F for 15 minutes.
Use room-temperature eggs for a smoother custard.
For an ultra-silky filling, blend the sweet potato puree in a food processor.
Tent the crust edges with foil if they brown too quickly during baking.
The pie is done when the center jiggles like set gelatin; it will firm up as it cools.
Nutrition values calculated using 1 cup brown sugar and 3 eggs (higher end of both ranges).
- Prep Time: 28 min
- Cook Time: 95 min
- Category: Dessert
- Method: Baking
- Cuisine: American
Nutrition
- Serving Size: 1 slice
- Calories: 350 kcal
- Sugar: 28 g
- Sodium: 220 mg
- Fat: 16 g
- Saturated Fat: 8 g
- Unsaturated Fat: 8 g
- Trans Fat: 0 g
- Carbohydrates: 45 g
- Fiber: 3 g
- Protein: 5 g
- Cholesterol: 75 mg
Sweet Potato Pie vs. Pumpkin Pie
They look similar in the pie case, but that’s where the similarities end. The difference is in the main ingredient. Sweet potato pie is made from roasted, orange-fleshed sweet potatoes. Pumpkin pie uses canned pumpkin puree. This gives them completely different personalities.
Sweet potato pie has a naturally richer, almost caramel-like sweetness. The texture is denser and more velvety. Pumpkin pie is lighter and, frankly, can taste a bit vegetal if you get a bad can. The spice profiles differ, too. My classic sweet potato pie recipe leans hard on cinnamon and nutmeg, with a hint of ginger. Pumpkin pie often includes cloves or allspice, which can overpower the more delicate sweet potato.
Think of it this way: sweet potato pie is the humble, deeply flavorful Southern dessert. Pumpkin pie is the classic New England icon. Both are Thanksgiving staples, but they’re not interchangeable. If you have extra sweet potatoes, try turning them into a sweet potato creme brulee recipe for another elegant dessert.
| Feature | Sweet Potato Pie | Pumpkin Pie |
| Main Ingredient | Fresh, roasted sweet potatoes | Canned pumpkin puree |
| Texture | Dense, velvety, custardy | Lighter, softer set |
| Flavor Profile | Caramel-like, earthy sweetness | Milder, sometimes vegetal |
| Common Spices | Cinnamon, nutmeg, ginger | Cinnamon, ginger, cloves, allspice |
Why Roasting Sweet Potatoes Matters
Boiling is the number one reason for a watery, bland filling, and the shortcut I mentioned above. It dilutes the potato’s natural sugars and starches. Roasting, however, concentrates everything. The dry heat caramelizes the sugars in orange-fleshed sweet potatoes, giving you a deeper, more complex flavor base for your pie.
It also solves the texture problem. Boiling makes potatoes waterlogged. You then have to add more thickeners, which can lead to a gluey feel. Roasted sweet potatoes have less excess moisture, so your custard filling sets beautifully with just eggs and evaporation. You’re aiming for the potatoes to be fork-tender and reach an internal temperature of 195°F. This ensures they’ll blend into a perfectly smooth puree for your sweet potato pie.
Once roasted, the skins slip right off. Then you can mash the flesh by hand for a slightly rustic texture or blitz it in a food processor for absolute silkiness. This control is why roasting is non-negotiable. It’s the same principle that makes air fryer sweet potato fries so good: dry heat equals better flavor and texture.
Sweet Potato Pie Ingredients
Active Time: 28 minutes
Total Time: 4 hours 3 minutes
Yield: 8 servings
- 2 lbs (about 900g) orange-fleshed sweet potatoes
- 1 cup (240ml) evaporated milk
- 3/4 to 1 cup (150-200g) packed light brown sugar
- 2-3 large eggs
- 4-5 tablespoons (57-71g) unsalted butter, melted
- 1 teaspoon pure vanilla extract
- 1 teaspoon ground cinnamon
- 1/2 teaspoon ground nutmeg
- 1/4 teaspoon ground ginger
- 1/4 teaspoon salt
- 1 9-inch pie crust, homemade or store-bought
No brown sugar? Use an equal amount of granulated sugar and add 1 tablespoon of molasses. No evaporated milk? Whisk 2/3 cup of heavy cream with 1/3 cup of whole milk.
Key Ingredients & Substitutions
This sweet potato pie recipe balances moisture, fat, and spice. Use room-temperature eggs; they incorporate more smoothly into the custard filling than cold ones. The melted butter gets stirred into the warm sweet potato puree, which helps it blend seamlessly and prevents a greasy layer.
The sugar amount is flexible. Use 3/4 cup for a lightly sweet, spiced pie, or the full cup if you have a serious sweet tooth. Note that the nutrition values below are calculated using 1 cup brown sugar and 3 eggs, the higher end of both ranges. For the spices, I stick to cinnamon, nutmeg, and ginger. They complement the sweet potato without fighting it. If you’re out of a homemade pie crust, a quality store-bought one works perfectly. Just keep it chilled until you’re ready to fill it.
| Original | Substitute | Notes |
| Evaporated Milk | Half-and-Half | Same 1:1 swap, but pie may be slightly less firm. |
| Butter | Coconut Oil | Use 1/3 cup for a dairy-free version. |
| Brown Sugar | White Sugar + Molasses | For 1 cup brown sugar, use 1 cup white sugar + 1 tbsp molasses. |
Why Evaporated Milk Makes a Difference
Evaporated milk is the secret to the pie’s creamy, sliceable texture. It’s literally milk with about 60% of the water removed through evaporation. This means it adds rich dairy flavor and protein without dumping extra water into your custard filling.
More water is the enemy of a set custard. If you used regular milk or even heavy cream, you’d risk a filling that’s either runny or cracks as it bakes because the excess moisture has to escape. The concentrated nature of evaporated milk gives you a lush, silky result that holds its shape when sliced. It’s the one ingredient I never substitute in this classic sweet potato pie.
Best Sweet Potato Varieties for Pie
You want orange-fleshed sweet potatoes. Varieties like Beauregard, Jewel, and Red Garnet have the vibrant color and moist, sweet flesh that make the best pie. They roast into a smooth, creamy puree that’s perfect for your food processor or mixer.
Avoid white or purple sweet potatoes (like Japanese or Okinawan). They’re much starchier and drier, which can lead to a pasty, dense filling. For this recipe, the classic orange ones are non-negotiable. They have the right balance of sugar and moisture. Once you’ve roasted and mashed more than you need, use any extra in a candied sweet potatoes recipe for another festive side.
How to Make Sweet Potato Pie
This sweet potato pie recipe comes together in four clear steps. The key is treating each component with a little care. Follow these instructions for a pie with a flaky crust and a perfectly set, silky filling.
Step 1: Roast the Sweet Potatoes
- Preheat your oven to 400°F / 200°C.
- Pierce 2 lbs of orange-fleshed sweet potatoes all over with a fork. This lets steam escape.
- Place them directly on the oven rack or on a baking sheet. Roast for 45-60 minutes. You’ll know they’re done when a fork slides in easily and the internal temperature hits 195°F / 90°C.
- Let them cool until you can handle them. The skins will peel off easily with your fingers.
Watch Out: Don’t wrap them in foil. Roasting them naked is what concentrates their flavor and removes excess moisture, which is essential for your custard filling.
Step 2: Prepare the Pie Crust
- Place your 9-inch pie crust in its dish. Crimp or flute the edges.
- Chill it in the freezer for 15 minutes. This prevents shrinkage.
- Decide if you need to blind bake: Use a store-bought crust? Blind bake it. Use a homemade crust with a high-fat, short ingredient list? You can skip it.
- To blind bake, line the chilled crust with parchment, fill with pie weights, and bake at 375°F / 190°C for 15 minutes. Remove the weights and parchment, then bake for 5-8 more minutes until the bottom looks dry.
Chef’s Note: Blind baking a store-bought crust is non-negotiable. It gives it a head start, so the bottom doesn’t end up soggy under the wet filling.
Step 3: Make the Filling
- Add the peeled, warm sweet potato flesh to a large bowl or food processor.
- Mash thoroughly with a potato masher until smooth. For an ultra-silky texture, pulse in a food processor.
- Whisk in the brown sugar, cinnamon, nutmeg, ginger, and salt (quantities listed in the ingredient section above).
- Whisk in the eggs one at a time, followed by the evaporated milk, melted butter, and vanilla extract. Mix until it’s a completely smooth, pourable custard.
Quick Note: If you’re using a food processor, pulse just until combined. Over-mixing can incorporate too much air, which might cause bubbles or cracks during baking.
Step 4: Bake the Pie
- Reduce your oven temperature to 350°F / 175°C.
- Pour the filling into your prepared pie crust. Gently tap the pan on the counter to release air bubbles.
- Bake on the center rack for 50-60 minutes. Start checking at 50 minutes. The pie is done when the edges are set, but the center still has a slight, 3-inch wobble, like set gelatin.
- The crust should be golden brown. Let the pie cool completely on a wire rack for at least 2 hours before slicing. This patience is what gives you clean slices.
Pro Tip: If your crust edges are browning too fast, tent them with strips of foil or a pie crust shield about halfway through baking. The filling will continue to set as it cools.
Storage, Make-Ahead & Serving Ideas
Your pie is done, and you’ve waited the agonizing two hours for it to cool. Now, let’s talk about keeping it perfect and serving it up.
Make-Ahead Tips
You can tackle this sweet potato pie recipe in stages to save time on the day of serving. Roast your orange-fleshed sweet potatoes up to two days ahead, peel them, mash the flesh, and store it covered in the fridge. When you’re ready to bake, let the puree come to room temperature before making the filling, as this helps everything blend smoothly. You can also blind bake your pie crust a day in advance; once cooled, wrap it well and keep it at room temperature. Assemble and bake the filled pie up to one day before you need it, then store it in the fridge overnight. It will taste even better after resting.
How to Store Sweet Potato Pie
Once it’s completely cool, cover the pie tightly with plastic wrap or slide it into a large airtight container. Store it in the refrigerator for up to 4 days. The cold keeps the custard filling safe and firm. That flaky pie crust will start to soften a bit after day two, but it’s still delicious. If you notice any liquid beading on the surface, just blot it gently with a paper towel.
To reheat a whole pie, cover it loosely with foil and warm it in a 350°F oven for about 15 minutes, just until the filling is warm to the touch. For a single slice, 30 seconds in the microwave does the trick, though the crust will soften.
Can You Freeze Sweet Potato Pie?
Absolutely. Freezing is the best move for making this a true make-ahead Thanksgiving dessert. Let the baked pie cool completely first. Then, wrap the whole pie (plate and all) tightly in plastic wrap, followed by a layer of heavy-duty aluminum foil. Label it with the date. Freeze for up to 3 months. To thaw, transfer it to the refrigerator and let it sit overnight. Avoid freezing individual slices; the custard can weep, and the crust gets soggy.
Serving Suggestions
This classic sweet potato pie is fantastic all on its own. But if you want to dress it up, here are a few simple ideas:
- A dollop of barely-sweetened whipped cream is the classic pairing.
- For a Southern twist, try a sprinkle of toasted pecans over the top.
- A drizzle of salted caramel sauce plays up the natural sweetness.
- For a fun, festive flair, top with mini toasted marshmallows.
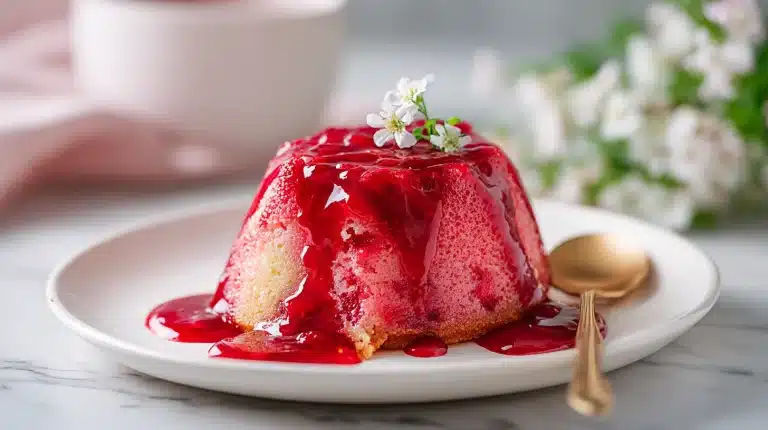
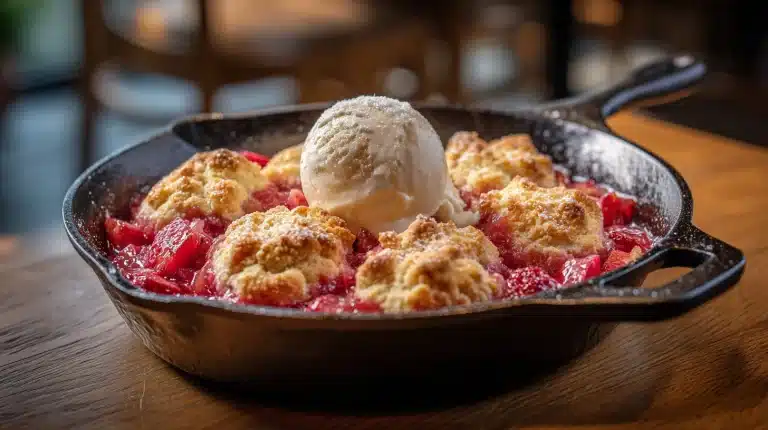
- A scoop of vanilla ice cream melting into a warm slice is pure comfort.
If you’re looking for another elegant holiday dessert, the sweet potato creme brulee recipe is a stunning follow-up to this pie.
Troubleshooting
Even with the best plans, sometimes things happen. Here’s a quick fix-it guide.
| Problem | Solution |
| Runny filling that won’t set | You likely had too much moisture. Always roast (don’t boil) your potatoes, and ensure your evaporated milk is the only liquid added. The pie must cool for a full 2 hours to set properly. |
| Lumpy filling | Make sure your roasted sweet potatoes are fork-tender. Use a food processor and scrape down the sides every 30 seconds for a perfectly smooth puree before adding other ingredients. |
| Soggy bottom crust | This is almost always a blind-baking issue. If using a store-bought crust, blind bake it with pie weights until the bottom looks dry. A properly pre-baked crust creates a barrier against the wet custard filling. |
Your Sweet Potato Pie Recipe Questions, Answered
Can You Make Sweet Potato Pie Ahead of Time?
Yes, see the Make-Ahead Tips section above for full details. In short: roast and mash the sweet potatoes up to two days ahead, blind bake your pie crust a day in advance, then assemble and bake the whole pie the day before serving. It will taste even better after resting overnight in the refrigerator.
Can You Freeze Sweet Potato Pie?
Yes. Wrap the fully baked and cooled pie tightly in plastic wrap, then foil, and freeze for up to 3 months. Thaw overnight in the refrigerator. Avoid freezing individual slices, as the custard filling can separate and become watery. See the full freezing instructions in the Storage section above.
Should I Blind Bake The Pie Crust?
It depends on your crust. For a store-bought crust, blind baking is essential to avoid a soggy bottom. Use pie weights at 375°F for 15 minutes, then bake 5-8 more minutes until dry. A sturdy homemade butter crust can often go straight in with the filling.
Can I Use Canned Sweet Potatoes?
I don’t recommend it. Canned sweet potatoes are packed in syrup or water, making them too wet and often overly sweet for this recipe. Roasting fresh potatoes concentrates their flavor and removes excess moisture, which is critical for a silky, properly-set filling with brown sugar and evaporated milk.
This sweet potato pie recipe is genuinely easy. Remember to roast the potatoes for flavor and skip the blind bake if your crust is homemade. That silky texture comes from blending the warm puree with melted butter and evaporated milk.
I always make the filling in my food processor now. It takes two minutes and guarantees no lumps. Give it a try this weekend, it’s simpler than it looks.
Do you top your slice with whipped cream, ice cream, or something else entirely?
For more recipes like the sweet potato pie recipe, follow us on Facebook and Pinterest for classic dessert recipes and holiday baking inspiration.