Protein ice cream was the thing I made every Sunday last summer, mostly because I couldn’t convince myself that a chalky protein shake counted as dessert.
 23")
Most high-protein frozen treats turn out grainy, icy, or so dense they could double as a hockey puck. This recipe fixes that with a ratio of frozen banana, Greek yogurt, and protein powder that churns into something genuinely scoopable.
We’ll get into why that ratio matters, how to get a silky texture without a Ninja Creami, and the exact chocolate variation that honestly tastes better than the vanilla base.
Table of Contents
Why This Protein Ice Cream Actually Works (The Science Behind the Creaminess)
A lot of homemade protein powder ice cream recipes fail for one specific reason: protein powder is hydrophilic. It pulls in water, and water, when frozen, forms large ice crystals. Those crystals give you that unpleasant, granular bite instead of the smooth, creamy scoop you want.
The fix isn’t complicated, but it requires understanding what each ingredient actually does in the bowl.
Frozen Bananas Are Your Fat Substitute
Frozen bananas do heavy lifting here. When blended from fully frozen, their cell walls break down and release a natural emulsion of starch, pectin, and sugar that mimics the mouthfeel of butterfat. That’s why banana nice cream protein recipes work so well without any dairy at all. The riper the banana, the more pectin, and the smoother your result.
Use bananas that are well-spotted, almost overripe. Peel them, slice them into coins, and freeze them flat on a lined sheet pan before transferring to a bag. This prevents one solid, impossible-to-blend banana brick.
Greek Yogurt Adds Creaminess and Protein
Full-fat Greek yogurt (2% or 5% fat) contributes two things: a tangy depth that keeps the ice cream from tasting one-dimensionally sweet, and a fat content that coats ice crystals and keeps them small. You’ll also get an extra 8 to 10 grams of protein per half-cup serving, which stacks nicely on top of your protein powder contribution.
For a dairy-free version, coconut cream yogurt is the closest substitute. It has a similar fat percentage and blends to a comparable texture.
Choosing the Right Protein Powder
Unflavored whey protein is the most forgiving option. It has a neutral taste and mixes cleanly into the base. Vanilla-flavored whey, like Truvani protein or a clean-label brand without artificial sweeteners, also works well and adds natural sweetness that lets you reduce or skip added sugar entirely.
Plant-based protein blends (pea and rice combinations) are usable, but they tend to freeze harder. If you’re going plant-based, add one tablespoon of nut butter to the base. The fat prevents the mixture from setting into a solid, unworkable block.
The ratio that works consistently: one scoop (approximately 30 grams) of protein powder per two servings. More than that and the powder overwhelms the emulsifying ingredients, sending you straight back to hockey puck territory.
For another high-protein treat using a similar yogurt-forward approach, the high protein yogurt bowl on Forkful Daily uses the same building-block logic.
Print 22")
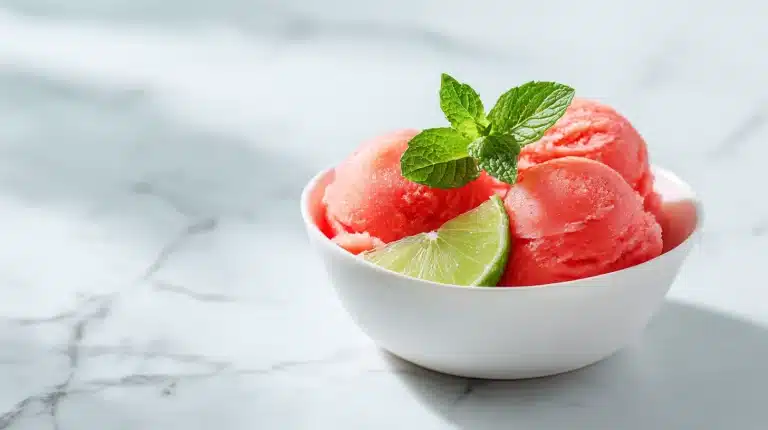
Protein Ice Cream That’s Actually Creamy (Not Icy or Crumbly)
- Total Time: 1455 min
- Yield: 2 servings 1x
- Diet: Gluten Free
Description
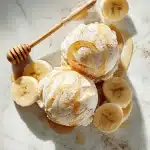
A creamy, scoopable frozen dessert made with frozen bananas, Greek yogurt, and protein powder. It delivers around 22 grams of protein per serving with a smooth texture that doesn’t turn icy or crumbly when done correctly. Works with a food processor or a Ninja Creami.
Ingredients
For the vanilla base:
2 large frozen bananas (peeled, sliced into coins, frozen flat overnight)
1 scoop (30 g) vanilla or unflavored whey protein powder
1/3 cup full-fat Greek yogurt (2% or 5% fat)
3 tablespoons Fairlife milk or any dairy or plant-based milk
1 teaspoon vanilla extract
1 pinch fine sea salt
Optional add-ins:
1 tablespoon almond butter or peanut butter (for extra creaminess and richness)
1 tablespoon honey or maple syrup (only if protein powder is unsweetened)
For the chocolate version (replaces vanilla base flavoring):
1 scoop chocolate protein powder (in place of vanilla)
1 tablespoon Dutch-process cocoa powder
1 tablespoon almond butter
Instructions
1. Freeze the bananas: Peel and slice bananas into 1/2-inch coins. Arrange in a single layer on a parchment-lined baking sheet and freeze for at least 6 hours or overnight until completely solid.
2. Combine ingredients: Add the frozen banana coins, protein powder, Greek yogurt, milk, vanilla extract, and salt to a food processor or high-speed blender. If using nut butter or sweetener, add it now.
3. Blend until smooth: Process on high, stopping to scrape down the sides every 30 seconds. Blend for 3 to 4 minutes total until the mixture is pale, thick, and completely smooth with no banana chunks remaining. It will smell lightly sweet and creamy.
4. Check consistency: The mixture should look like thick, glossy soft-serve. If it feels grainy, blend for 1 more minute. If it is too thick to move in the processor, add 1 additional tablespoon of milk and pulse briefly.
5. Freeze for scooping (no-churn method): Transfer the blended base into a standard loaf pan. Press a sheet of plastic wrap directly against the surface of the mixture, covering every edge with no air gaps. Freeze for 4 to 6 hours until firm enough to scoop.
6. (Ninja Creami method, optional): Instead of the loaf pan, pour the blended base into the Ninja Creami pint container, filling to the max line. Freeze flat for 24 hours until completely solid, then process on the ‘lite ice cream’ or ‘ice cream’ setting. If the result is crumbly, add 1 tablespoon of milk and use the re-spin function once.
7. Serve: Remove from the freezer and let the container sit at room temperature for 8 to 12 minutes until the edges loosen slightly. Run an ice cream scoop under hot water, dry it quickly, and scoop into bowls. The ice cream should feel cold and dense but yield cleanly to the scoop.
8. Garnish and eat: Top with sliced fresh banana, a drizzle of nut butter, or mini chocolate chips. Return any remaining ice cream to the freezer immediately with the plastic wrap pressed back against the surface.
Notes
Store in an airtight container in the freezer for up to 2 weeks. Press plastic wrap directly against the surface before sealing to prevent ice crystal formation. Do not store in the refrigerator.
If your ice cream is crumbly after spinning in the Ninja Creami, add 1 tablespoon of milk directly to the pint and use the re-spin function. Do not skip this step.
For a dairy-free version, use coconut cream yogurt and your preferred plant-based milk. Add 1 tablespoon of nut butter to compensate for the lower fat content and prevent hard freezing.
Bananas must be well-spotted and ripe before freezing. Under-ripe bananas are starchier and produce a less sweet, slightly gummy base.
Protein powder brand matters. Avoid powders sweetened with sucralose or acesulfame potassium as these can taste bitter when frozen. A naturally sweetened vanilla whey or a monk-fruit-sweetened powder works best.
- Prep Time: 15 min
- Rest Time: 1440 min
- Cook Time: 0 min
- Category: Dessert
- Method: No-Cook
- Cuisine: American
Nutrition
- Serving Size: 1 cup
- Calories: 210 kcal
- Sugar: 14 g
- Sodium: 115 mg
- Fat: 3 g
- Saturated Fat: 1 g
- Unsaturated Fat: 2 g
- Trans Fat: 0 g
- Carbohydrates: 28 g
- Fiber: 2 g
- Protein: 22 g
- Cholesterol: 25 mg
Ingredients, Equipment, and the Two Methods That Work
You don’t need a Ninja Creami to make excellent homemade protein ice cream, but you do need to understand what each method can and can’t do.
What You Need
The base ingredients:
- 2 large frozen bananas (sliced and frozen overnight)
- 1 scoop (30 g) vanilla or unflavored whey protein powder
- 3 tablespoons Fairlife milk or any dairy or plant-based milk
- 1/3 cup full-fat Greek yogurt
- 1 teaspoon vanilla extract or a small amount of vanilla bean paste for a stronger, more complex flavor
- Pinch of fine sea salt
For the chocolate version: swap vanilla protein powder for chocolate protein powder and add 1 tablespoon of cocoa powder. The cocoa deepens the chocolate flavor beyond what the powder alone provides.
Optional richness add-ins:
- 1 tablespoon almond butter or peanut butter (adds fat and prevents hard freezing)
- 1 tablespoon honey or maple syrup (if your protein powder isn’t sweetened)
Method 1: Food Processor or High-Speed Blender
This is the no-churn protein ice cream method. Add all ingredients to a food processor and blend on high, stopping to scrape down the sides every 30 seconds. It takes about 3 to 4 minutes of total blending to go from chunky to smooth.
The texture at this point is soft-serve. You can eat it immediately for a softer result, or transfer it to a loaf pan, press plastic wrap directly against the surface (this prevents ice crystals from forming on top), and freeze for 4 to 6 hours until scoopable.
The direct-surface plastic wrap step matters more than most recipes admit. Air contact is what causes the top layer to freeze unevenly and crack.
Method 2: Ninja Creami
Pour your blended base into the Ninja Creami pint container and freeze it flat for a full 24 hours. The base must be completely, evenly solid. Then process it on the “lite ice cream” or “ice cream” setting.
If the result is crumbly after the first spin, that’s normal. Add one tablespoon of milk directly to the pint and use the re-spin function once. The re-spin is the step most people skip, and it’s the difference between a dry, sandy texture and something genuinely creamy.
The Chocolate Variation and Flavor Combinations Worth Trying
The vanilla base is the canvas. Here’s how to take it somewhere more interesting.
Classic Chocolate Protein Ice Cream
Replace vanilla whey with chocolate protein powder and add 1 tablespoon of Dutch-process cocoa powder. The Dutch-process cocoa has a smoother, less acidic flavor than natural cocoa, which pairs better with the tanginess of Greek yogurt.
Add a tablespoon of almond butter to this version. It adds a subtle, roasted depth and keeps the chocolate base from freezing too hard if you’re using plant-based protein.
The texture of the chocolate version is noticeably denser than the vanilla. That’s partly because cocoa powder absorbs liquid. If your chocolate batch feels too thick before freezing, add an extra tablespoon of milk and pulse once more.
Peanut Butter Banana Protein Ice Cream
Keep the vanilla base and add 2 tablespoons of peanut butter and a small drizzle of honey. The peanut butter fat content genuinely transforms the mouthfeel. This version scoops cleanly straight from the freezer without the 5-minute counter-thaw wait that the leaner vanilla base sometimes needs.
For a drinkable version of this flavor combination, the whey protein smoothie with banana and peanut butter uses the same trio in a quick blend format that works on busy mornings.
Matcha Vanilla Protein Ice Cream
Add 1 teaspoon of culinary-grade matcha powder to the vanilla base. Matcha is slightly bitter and earthy, which cuts through the sweetness of the banana and balances the protein powder’s aftertaste. Use unflavored whey here rather than vanilla-flavored powder, since layering two strong flavors gets murky.
Coffee Protein Ice Cream
Swap the plain milk for cold brew concentrate (about 2 tablespoons, plus 1 tablespoon of regular milk to hit the total liquid volume). The coffee flavor amplifies the protein powder’s natural toasty notes and makes this feel like a frozen mocha. Let the frozen base sit on the counter for 8 minutes before scooping. Coffee variations freeze slightly harder than the plain base because of the lower fat content.
Mix-In Ideas
Stir these in by hand after blending, before the final freeze:
- Mini chocolate chips (they stay crunchy and add textural contrast)
- Crushed graham crackers (add right before serving so they don’t go soggy)
- Toasted coconut flakes
- A swirl of nut butter pressed in with a knife before you cover and freeze
Storage, Serving Tips, and Getting the Texture Right Every Time
Homemade protein ice cream doesn’t behave exactly like commercial ice cream, and knowing why makes you a better troubleshooter in the kitchen.
Why It Gets Hard in the Freezer
Commercial ice cream stays scoopable because it contains stabilizers (guar gum, carrageenan) and a much higher fat percentage than any home recipe can replicate without heavy cream. Your protein ice cream base is leaner, so it will freeze harder.
The practical fix: pull the container from the freezer and let it rest on the counter for 8 to 12 minutes before scooping. If you used nut butter in your base, that time drops to about 5 minutes because the fat keeps the mixture slightly more flexible.
A warm ice cream scoop (run it under hot water and dry quickly) also makes cleaner, rounder scoops from a hard-frozen base.
Storage Timeline
- Counter-thaw method: Leave at room temperature for 8 to 12 minutes, scoop, and return the remainder to the freezer immediately.
- Refrigerator: Do not store this in the fridge. It will melt and re-freeze with large ice crystals and a watery texture.
- Freezer shelf life: Up to 2 weeks in an airtight container with plastic wrap pressed directly against the surface. After 2 weeks, ice crystal formation becomes noticeable even with proper covering.
Serving Suggestions
Protein ice cream works beautifully in a bowl topped with sliced fresh banana, a drizzle of almond butter, and a few chocolate chips. For a parfait-style presentation, layer it with granola and berries, similar to the layering approach in a greek yogurt parfait recipe, which uses the same textural contrast of creamy base against crunchy toppings.
Nutrition at a Glance
Here’s an approximate breakdown for the vanilla base recipe (per serving, with Greek yogurt and whey protein):
| Nutrient | Per Serving |
|---|---|
| Calories | 210 kcal |
| Protein | 22 g |
| Carbohydrates | 28 g |
| Fat | 3 g |
| Fiber | 2 g |
| Sugar | 14 g |
Numbers will shift depending on your protein powder brand and whether you add nut butter. Using Fairlife milk instead of regular milk adds roughly 4 additional grams of protein per serving with no change in calories.
If you want to keep the carbohydrates lower, the low carb vanilla protein jello recipe offers a similar creamy, cold dessert experience with significantly fewer carbs from fruit.
Frequently Asked Questions
Can I use vanilla protein powder?
Yes, and it’s actually the easiest option for beginners. Vanilla protein powder brings its own sweetness and flavor, which means you can use less (or no) added sweetener in the base. Just check the ingredient list: protein powders with sucralose or acesulfame potassium can taste slightly chemical when frozen, so a naturally sweetened powder like Truvani or a monk-fruit-sweetened whey tends to produce a cleaner final flavor.
Why is my ice cream crumbly after spinning?
Crumbly texture almost always means the base froze too dry, or the Ninja Creami processed it before it was completely solid. Add one tablespoon of milk directly into the center of the pint and use the re-spin function immediately. That added liquid and the second processing cycle breaks up the ice crystals and brings the mixture together into a smooth, cohesive scoop. Do not add more than one tablespoon, or the result will be too soft.
Do I need a Ninja Creami?
No. A food processor or a high-speed blender handles this recipe well using the no-churn method. The Ninja Creami does produce a slightly smoother result with more consistent texture across the whole pint, but the food processor method is genuinely good, especially if you eat the ice cream within the first 24 hours of freezing. The main tradeoff with the blender method is that texture can vary slightly between batches depending on how long you blend and how frozen your bananas are.
Can I make this without bananas?
Yes. Replace the two frozen bananas with 3/4 cup of frozen cauliflower florets and 2 tablespoons of nut butter. The cauliflower adds bulk and blends smoothly without a strong flavor, while the nut butter provides the fat content that bananas would normally contribute. Add an extra tablespoon of your preferred sweetener since cauliflower has none of the banana’s natural sugar. The texture is slightly less creamy than the banana version but still very scoopable, and the protein content per serving increases slightly since you’re removing a higher-carb ingredient.
Conclusion
The thing about protein ice cream is that it doesn’t ask you to compromise on the experience of eating ice cream. Done right, it’s cold, creamy, and satisfying in the same way a real scoop should be. The key is understanding which ingredients do the structural work (banana, yogurt, fat) and which ones threaten to ruin the texture when over-used (protein powder). Get that balance right and you get a dessert you’ll actually want to eat, not just tolerate.
Give this a try this week, especially the chocolate almond butter variation. It’s the one that disappears fastest in my kitchen.
For more recipes like protein ice cream, follow us on Facebook and Pinterest for high-protein dessert ideas and healthy frozen treat inspiration.