Garlic brown sugar green beans are the side dish that quietly steals the show at every dinner table. Once you try them, you won’t go back to plain steamed beans.
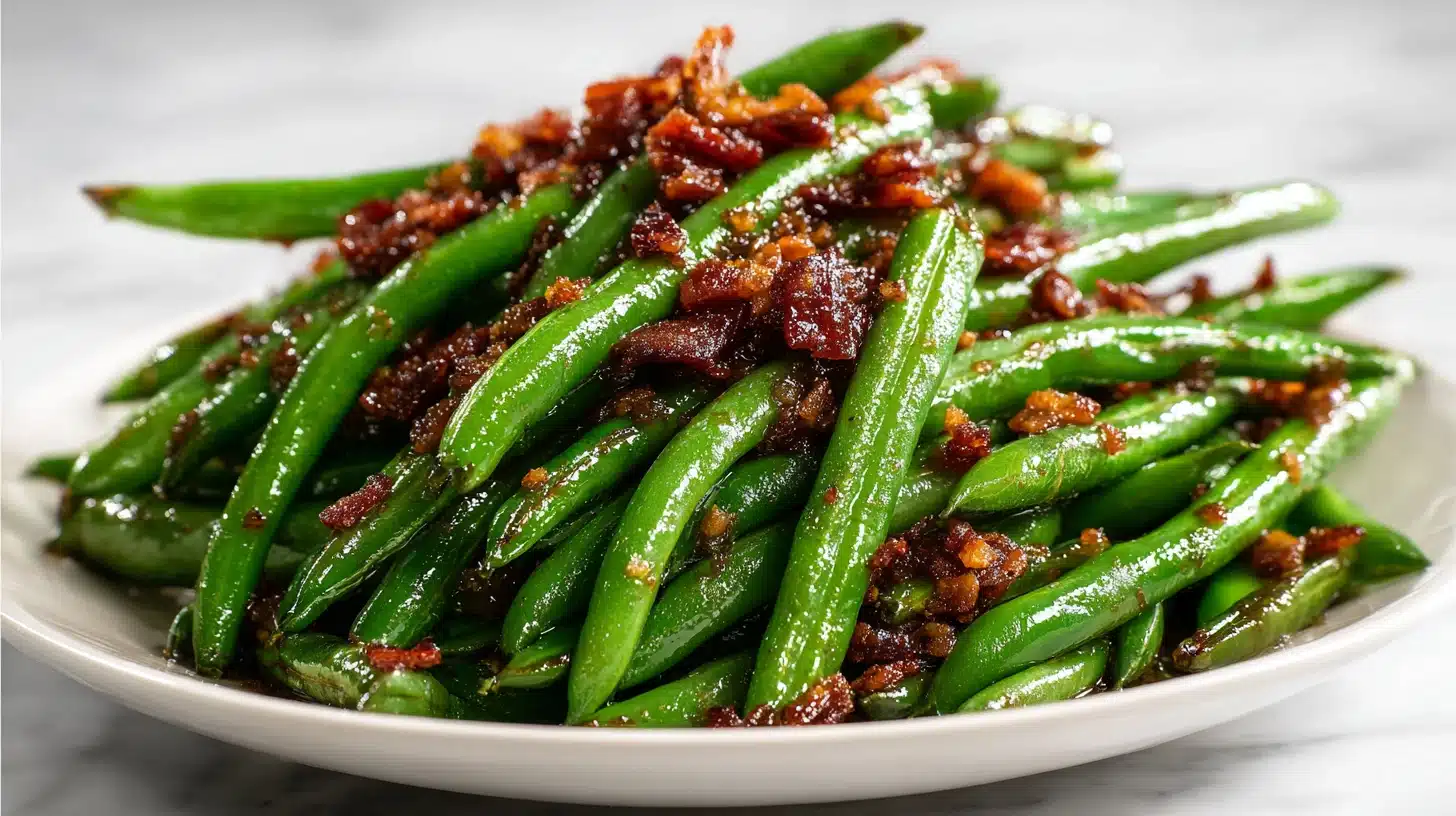
Most green bean recipes leave you with limp, waterlogged vegetables that taste like an afterthought. This recipe fixes that by using high heat and a caramelized glaze that coats every bean with something irresistible.
This guide covers exactly how to get that glossy, sticky finish without burning the sugar, which pan to use for the best results, and smart ways to adapt the recipe for holidays or weeknight dinners.
Table of Contents
Why This Recipe Works: The Science Behind the Glaze
Understanding why these garlic green beans with brown sugar taste so good makes you a better cook, not just someone who follows steps blindly. A few principles are at play here, and once you see them, you’ll spot them in other recipes too.
The Maillard Reaction vs. Caramelization
When brown sugar hits a hot pan, it doesn’t simply melt. It undergoes caramelization, breaking down into hundreds of flavor compounds that range from butterscotch and toffee notes to a subtle bitterness that keeps the sweetness from going flat. Meanwhile, the garlic browns slightly alongside the sugar, triggering the Maillard reaction and producing nutty, savory depth. These two processes happen simultaneously in your skillet, building a glaze that is layered and complex in a way that no bottled sauce can replicate.
High Heat Is Non-Negotiable
The single biggest mistake home cooks make with sautéed brown sugar green beans is using too low a heat. Low heat causes the sugar to liquefy slowly and then steam the beans instead of searing them. You end up with mushy, pale green beans swimming in a thin syrup. Crank the burner to medium-high, let the pan get genuinely hot before anything goes in, and you’ll hear that satisfying sizzle the moment the beans hit the surface. That sound is moisture evaporating fast, which is exactly what you want.
The Role of Butter
Butter does two things here. First, it carries the garlic’s flavor compounds and distributes them evenly across every bean. Second, as the water in the butter evaporates, the milk solids brown very slightly, adding another subtle layer of nuttiness to the glaze. You could use olive oil, but you’d lose that rounded, slightly creamy quality that makes these sweet and savory green beans so satisfying.
Salt as a Flavor Amplifier
A pinch of salt in a sweet glaze sounds counterintuitive, but salt suppresses bitterness and amplifies sweetness. It’s the same reason a good salted caramel tastes more intensely caramel-flavored than an unsalted one. Don’t skip it, and don’t be shy with it. A quarter teaspoon of kosher salt added at the end brings the whole dish into focus, the way turning up the contrast on a photograph makes every detail pop.
If you enjoy this approach to sweet and savory glazing, the same technique works beautifully in a garlic brown sugar pork tenderloin juicy glazed easy dinner, where the caramelized crust is the star of the entire plate.
Print
Garlic Brown Sugar Green Beans: Sweet, Savory, and Ready in 20 Minutes
- Total Time: 20 min
- Yield: 6 servings 1x
- Diet: Vegetarian
Description
Garlic brown sugar green beans are a quick sweet and savory side dish made in one skillet in just 20 minutes. Fresh green beans are seared over high heat then coated in a caramelized brown sugar and garlic glaze that is sticky, glossy, and full of flavor. This recipe works for busy weeknights and holiday dinners alike.
Ingredients
For the green beans:
1.5 lbs fresh green beans (trimmed and patted dry)
3 tablespoons unsalted butter
4 cloves garlic (minced finely)
3 tablespoons packed brown sugar (light or dark)
1 tablespoon soy sauce
1/4 teaspoon kosher salt
1/4 teaspoon black pepper
1/4 teaspoon red pepper flakes
Optional add-in:
3 strips bacon (chopped, cooked until crispy and crumbled for topping)
Instructions
1. Trim and dry the green beans. Trim the stem ends from all the green beans and wash them well. Spread them on a clean kitchen towel and pat them completely dry. Any moisture left on the beans will prevent searing and cause steaming instead.
2. Heat the pan. Place a large heavy skillet, cast iron or stainless steel, over medium-high heat. Add the butter and let it melt until it foams, about 1 to 2 minutes. The foam signals the water in the butter is evaporating and the pan is nearly hot enough.
3. Bloom the garlic. Add the minced garlic to the foaming butter and stir constantly for 30 to 45 seconds until it turns pale gold and smells fragrant and nutty. Do not let it turn dark brown or it will taste bitter.
4. Sear the green beans. Add the dry green beans to the pan in as close to a single layer as possible. Let them sit undisturbed for 2 minutes to build a light sear, then stir and let them sit again for 2 more minutes. Repeat once more for a total of about 6 minutes of searing.
5. Add the brown sugar and soy sauce. Sprinkle the brown sugar evenly over the beans and add the soy sauce. Toss everything quickly together. The sugar will melt within about 60 seconds into a shiny amber glaze that coats every bean.
6. Season and finish. Add the kosher salt, black pepper, and red pepper flakes. Toss once more to distribute evenly, then pull the pan off the heat immediately. The residual heat will finish the cooking without risking burnt sugar.
7. Taste and serve. Taste a bean and adjust salt if needed. For a touch of brightness, add a few drops of fresh lemon juice. Top with crumbled crispy bacon if using and serve immediately while the glaze is glossy and the beans still have a slight snap.
Notes
Store leftovers in an airtight container in the refrigerator for up to 3 days. Reheat in a hot skillet with a small piece of butter for 2 minutes rather than microwaving, which makes the beans soft and dulls the glaze.
For a bacon version, cook 3 strips of chopped bacon in the skillet first, remove them, then cook the beans in the rendered fat plus the butter. Crumble the bacon back over the top just before serving.
To make ahead for the holidays, blanch the trimmed green beans in boiling salted water for 3 minutes, then transfer to an ice bath immediately. Drain, dry, and refrigerate for up to 2 days. Finish with the glaze steps when ready to serve, reducing searing time by about 2 minutes.
Do not use canned green beans for this recipe. They are too soft and will not hold up to the high-heat sear needed to build the caramelized glaze.
- Prep Time: 5 min
- Cook Time: 15 min
- Category: Side Dishes
- Method: Stovetop
- Cuisine: American
Nutrition
- Serving Size: 1 cup
- Calories: 112 kcal
- Sugar: 9 g
- Sodium: 210 mg
- Fat: 6 g
- Saturated Fat: 4 g
- Unsaturated Fat: 2 g
- Trans Fat: 0 g
- Carbohydrates: 14 g
- Fiber: 3 g
- Protein: 2 g
- Cholesterol: 15 mg
Ingredients You Need and Smart Substitutions
One of the best things about garlic brown sugar green beans is how short the ingredient list is. You likely have everything already, and where you don’t, the substitutions are easy and the results are still excellent.
The Core Ingredient List
- 1.5 lbs fresh green beans (trimmed)
- 3 tablespoons unsalted butter
- 4 cloves garlic (minced finely)
- 3 tablespoons packed brown sugar (light or dark)
- 1/4 teaspoon kosher salt
- 1/4 teaspoon black pepper
- 1/4 teaspoon red pepper flakes (optional, but recommended)
- 1 tablespoon soy sauce (optional, for a deeper umami note)
Fresh vs. Frozen vs. Canned
Fresh green beans are the clear first choice here. They have a firm snap and a bright color that holds up to high-heat cooking without turning to mush. Frozen green beans can work if you thaw them completely and pat them very dry with paper towels before they go into the pan. Any residual water will lower the pan temperature dramatically and prevent proper caramelization. Canned green beans aren’t recommended for this recipe. They’re already fully cooked and too soft to handle the sear.
Brown Sugar: Light vs. Dark
Light brown sugar gives you a milder, more delicate sweetness that lets the garlic come forward. Dark brown sugar has a higher molasses content, which means a deeper, slightly smoky flavor and a glaze that looks almost lacquered once it sets. Both are delicious. Dark brown sugar is the better choice for a holiday table where you want maximum visual drama. Light brown sugar is what you want on a Tuesday night when you need something that tastes special without demanding attention.
The Bacon Variation
For brown sugar green beans with bacon, cook two or three strips of chopped bacon in the skillet first, remove them, and cook the beans in the rendered fat along with the butter. Crumble the bacon back over the top just before serving. The smokiness of the bacon weaves through every bite and transforms this from a quick weeknight side into something that belongs on a holiday spread alongside the green bean casserole for a full green bean moment.
Other Swaps Worth Knowing
- No fresh garlic? Use 1 teaspoon of garlic powder, added to the pan with the sugar rather than before it, so it doesn’t scorch.
- Dairy-free? Substitute the butter with a plant-based butter or refined coconut oil.
- Lower sugar? Reduce to 2 tablespoons and add a teaspoon of balsamic vinegar for complexity without extra sweetness.
Step-by-Step Instructions for Perfect Results
This is where specifics matter more than anywhere else. Follow these steps in order and you’ll get glossy, caramelized, tender-crisp easy holiday green beans every single time.
Step 1: Prep the Beans Properly
Trim the stem end of each bean but leave the tail. Wash them and then dry them thoroughly. This is the step most people skip, and it’s the one that causes the most problems. Wet beans don’t sear, they steam, and you lose the caramelized texture entirely. Spread them on a clean kitchen towel, roll it up gently, and give it a few pats. Even five minutes of air-drying helps.
Step 2: Heat the Pan Until It Is Ready
Place a wide, heavy skillet (cast iron or stainless steel works best) over medium-high heat. Add the butter and let it melt completely until it just begins to foam. That foam means the water in the butter is evaporating, and when it subsides, the pan is hot enough for the garlic.
Step 3: Bloom the Garlic
Add the minced garlic to the foaming butter and stir constantly for about 30 to 45 seconds. You’re looking for the garlic to turn pale gold and smell intensely fragrant, not brown. Pale gold is sweet and nutty. Past that point, it turns bitter fast.
Step 4: Add the Beans and Sear
Add the dry green beans in a single layer if possible, or as close to one layer as your pan allows. Let them sit undisturbed for 2 minutes before stirring. That contact time builds the slight char and texture that makes garlic brown sugar green beans distinct from a basic stir-fry. Stir, then let them sit for another 2 minutes. Repeat once more.
Step 5: Add the Sugar and Finish
Sprinkle the brown sugar evenly over the beans, add the soy sauce if using, and toss everything together quickly. The sugar will melt within about 60 seconds and coat the beans in a shiny, amber glaze. Add the salt, pepper, and red pepper flakes, toss once more, and pull the pan off the heat. The residual heat will finish the job without risking burnt sugar. Total cooking time is about 12 to 15 minutes.
Step 6: Taste and Adjust
Before you plate, taste a bean. If it needs more salt, add a pinch. If the sweetness feels too forward, a few drops of fresh lemon juice will cut through it and add brightness. Serve immediately for the best texture.
Serving Ideas, Storage, and Make-Ahead Tips
Garlic brown sugar green beans are at their absolute best served immediately while the glaze is still glossy and the beans still have that slight snap. But real life doesn’t always allow for perfect timing, so here’s how to handle every scenario.
What to Serve Alongside
These sweet and savory green beans are versatile enough to sit next to almost anything. They work particularly well with:
- Roast chicken or a simple pan-seared pork chop
- A holiday ham or glazed turkey breast
- A plate of pasta, where the sweetness of the beans balances the richness of the sauce
If you’re building a weeknight plate around these beans, a simple one pan garlic butter chicken recipe uses a similar flavor profile and comes together in roughly the same amount of time, making the whole dinner feel cohesive.
Make-Ahead Options
For holiday cooking especially, you can blanch the green beans up to two days in advance. Bring a large pot of salted water to a boil, cook the beans for 3 minutes, then transfer them immediately to a bowl of ice water. Drain, dry, and refrigerate in an airtight container. When you’re ready to serve, start at Step 2 and proceed as usual. The beans will already be partially cooked, so reduce the searing time by about 2 minutes.
The glaze itself doesn’t do well made ahead. Sugar glazes crystallize and lose their shine when refrigerated and reheated. For the best results, always make the glaze fresh and toss it with the pre-blanched beans right before serving.
Storing Leftovers
Store any leftover candied bacon green beans or plain glazed beans in an airtight container in the refrigerator for up to 3 days. To reheat, skip the microwave if you can. A quick 2-minute toss in a hot skillet revives the texture far better and brings the glaze back to life. Add a tiny piece of butter to the pan before the beans go in. You’ll be surprised how close they come to tasting fresh.
Scaling for a Crowd
This recipe serves 6 comfortably as a side dish. For 12 people, simply double every ingredient, but use two separate pans rather than one large one. Overcrowding a single pan is the fast track to steamed, limp beans. Two pans, two hot surfaces, and you’re done in the same 15 minutes.
| Servings | Green Beans | Butter | Garlic | Brown Sugar |
|---|---|---|---|---|
| 6 | 1.5 lbs | 3 tbsp | 4 cloves | 3 tbsp |
| 12 | 3 lbs | 6 tbsp | 8 cloves | 6 tbsp |
| 18 | 4.5 lbs | 9 tbsp | 12 cloves | 9 tbsp |
Frequently Asked Questions
Can I make garlic brown sugar green beans in an air fryer?
Yes, and the results are surprisingly good. Toss the dry, trimmed beans with melted butter, minced garlic, and brown sugar before they go in. Air fry at 380 degrees F for 10 to 12 minutes, shaking the basket halfway through. The sugar caramelizes nicely in dry heat, though you won’t get quite the same glossy, saucy glaze as the stovetop version.
Why did my brown sugar glaze turn grainy and dry instead of glossy?
This usually happens when the pan isn’t hot enough or the sugar is added too early before enough moisture is present. Make sure the beans have released a little of their natural moisture during the sear before adding sugar. If the glaze still looks grainy, add a teaspoon of water or soy sauce and toss quickly over the heat. It should smooth out within 30 seconds.
Can I use frozen green beans for this recipe?
You can, but the prep step is critical. Thaw the frozen beans completely and pat them as dry as possible with paper towels or a clean kitchen towel. Any lingering ice crystals will drop the pan temperature and produce steamed, pale beans instead of seared ones. Frozen beans are also softer to begin with, so reduce total cooking time by about 3 minutes to avoid mushiness.
Are these green beans suitable for a holiday menu?
Absolutely. These garlic brown sugar green beans are one of the easiest dishes to add to a Thanksgiving or Christmas spread because they take only 20 minutes from start to finish. Blanch the beans ahead of time, then do the quick glaze on the stovetop while other dishes rest. The sweet and savory flavor pairs with almost every traditional holiday protein, from turkey to ham to prime rib.
Conclusion
There’s something quietly satisfying about a side dish that does more than fill space on a plate. Garlic brown sugar green beans bring a real contrast of flavors, a caramelized sweetness cut by savory garlic, and a texture that actually holds up rather than collapsing into mush.
Give these a try this week alongside whatever protein you have planned, or save them for your next holiday dinner where they will absolutely earn a spot next to the main event.
For more recipes like garlic brown sugar green beans, follow us on Facebook and Pinterest for easy weeknight dinner ideas and crowd-pleasing side dish inspiration.