You don’t need a candy thermometer or an hour of stirring to make peanut butter fudge. The real shortcut is ignoring the stove entirely.
Most recipes turn out grainy or crumbly. This one uses a simple microwave method to guarantee a creamy, sliceable texture every time, with just five minutes of active work.
Here you’ll get the exact ratio for four ingredients, learn why sifting powdered sugar matters, and discover how long to freeze it for clean slices.
Table of Contents
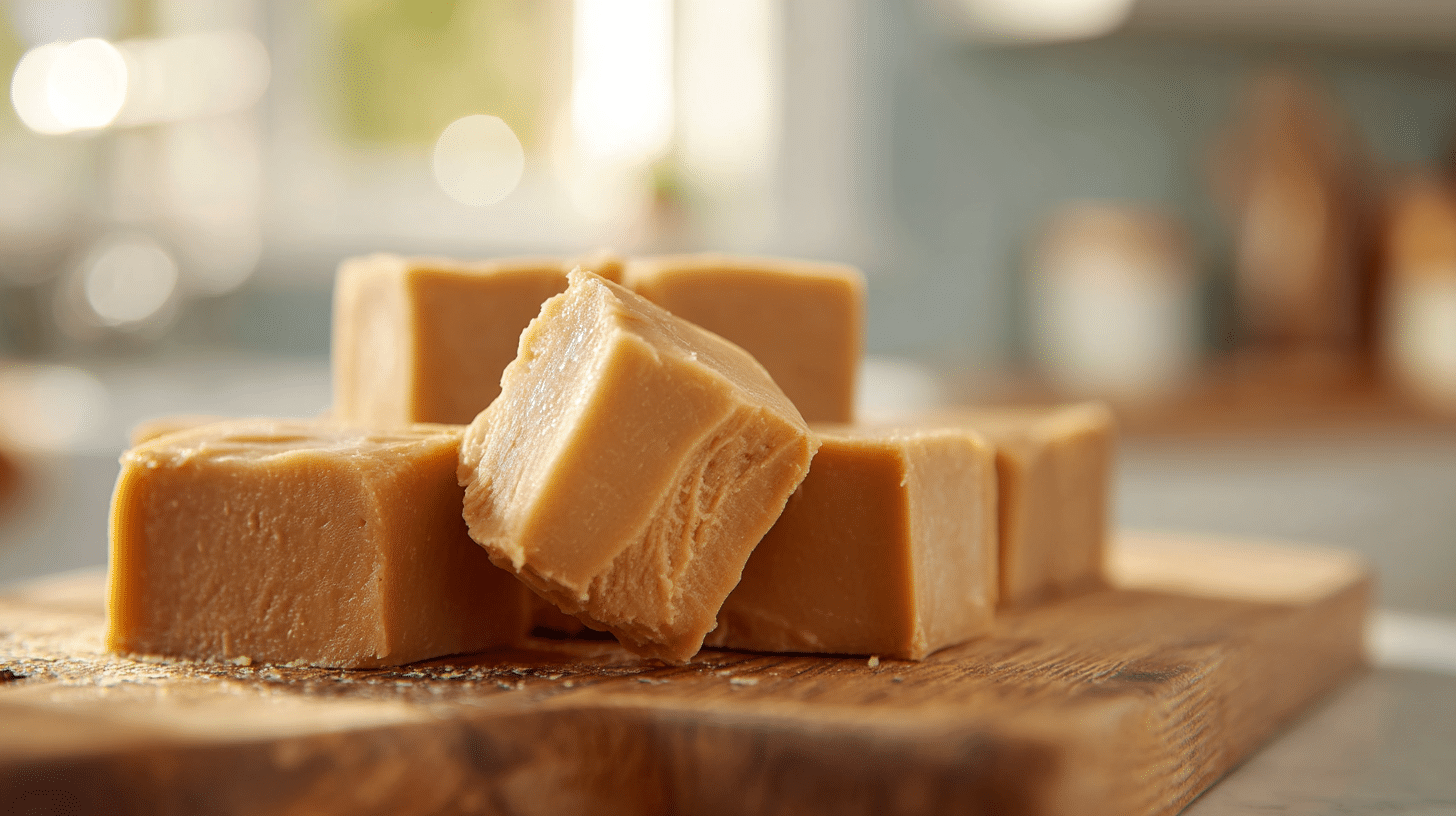
Table of Contents
Why this peanut butter fudge recipe works
This easy peanut butter fudge solves the classic problems: it’s not grainy, it doesn’t require a stove, and it sets up perfectly every time. The method uses your microwave and a few pantry staples to deliver a reliable treat. Here’s exactly why it works so well.
Only 4 simple ingredients
You only need four things: creamy peanut butter, unsalted butter, powdered sugar (confectioners’ sugar), and vanilla extract. That’s it. I specifically use shelf-stable, no-stir peanut butter like Jif or Skippy. The stabilizers in it help create a smooth, sliceable texture that won’t separate. European-style butter, with its higher milkfat, makes the fudge even silkier. This minimalist list means you can whip up a batch anytime, which is perfect when you need a last-minute gift or a sweet project with kids. It’s simpler than making peanut butter balls.
No candy thermometer needed
Forget watching a pot and worrying about the soft-ball stage. This is a no-cook fudge. You simply melt the peanut butter and butter together in the microwave, then stir in the sugar and vanilla. The mixture sets in the fridge, not from precise sugar cooking. The key is sifting your powdered sugar. This prevents any lumps and guarantees a perfectly smooth, non-gritty bite without any specialized tools.
Creamy, melt-in-your-mouth texture
The magic is in the method. Melting the fats first ensures everything blends into a smooth, homogeneous mixture. When you use pre-sifted sugar, it incorporates seamlessly. The result is a fudge that’s dense yet soft, with a clean melt. For the absolute best texture:
- Use room temperature ingredients so they combine smoothly.
- Line your 8-inch pan with parchment paper for easy removal and clean cuts.
- Let it chill for the full 4 hours so it sets completely.
This method is so reliable, it’s become my go-to for a guaranteed win. It’s as straightforward as our homemade pumpkin butter recipe, but for a classic candy.
Print
Easy Microwave Peanut Butter Fudge in Just 5 Minutes Active Time
- Total Time: 4 hours 10 min
- Yield: 48 servings 1x
Description
This easy peanut butter fudge is a no-stove, microwave-friendly recipe that yields a creamy, sliceable treat. It uses just four pantry ingredients and sets up in the fridge. Perfect for gifts or a sweet snack.
Ingredients
For the fudge:
1 cup (270g) creamy peanut butter
1/2 cup (113g) unsalted butter
3 cups (360g) powdered sugar (confectioners’ sugar), sifted
1 teaspoon vanilla extract
Optional:
1/2 cup chocolate chips + 1 teaspoon butter (for a swirl)
1/4 cup chopped salted peanuts or pretzels
Flaky sea salt for sprinkling
Instructions
1. Line an 8-inch square baking pan with parchment paper, leaving overhang on two sides for easy removal.
2. In a large microwave-safe bowl, combine the peanut butter and unsalted butter. Microwave on high for 1 minute, then stir with a wooden spoon. If not fully melted, heat for another 30 seconds until smooth and hot.
3. Immediately add the sifted powdered sugar and vanilla extract to the hot peanut butter mixture. Stir vigorously until completely combined and no dry sugar remains. The mixture will be thick and creamy.
4. Transfer the fudge mixture to the prepared pan. Press it firmly and evenly into the pan using your hands or the back of a spoon.
5. Refrigerate the fudge, uncovered, for at least 4 hours, or until completely firm.
6. Use the parchment paper to lift the fudge slab out of the pan. Place it on a cutting board and slice into 48 squares (6 rows by 8 columns works perfectly).
Notes
For the best texture, use a shelf-stable, no-stir peanut butter like Jif or Skippy. Natural peanut butter can make the fudge grainy.
The mixture must be hot when you add the powdered sugar to ensure a smooth, non-gritty texture.
Store squares in an airtight container in the refrigerator for up to 14 days.
For longer storage, keep in a freezer-safe container for up to 3 months.
- Prep Time: 5 min
- Rest Time: 4 hours
- Cook Time: 5 min
- Category: Dessert, Snack
- Method: No-bake
- Cuisine: American
Nutrition
- Serving Size: 1 square
- Calories: 95 kcal
- Sugar: 10 g
- Sodium: 45 mg
- Fat: 6 g
- Saturated Fat: 2.5 g
- Unsaturated Fat: 3.5 g
- Trans Fat: 0 g
- Carbohydrates: 10 g
- Fiber: 0.5 g
- Protein: 2 g
- Cholesterol: 5 mg
Peanut Butter Fudge Ingredients
Active Time: 5 minutes Total Time: 4 hours 10 minutes Yield: 48 squares
- 1 cup (270g) creamy peanut butter
- 1/2 cup (113g) unsalted butter
- 3 cups (360g) powdered sugar (confectioners’ sugar), sifted
- 1 teaspoon vanilla extract
No vanilla? Use 1/2 teaspoon almond extract. Out of butter? An equal amount of refined coconut oil works. For a richer flavor, swap the vanilla for a pinch of flaky sea salt stirred in at the end.
The essential 4 ingredients
Each ingredient has a specific job. The creamy peanut butter and butter are the fat base, melting together to create a smooth, pliable foundation. Powdered sugar is non-negotiable—its fine texture dissolves instantly, preventing grittiness and helping the fudge set without cooking. The vanilla extract rounds out the flavor, cutting the sweetness just enough. Sifting the sugar is the one extra step I never skip; it guarantees that creamy mouthfeel.
Choosing the right peanut butter
Use a shelf-stable, no-stir peanut butter like Jif or Skippy. The added stabilizers prevent oil separation, giving you a consistently smooth and sliceable fudge. Natural peanut butter tends to seize up and create a grainy, crumbly texture. For the butter, European-style with higher milkfat makes an exceptionally silky batch, but any good-quality unsalted butter works perfectly.
Optional add-ins and variations
This easy peanut butter fudge is a perfect canvas. For a chocolate swirl, melt 1/2 cup chocolate chips with 1 teaspoon of butter and drizzle it over the top before chilling. Chopped salted peanuts or pretzel pieces add a fantastic crunch. If you love that sweet-and-salty combo from our giant peanut butter rice cake, sprinkle flaky salt on top right after pouring the fudge into the pan. For a cozy spice twist inspired by our cookie butter cloud latte recipe, add 1/2 teaspoon of cinnamon to the melted peanut butter mixture.
How to make peanut butter fudge
Step 1: Prepare your pan
Start with an 8-inch baking pan. I use a square one. The size is perfect for getting those neat, uniform squares.
Line it with parchment paper. You can also lightly grease the pan with a dab of butter if you don’t have parchment. This guarantees your fudge won’t stick and you can lift the whole slab out for clean cutting.
Cook’s Tip: If you’re lining the pan, cut the parchment so it hangs over two sides. These “handles” make lifting the chilled fudge block incredibly easy.
Step 2: Melt and combine
You have two options here, both quick.
Microwave Method: Put the peanut butter and unsalted butter in a large microwave-safe bowl. Heat on high for 1 minute. Stir with a wooden spoon. If it’s not fully melted and smooth, heat for another 30 seconds.
Stovetop Method: Combine the peanut butter and butter in a small saucepan over low heat. Stir constantly until melted and completely blended, about 3-4 minutes. Don’t let it boil. Note: The stovetop method takes 8-10 minutes of active time total.
Once your mixture is smooth and hot, immediately add your sifted powdered sugar and vanilla extract. Stir vigorously until no dry pockets of sugar remain. It will look thick, almost crumbly at first, but keep stirring—it will become one cohesive, creamy mass.
Watch Out: The mixture must be hot when you add the sugar. If it cools, the sugar won’t incorporate properly and your fudge will be grainy.
Step 3: Press and chill
Transfer your warm fudge mixture into your prepared pan. Use your hands or the back of a spoon to press it into an even layer. Get it as flat and smooth as you can now; it sets hard.
Place the pan in the refrigerator to chill. Let it set undisturbed for at least 4 hours. This isn’t just cooling—it’s firming up so you can slice it without smudging.
When fully set, use the parchment paper to lift it out onto a cutting board. Slice into 48 squares (6 rows by 8 columns works perfectly). Store squares in an airtight container in the fridge for up to 14 days, or in a freezer-safe container for 3 months.
Storage, troubleshooting, and serving ideas
How to store and freeze fudge
This fudge keeps beautifully. For daily snacking, store squares in an airtight container in the fridge. They’ll stay fresh and firm for up to 14 days. You can also keep them at cool room temperature for about a week if your kitchen isn’t warm.
For long-term storage, freeze it. Place squares in a single layer on a parchment-lined tray until solid, about 2 hours. Then transfer them to a freezer-safe container or bag. They’ll keep for up to 3 months. Thaw overnight in the fridge before serving.
Fixing common fudge problems
| Storage Method | Duration | Notes |
|---|---|---|
| Refrigerator | Up to 14 days | Store in an airtight container. |
| Freezer | Up to 3 months | Use a freezer-safe container. Thaw in fridge. |
Most issues are easy to prevent or fix right away. Here’s a quick guide to the most common snags.
Creative ways to serve and gift
| Problem | Solution |
|---|---|
| Too soft after chilling | Chill longer. It needs a full 4 hours minimum to set firmly. |
| Texture is gritty | Always sift your powdered sugar before mixing. Granulated sugar won’t work. |
| Dry or crumbly | Use a no-stir, shelf-stable peanut butter. Natural varieties often cause this. |
| Greasy or oily | Use real butter, not margarine or spreads, which have more water. |
| Sticks to the pan | Always line your 8-inch pan with parchment paper or grease it lightly with butter. |
This easy fudge is perfect for sharing. For parties, arrange squares on a platter with other bite-sized treats. The rich flavor pairs wonderfully with a whey protein smoothie with banana and peanut butter for balance.
For gifting, stack squares in small cellophane bags or tiny gift boxes. Tie them with ribbon and add a handmade tag. Layer them in a mason jar for a cute, portable present. Include a note with storage instructions so they know it stays fresh in the fridge.
It makes a thoughtful homemade gift anyone will love.
Can you freeze peanut butter fudge?
Yes, you absolutely can. For best results, freeze the sliced squares in a single layer first, then transfer them to a freezer-safe container. They will keep for up to 3 months. Thaw them overnight in the refrigerator before serving to maintain the perfect, creamy texture.
Can I use natural peanut butter?
I don’t recommend it. Natural peanut butter tends to separate and can make the fudge oily, crumbly, or grainy. For a reliably smooth and sliceable texture, use a shelf-stable, no-stir brand like Jif or Skippy. Their stabilizers are the key to a perfect set.
Why did my fudge turn out gritty?
This almost always happens because the powdered sugar wasn’t sifted. Lumps in the sugar don’t dissolve fully. Always sift your sugar into the melted peanut butter and butter mixture. Also, ensure the mixture is still hot when you add the sugar so it incorporates seamlessly.
What can I do if my fudge is too soft after it sets?
First, ensure it chilled for the full 4 hours. If it’s still soft, your kitchen might be warm. Pop the whole pan in the freezer for an hour to firm it up.
How long does peanut butter fudge last?
Stored in an airtight container in the refrigerator, it lasts up to 14 days. You can also keep it at cool room temperature for about a week. For specific storage times and freezing instructions, check the detailed table in the troubleshooting section above.
What is the secret to smooth fudge?
The secret is a two-part process. First, always sift your powdered sugar (confectioners’ sugar). Second, make sure your melted peanut butter and butter mixture is hot when you stir the sugar in. This combination guarantees a perfectly smooth, non-gritty mixture every single time.
Make this 5-minute microwave peanut butter fudge this weekend
You don’t need a stove or thermometer. Just melt, stir with sifted sugar, and chill. This peanut butter fudge guarantees a creamy slice. Add a pinch of cinnamon for a warm spice twist.
I always line my pan with parchment paper for easy lifting. It’s the perfect project to try this weekend.
Do you prefer your fudge plain, or will you add the cinnamon?
For more recipes like peanut butter fudge, follow us on Facebook and Pinterest for simple dessert recipes and sweet homemade gift ideas.