The first time I tried making cauliflower rice, I ended up with a wet, gummy puddle that tasted nothing like the fluffy grains I admired in restaurant bowls. It is the most common complaint I hear from home cooks. You pulse your fresh vegetable, toss it in a pan, and suddenly it steams into a soggy mess.

Nobody wants a watery side dish that ruins the texture of a perfectly seared protein or turns your burrito bowl into soup. The secret to fixing this is entirely about moisture control and cooking technique, not complicated ingredients.
Here is what we will cover: how to prep your head for the best grain structure, the exact pan temperature for dry edges, and a quick flavor-building method that makes this low-carb rice substitute taste incredible.
Table of Contents
The Secret to Fluffy Grains
The biggest mistake people make when preparing homemade cauliflower rice is treating it exactly like regular rice. You cannot boil it in a pot of water and expect good results. Cauliflower is roughly 92 percent water, which means it holds a massive amount of moisture that needs to escape during the cooking process. If you trap that moisture in a covered pan, the grated florets will steam, collapse, and turn into a gummy paste. To get those distinct, separate grains that actually mimic the mouthfeel of traditional rice, you need a hot pan and open air.
Let us talk about the prep work before it ever hits the heat. You can use a food processor or a simple box grater. If you use a food processor, work in small batches and pulse in short one-second bursts. If you run the machine continuously, the blades will bruise the vegetable and release water before it even hits the pan. You want small, distinct pebbles, not a pureed slush. If you prefer to use a box grater, use the largest holes and press the firm florets against them. The grating motion creates perfect, long grains that look remarkably like real basmati.
Once you have your riced cauliflower, take a moment to assess the moisture. If it looks particularly wet, spread it out on a clean kitchen towel, wrap it up, and give it a firm squeeze over the sink. You will be amazed at how much green liquid comes out. Removing this excess water is the difference between a crispy stir-fry and a soggy disaster. I learned this the hard way when trying to recreate my favorite takeout bowls, and it completely changed my approach.
Another step that matters more than people think: letting the pan get genuinely hot before adding anything. A preheated skillet ensures the grains hit the surface and immediately begin to dehydrate and brown slightly. If you add the grated vegetable to a cold pan with oil, the oil will just absorb into the grains and create a greasy, heavy texture. If you are looking for a great protein to pair with this technique, this one pan garlic butter chicken recipe cooks right alongside your vegetables for an easy dinner.
Print
How to Make Fluffy, Never-Soggy Cauliflower Rice
- Total Time: 17 min
- Yield: 4 servings 1x
- Diet: Gluten Free, Low Carb
Description
A quick and savory low-carb rice substitute made by grating fresh cauliflower and sauteing it with garlic, onions, and scallions. This stovetop method ensures fluffy, never soggy grains every time.
Ingredients
For the cauliflower rice:
1 large head fresh cauliflower (stem removed, florets only)
2 tablespoons olive oil
1/2 medium yellow onion (finely diced)
3 cloves garlic (minced)
1/4 cup chicken broth
1/2 teaspoon kosher salt
1/2 teaspoon black pepper
For the garnish:
2 scallions (thinly sliced)
1/2 lime (juiced)
Instructions
1. Grate the cauliflower florets using a food processor or the largest holes of a box grater until it resembles small grains of rice.
2. Spread the grated cauliflower on a clean kitchen towel, wrap it tightly, and squeeze firmly over the sink to remove as much excess moisture as possible.
3. Heat a large skillet over medium-high heat for three minutes until it is very hot, then pour in the olive oil and swirl to coat the pan completely.
4. Add the diced onion and saute for two minutes until the edges turn translucent and soften slightly.
5. Stir in the minced garlic and cook for thirty seconds, stirring constantly until it becomes highly fragrant and sweet.
6. Add the squeezed cauliflower and the salt and pepper to the skillet, tossing well to coat the grains in the hot oil, then press it into an even layer.
7. Let it cook untouched for two minutes so the bottom develops a slight golden crust, then pour in the chicken broth and stir continuously for two minutes until the liquid evaporates.
8. Remove the pan from the heat, squeeze the fresh lime juice over the top, and sprinkle generously with the sliced scallions before serving.
Notes
Store raw grated cauliflower in an airtight container in the refrigerator for up to four days before cooking.
Cooked leftovers can be stored for up to three days and should be reheated in a dry hot skillet rather than a microwave to maintain texture.
For a vegan version, replace the chicken broth with vegetable broth.
Add a splash of soy sauce and sesame oil at the end for an Asian-inspired variation.
- Prep Time: 8 min
- Cook Time: 9 min
- Category: Side Dishes
- Method: Stovetop
- Cuisine: American
Nutrition
- Serving Size: 1 cup
- Calories: 110 kcal
- Sugar: 3 g
- Sodium: 320 mg
- Fat: 7 g
- Saturated Fat: 1 g
- Unsaturated Fat: 6 g
- Trans Fat: 0 g
- Carbohydrates: 9 g
- Fiber: 3 g
- Protein: 3 g
- Cholesterol: 0 mg
Building Flavor From Scratch
Plain grated cauliflower can taste a little flat on its own, so you need to build a flavor base just like you would for any traditional grain dish. Aromatics are your best friend here. Start by sauteing minced garlic and chopped onions in your hot olive oil before the vegetable even enters the equation. Let the onions turn translucent and let the garlic become incredibly fragrant, usually taking about two minutes. This infuses the cooking fat with a savory backbone that coats every single grain later.
When the aromatics are ready, add your squeezed, riced cauliflower to the pan and stir immediately to coat the grains in that flavored oil. This is also the perfect time to season aggressively. Sprinkle a generous pinch of salt and freshly ground black pepper over the top. Do not be shy with the salt, because it helps draw out any remaining hidden moisture and seasons the grains from the inside out. Let it sit undisturbed for a full minute. That brief pause allows the bottom layer to develop a slight golden crust, adding a nutty flavor that you typically only get from a really well toasted grain.
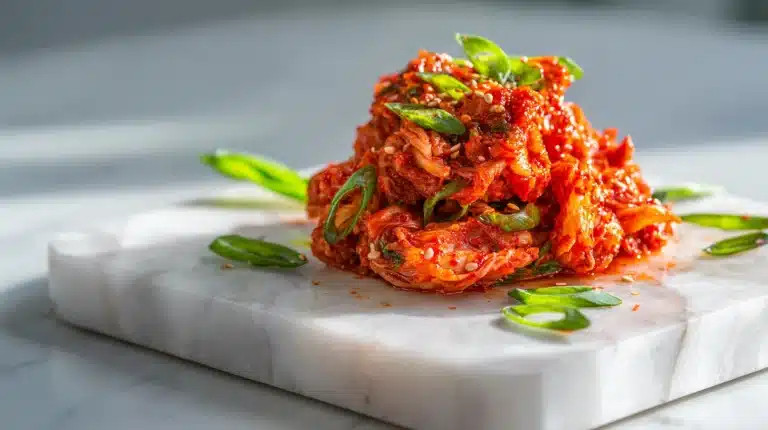
To take the flavor even further, skip the water and use chicken broth to deglaze the pan. Just a splash, about two tablespoons, adds a deep savory note that water simply cannot provide. The broth evaporates almost instantly in the hot skillet, leaving behind a concentrated meaty flavor that coats the grains. If you want to push the boundaries of this dish, you can look to global cuisines for inspiration. A classic kimchi fried rice technique works well here, substituting the traditional grains with your prepared vegetable for a tangy, spicy twist.
Finish the dish off the heat with a squeeze of fresh lime juice and a handful of thinly sliced scallions. The acidity from the lime cuts through the richness of the olive oil and brightens the entire profile, while the scallions add a sharp, fresh bite. You can serve it immediately as a base for grilled proteins or fold it into a larger meal. For a great lunch, try spooning it into bbq chicken rice bowls where it absorbs the smoky sauce perfectly.
Stovetop method: step by step
Now that you understand the science and flavor profile, let us walk through the exact stovetop cooking method. This approach takes less than ten minutes of active cooking time and guarantees fluffy, separate grains every time. First, gather your mise en place. You will need one large head of fresh cauliflower, two tablespoons of olive oil, half a medium yellow onion finely diced, three cloves of garlic minced, one quarter cup of chicken broth, one lime, and a bunch of scallions.
Grate the head using your box grater or food processor as discussed earlier. Take the time to squeeze out the moisture using a clean towel. Heat a large nonstick skillet or a well-seasoned cast iron pan over medium-high heat. Let the pan sit on the flame for a good three minutes until you can feel the heat radiating when you hold your hand above the surface. Add the olive oil and swirl it to coat the bottom completely.
Add the diced onion and saute for two minutes until the edges turn translucent and soft. Add the minced garlic and cook for thirty seconds, stirring constantly so the garlic sweetens without burning. Pour the grated vegetable into the skillet and use a spatula to toss it thoroughly with the onions and garlic. Spread it out into an even layer and press it down gently against the hot surface.
Let it cook untouched for two minutes. You will hear a gentle sizzle and smell a toasted, nutty aroma. Add the chicken broth and stir well. The liquid will hiss and steam immediately. Continue cooking for another two to three minutes, stirring occasionally, until the grains are tender but still have a slight bite. Remove the pan from the heat. Squeeze the juice of half a lime over the top and sprinkle generously with sliced scallions. Taste and adjust the salt if needed. This homemade cauliflower rice is now ready to serve. It makes a great base for a fried rice and vegetables recipe when you want something quick and colorful.
Storage, meal prep, and variations
One of the best things about this cauliflower rice recipe is how well it stores. If you are meal prepping for the week, you can grate the heads on Sunday and keep the raw grains in an airtight container in the refrigerator for up to four days. Do not cook it until you are ready to eat, as cooked grains will soften and release water upon reheating. When you are ready for a quick weeknight dinner, the raw riced cauliflower is ready to dump straight into a screaming hot pan.
If you have leftover cooked cauli rice, let it cool completely to room temperature before transferring it to an airtight container. It will keep in the refrigerator for up to three days. To reheat, skip the microwave. Microwaving traps steam and turns the texture mushy. Instead, heat a dry skillet over medium-high heat and toss the leftovers in the pan for two minutes just to warm them through and crisp up the edges again. You can also freeze raw riced cauliflower in a sealed bag for up to two months, though I recommend squeezing out every drop of moisture before freezing to prevent ice crystals from forming.
There are endless ways to vary this base recipe depending on what you have in your pantry. For a Mediterranean twist, fold in chopped sun-dried tomatoes, crumbled feta cheese, and a pinch of dried oregano right at the end of cooking. For an Asian-inspired cauliflower couscous, add a tablespoon of toasted sesame oil, a splash of soy sauce, and a handful of shredded carrots. If you are serving a crowd, you can even mound the hot grains on a platter and top them with bright, acidic garnishes. A spoonful of quick pickled red onions recipe on top adds a bright, crunchy contrast to the savory, tender grains.
Do not be afraid to experiment with different fats and acids. A knob of butter stirred in at the end adds richness, while a splash of rice vinegar gives it a tangy punch. Once you master the basic technique of keeping the pan hot and the lid off, you can adapt this low-carb rice substitute to fit virtually any flavor profile.
Frequently asked questions
Is cauliflower rice actually healthy?
Yes, it is highly nutritious and low in calories. A single cup contains only about 25 calories and five grams of carbohydrates, making it a great choice for anyone reducing their carb intake. It also provides a good dose of vitamin C, vitamin K, and dietary fiber to support digestion.
What’s the point of cauliflower rice?
The main appeal is providing a low-carb rice substitute that mimics the texture of traditional grains without the heavy carbohydrates. It allows you to enjoy your favorite bowl meals, stir-fries, and curries while increasing your daily vegetable intake and keeping blood sugar stable.
Is cauliflower rice just chopped cauliflower?
While it is literally just chopped cauliflower, the preparation method matters significantly. Pulsing it into small, uniform pieces and cooking it over high heat without a lid changes the cellular structure, giving it a distinct, rice-like texture rather than a mashed consistency.
Which is healthier, quinoa or cauliflower rice?
It depends entirely on your dietary goals. Quinoa is a complete protein and offers complex carbohydrates, making it great for athletes needing sustained energy. Cauliflower rice is far lower in calories and carbohydrates, making it better for strict low-carb diets and weight management.
Conclusion
Mastering homemade cauliflower rice comes down to one simple rule: keep the moisture out and the heat high. By using a towel to squeeze out excess water and cooking in a hot, open skillet, you avoid the soggy puddle that ruins so many attempts. This technique guarantees fluffy, savory grains every time.
Give this cauliflower rice recipe a try this week and see how easily it transforms your everyday dinners. It is quick enough for a Monday night but versatile enough for a weekend feast.
For more recipes like cauliflower rice, follow us on Facebook and Pinterest for weeknight dinner ideas.
More recipes in this series: